
You are here:
Create a Case Comment Quick Action
To let your support reps create case comments from the case feed publisher in Lightning Experience, create a Case Comments quick action and add it to the case page layout.
Required Editions
| View supported editions. |
| User Permissions Needed | |
|---|---|
| To set up cases for Lightning Experience: | Manage Cases AND Customize Application |
In Salesforce Classic, you can add the Internal Comments field, which created Case Comments, to the Close Case button. Your support reps can then close a case and add a case comment at the same time.
In Lightning Experience, the Internal Comments field isn’t available, so you must create a separate quick action for closing a case and one for creating a case comment.
- From Setup, click the Object Manager tab. Select Cases, and open the Buttons, Links, and Actions setup page.
- Click New Action.
- For Action Type, select Create a Record.
- For Target Object, select Case Comment.
-
For Standard Label Type, select None. For Label, enter
Case Comment. The Name field is auto-filled. Optionally, enter a
description and success message.
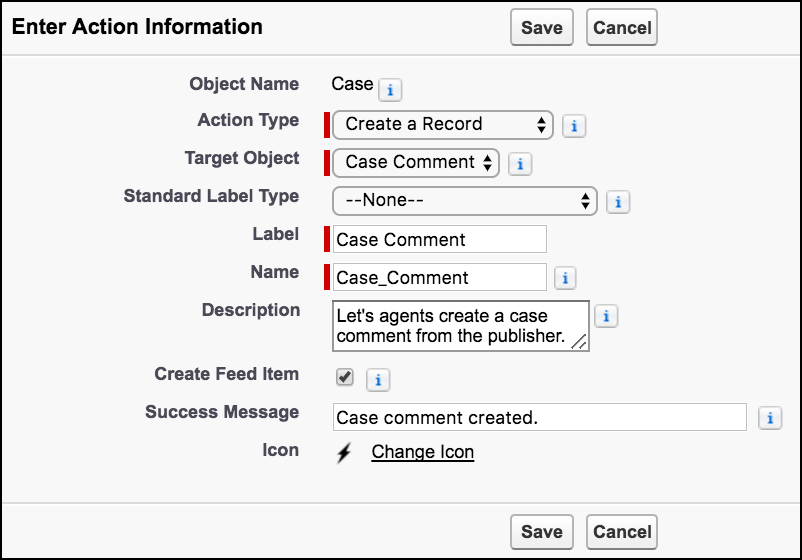
- Click Save.
-
To choose the fields users see, customize the action’s layout, and click
Save.
Keep these things in mind.
- The Body field is always required, even if Required isn’t selected in its Field Properties dialog (invoked when you double-click the field).
- The Public field is available only if you have Experience Cloud sites enabled.
- The Public field is labeled “Published” in the quick action layout editor.
-
Go to the Case Page Layouts setup page, and edit your case layout.
Drag the new quick action to the Salesforce Mobile and Lightning Experience Actions section, and click Save.
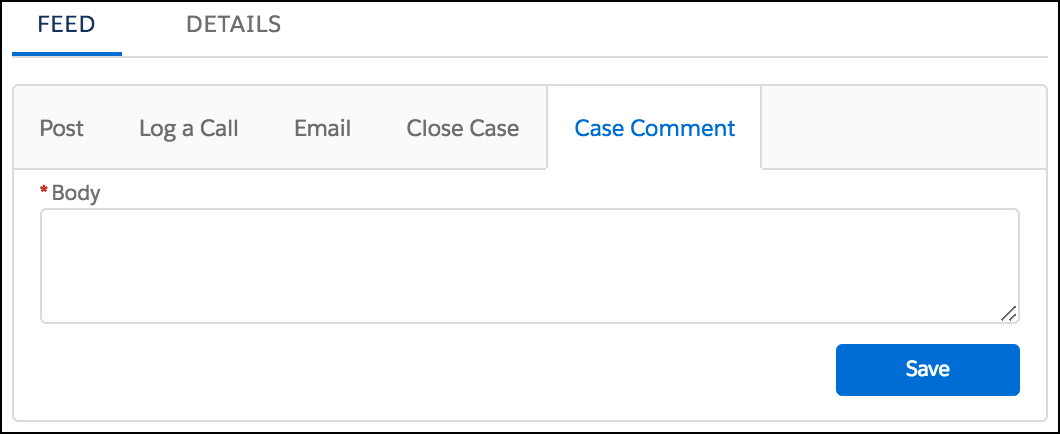
When support reps click the action from the Service Console, they see:
Example
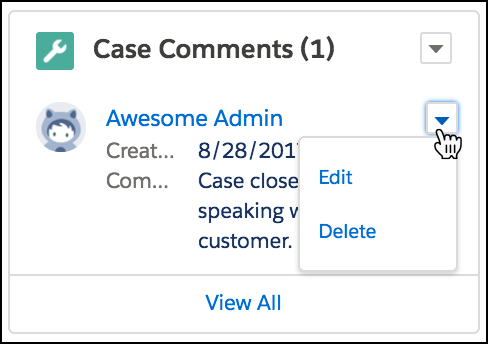
Tip In the Lightning App Builder, you can add the Case Comments related list to
the case page. Then your support reps can also create case comments directly from the
related list using the New button. They can also edit and delete comments.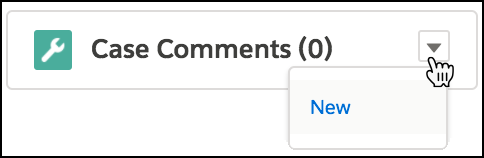
Did this article solve your issue?
Let us know so we can improve!