
You are here:
Create Conditional Visibility Rules for the Case Feed Component
Create conditional visibility rules in the Service Console and Lightning App Builder for the case feed component of the Case Record page. The rules prevent service agents from seeing sensitive information in the Service Console when a case is about themselves.
The solution requires the creation of a formula field for the Case object: CaseIsAboutLoginUser. The formula field indicates that the
service agent user who views a case in the Service Console is the same employee that the
case is about.
The formula field assumes these default data model mappings for the Login User, Employee User, and Person Account.
- The individual’s Employee user and Service Agent user have the same Employee Number
(
Employee.EmployeeNumber) for both personas due to the Create and Link Employees and Users process. This process results in aUser.EmployeeNumber=Employee.EmployeeNumberconfiguration. - The Create Person Accounts for
Employee Records process results in a Person Account with the same account number
(
Account.AccountNumber) as the Employee Number (Employee.EmployeeNumber). It creates anEmployee.EmployeeNumber=Account.AccountNumberconfiguration. - These processes result in a configuration where the Person Account Number and the
Employee Number are the same:
User.EmployeeNumber=Account.AccountNumber
To address the User.EmployeeNumber=Account.AccountNumber configuration, create a field label
(CaseIsAboutLoginUser) and data model formula field
($User.EmployeeNumber = Account.AccountNumber) for
the Case object. The field label and formula check if the current Login User’s User.EmployeeNumber is the same as the Account.AccountNumber for the case in the Service Console.
When the numbers match, the case feed component isn’t visible to the user.
To create conditional visibility rules, create the CaseIsAboutLoginUser field for the Case object, then disable the Feed component
visibility for the agent user.
Create the CaseIsAboutLoginUser for the Case Object
- From Setup, in the Quick Find box, enter Object Manger, and then select Object Manager.
-
From the Object Manger, select Case > Field &
Relationships > New.
You see the New Custom Field page open. The multistep New Custom Field workflow initiates for you to create the
CaseIsAboutLoginUserfield. -
From step 1 of the workflow, select Formula as the Data Type,
and then click Next.

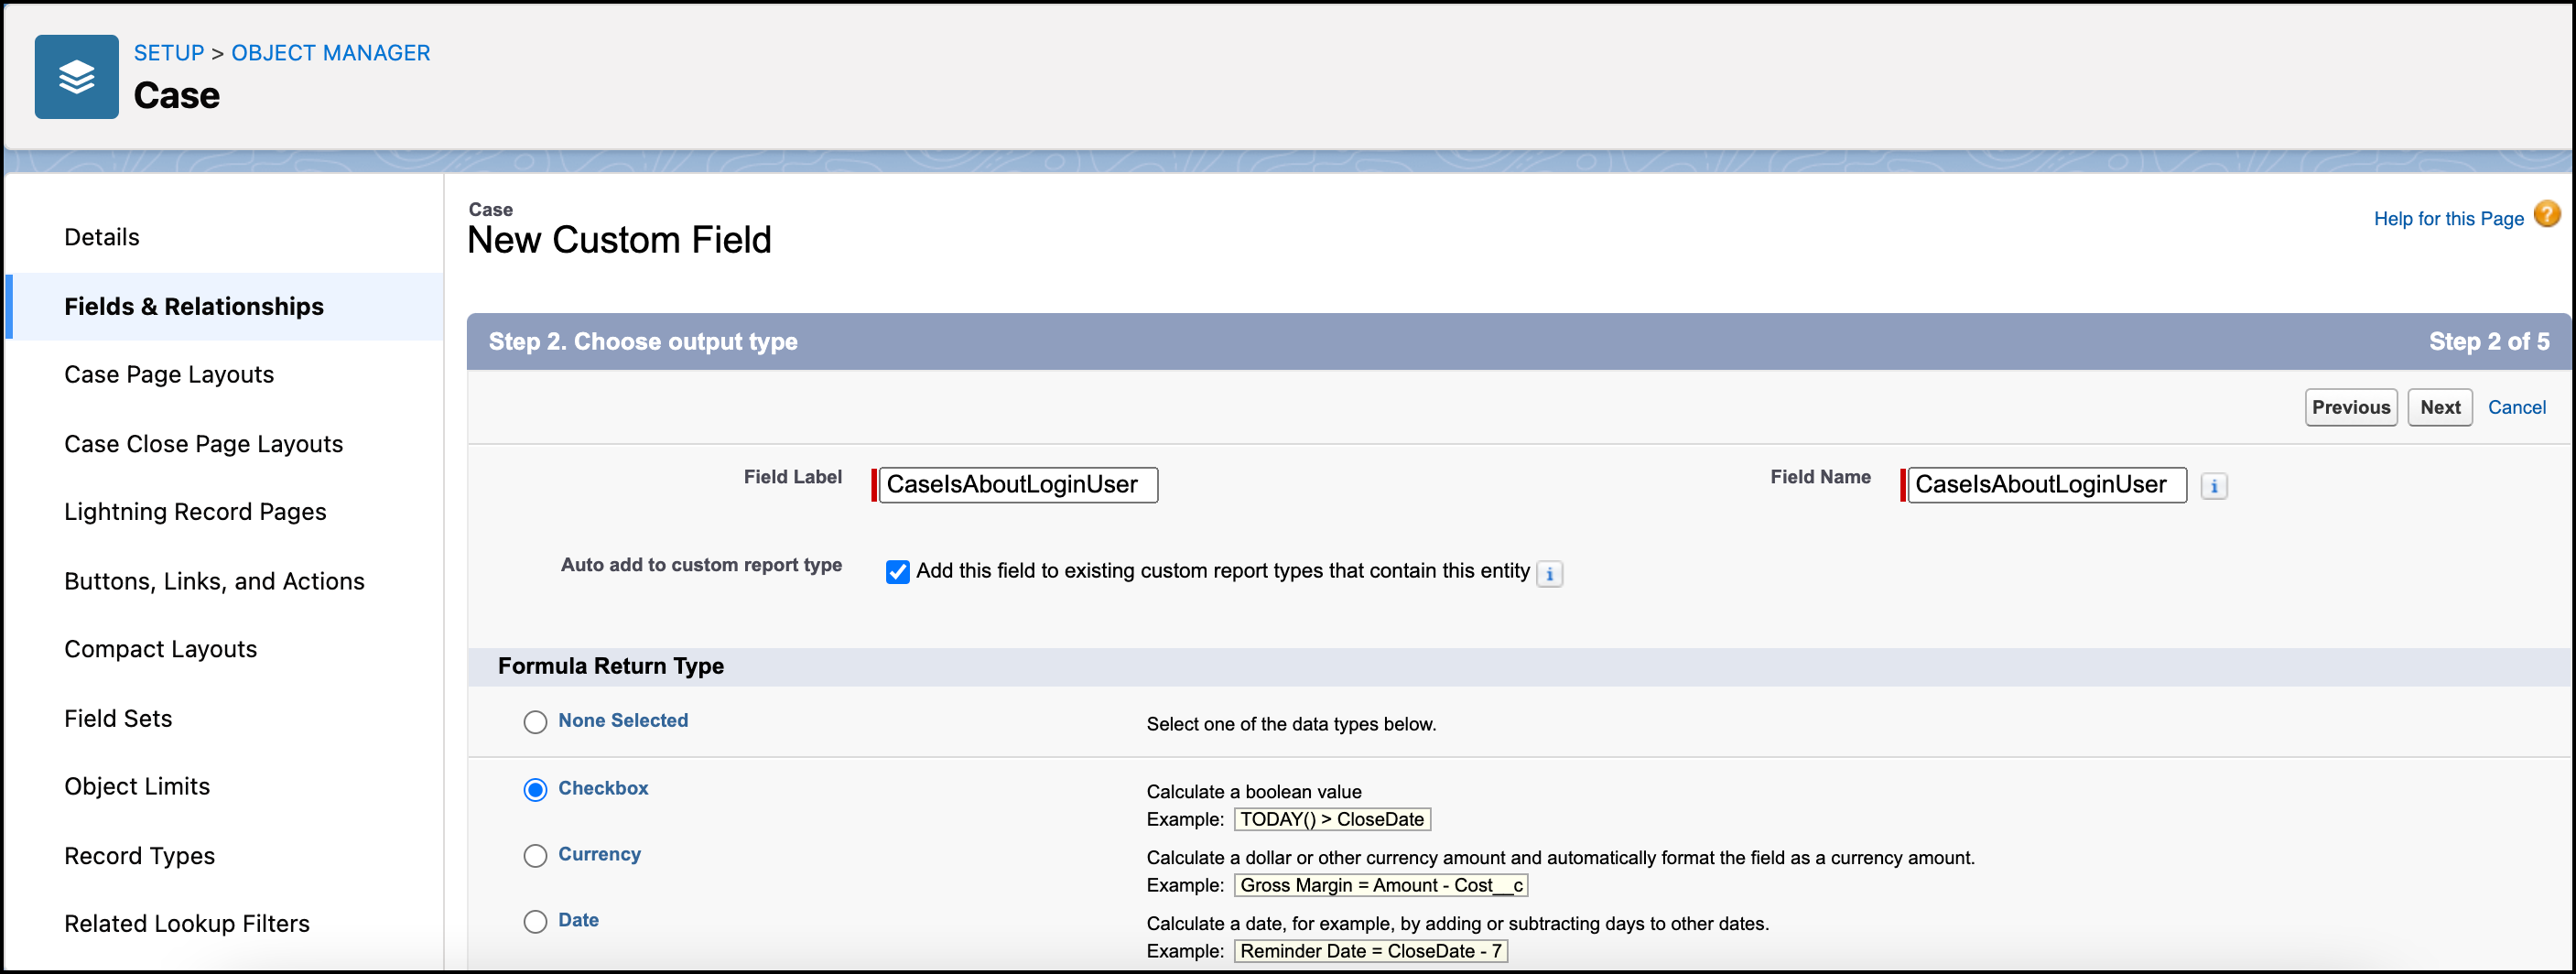
-
From step 2 of the workflow, select Checkbox as the Formula
Return Type, then lick Next.
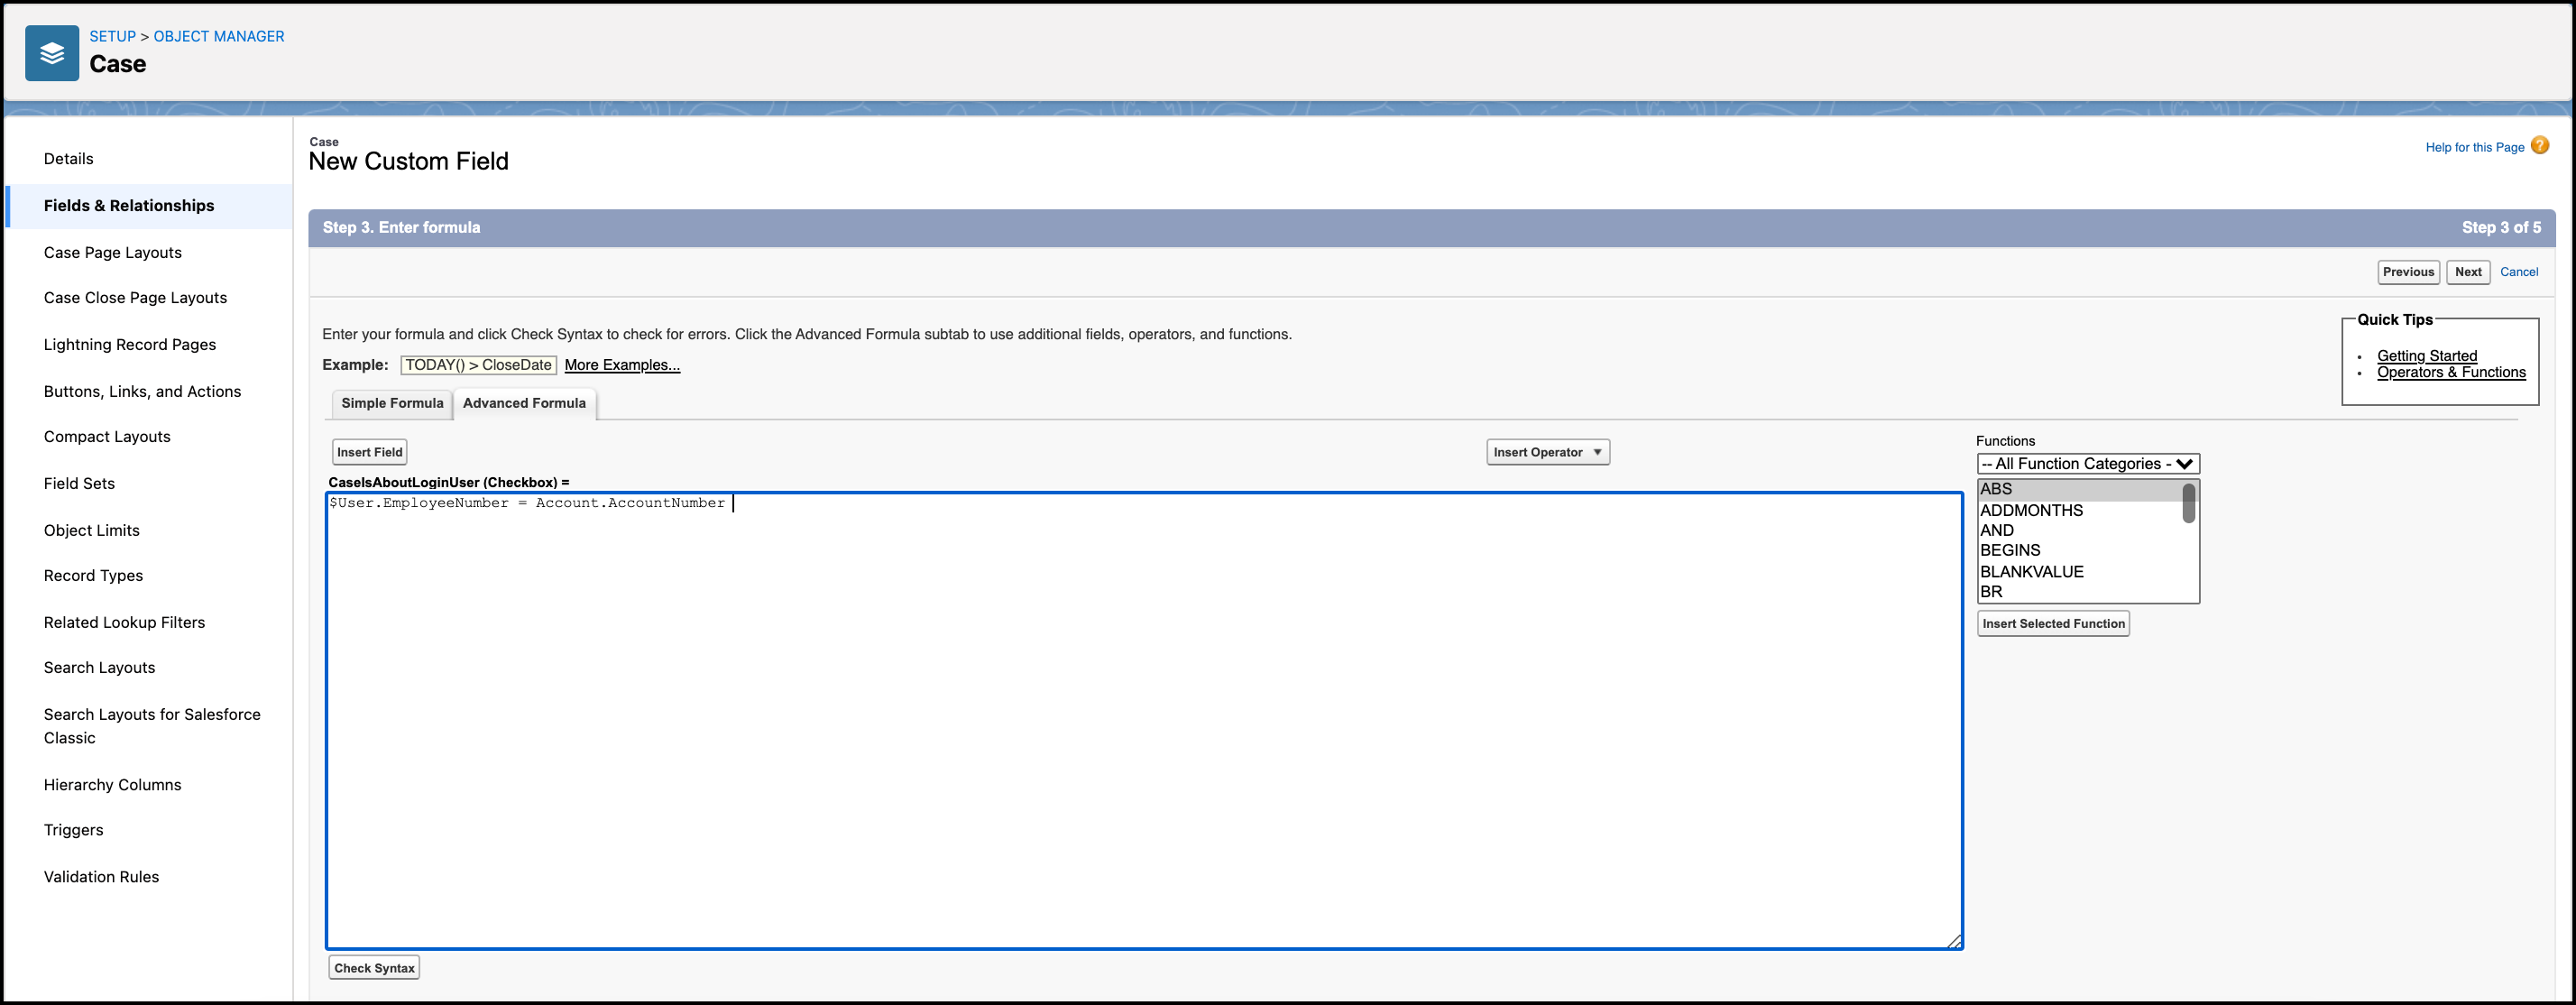
-
From step 3 of the workflow, Select Advanced Formula.
- In the text field, enter $User.EmployeeNumber=Account.AccountNumber.
-
To confirm that there are no formula errors, click Check
Syntax, then click Next.
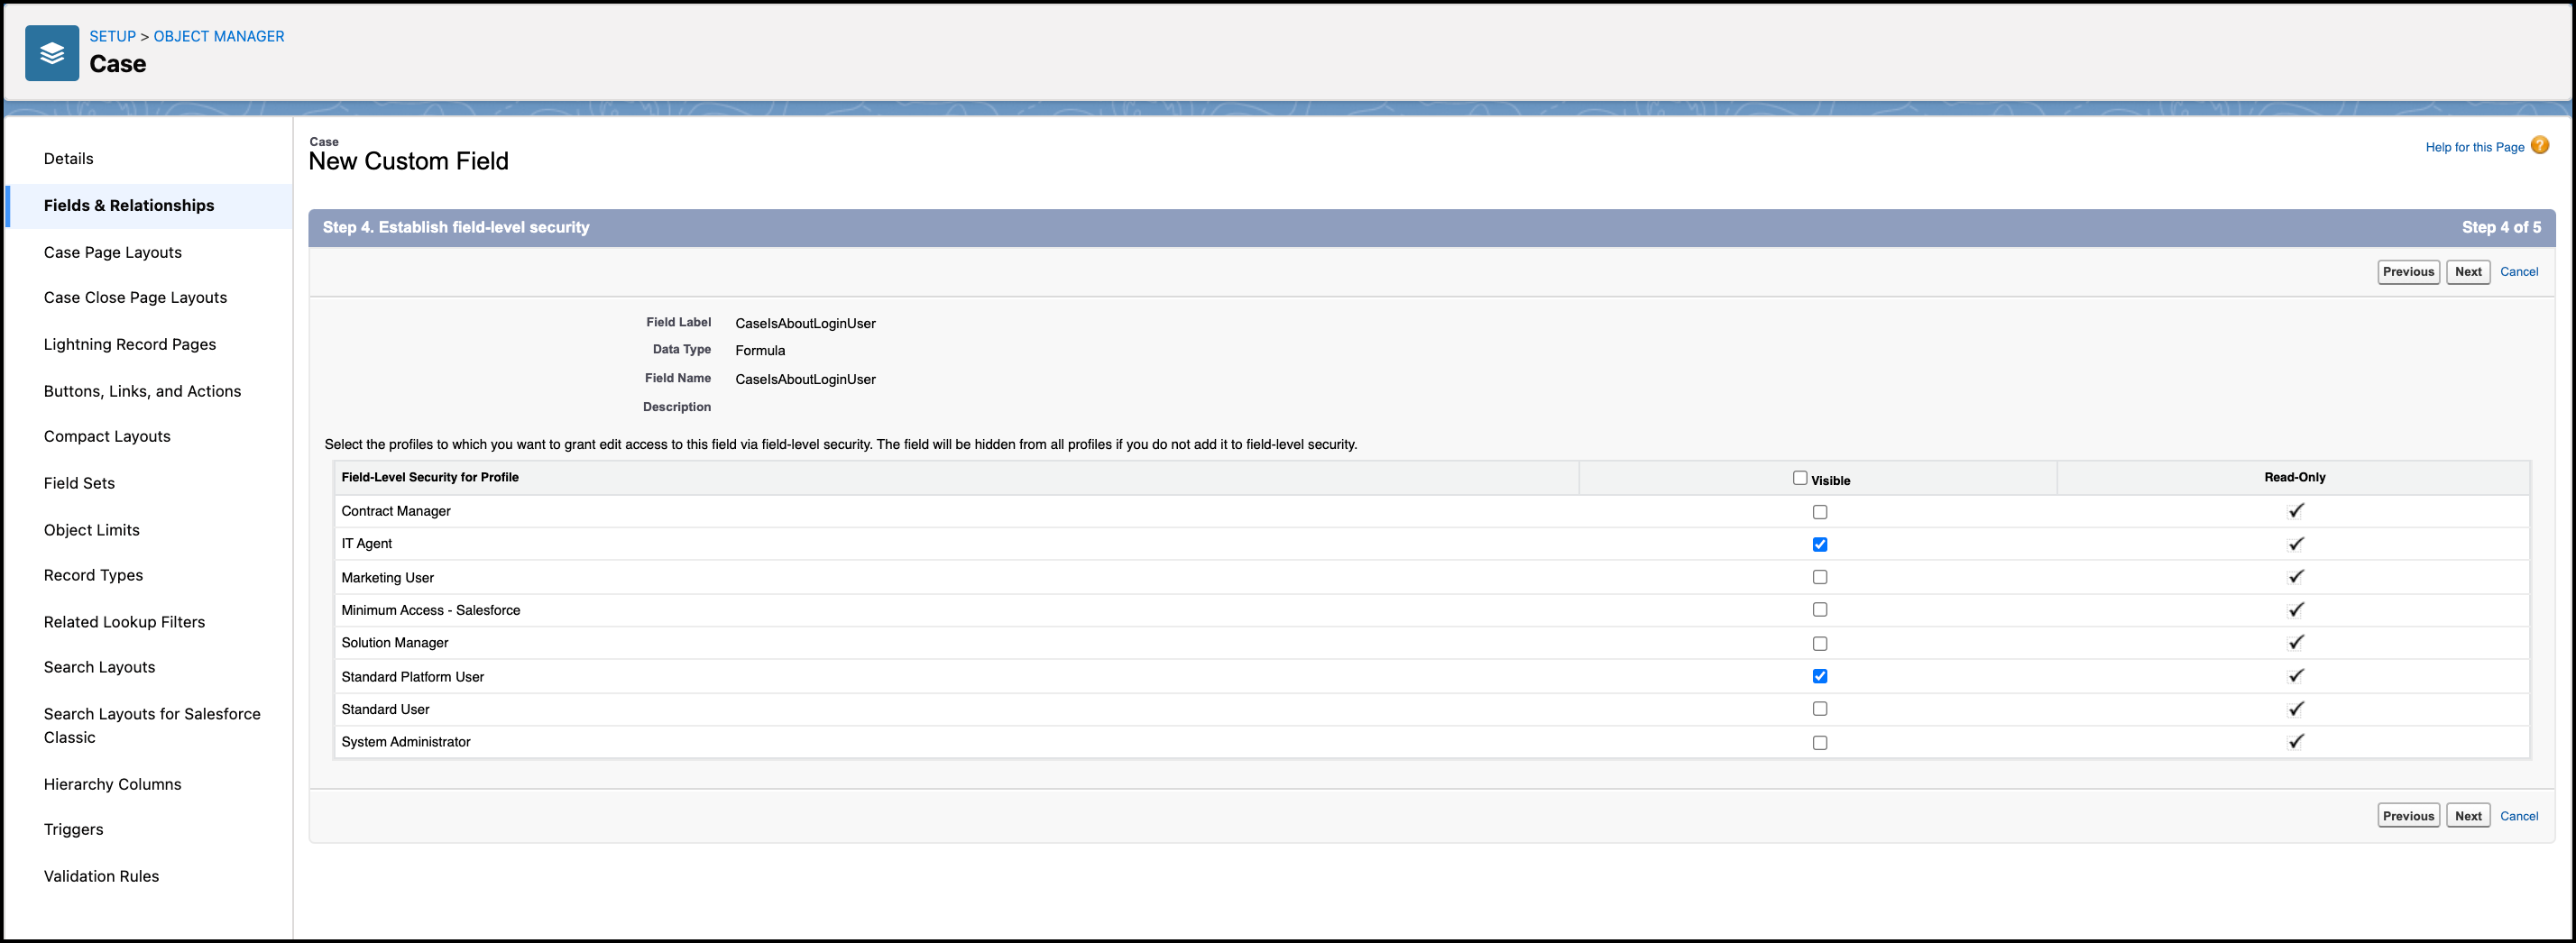
-
From step 4 of the workflow, unselect Visible.
- Select Standard Platform User.
-
Select either or both IT Agent and HR Service
Agent, then click Next.
- Optional:
From step 5 of the workflow, choose the page layouts to include the
CaseIsAboutLoginUserfield, and then click New.TheCaseIsAboutLoginUserfield doesn’t require exposure on any page layout because the Field Level Security is set in the previous step.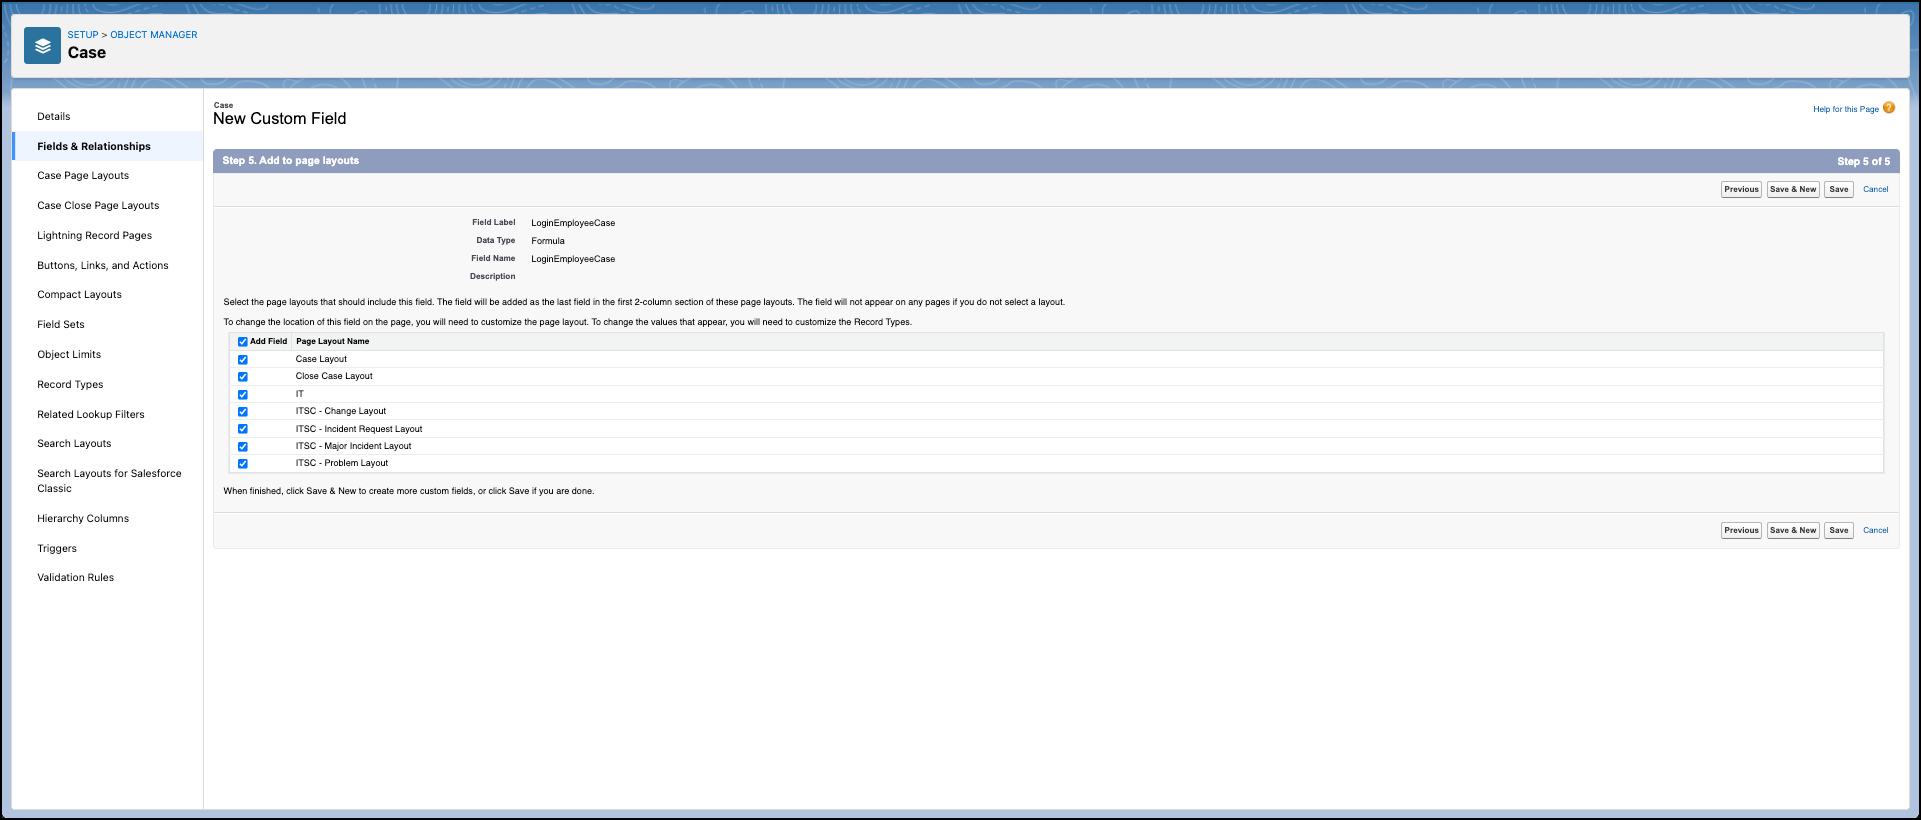
Disable the Feed Component Visibility for the Agent User
- From Setup, in Quick Find box, enter Lightning App Builder, and then select Lightning App Builder.
-
From the Lightning Pages menu, select your Case Record Page, and then click
Edit.
For HR Service Center, select HR Case Record Page Layout.
For Employee Concierge (Agent Desk), select IT Case.
 You see the Case Record Page open in the Lightning App Builder.
 -
From the Case Record Page, click any component that you don’t
want the agent user to see, and then proceed to the component attributes menu.
For example, you can select Feed and then configure its settings.

- From the Set Component Visibility dropdown, click + Add Filter.
-
Set the filter with these configurations.
- For Filter Type, select Record Field.
- For Field, select CaseIsAboutLoginUser.
- For Operator, select Equals.
- For Value, select False.
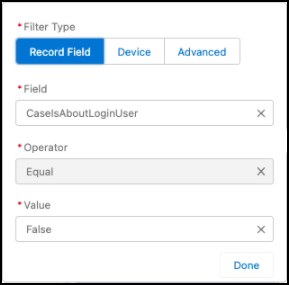
- Click Done, and save your updates. If you haven’t activated your record page, click Activate.