
You are here:
Create a Separate Service Agent User for Each Employee User
Create a separate Service Agent user for each Employee user in your organization, and then assign the proper permission configurations.
This task assumes that there are significantly more people in your organization who are employees only than people who are both an employee and a Service Agent. Therefore, it’s best to use the provided steps to manually create a Service Agent user for each employee whose role is a Service Agent.
If you must create a large number of Service Agent users, consider using a data loading tool to automate the process, such as the Salesforce Data Loader. Review the associated Data Loader content that details how to configure and use the Salesforce Data Loader.
Completing this task creates a Service Agent user login and an Employee user login for the employee who is a Service Agent. The agent user login is used to access the Service Console to handle support tickets and cases. To access the Employee Workspace, the original employee login is used.
As you complete the task, keep this consideration in mind:
- If you have Omni-Channel case routing enabled and the Employee user who is also a Service Agent user is online in the Service Console, then the case that is raised by this employee in Employee Workspace could be routed to their service agent user in the Service Console. This is a default Omni-Channel case routing behavior.
- From Setup, in the Quick Find search, enter Users, and then select Users.
- From the Active Users page, click New User.
-
Enter the listed settings for the required fields based on the Service Agent
user. All other non-required fields can be set to your own preferences, and they
can be the same or different from the employee user.
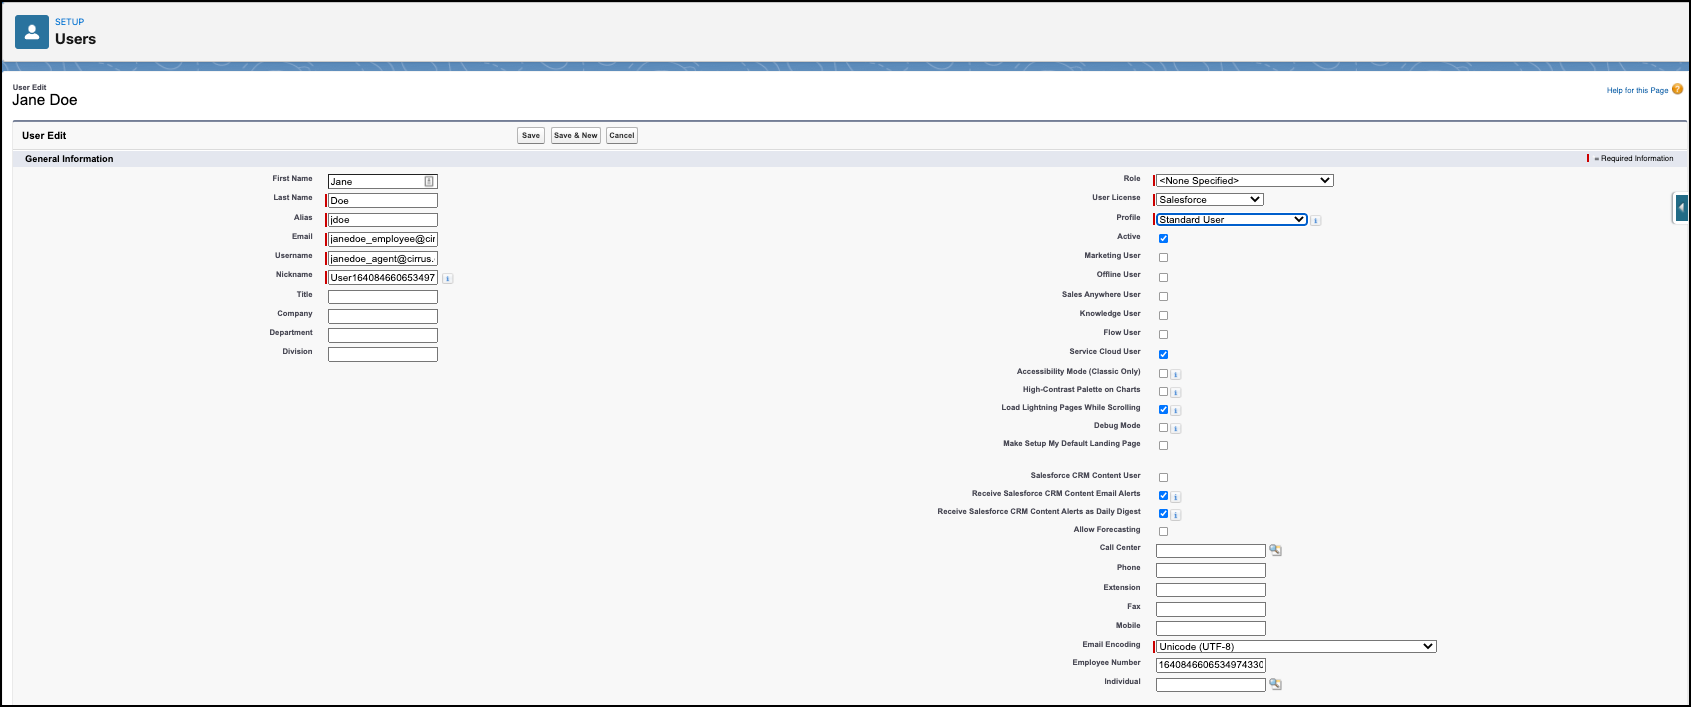
- Set the Email field with the same email alias as the existing employee user.
-
Set the Username field to a different username
than the Employee user.
For example, when an Employee username is janedoe_employee@cirrus.com, set the Service Agent username to janedoe_agent@cirrus.com. The Service Agent alias is used to log into the Service Console, and the Employee user alias is used to log into Employee Workspace.
- Set the Role field to <None Specified>.
- Set the User License field to Salesforce.
- Set the Profile field to either Standard User for an HR Service Center Agent or IT Agent for an Employee Concierge IT Agent.
- Select the Feature License field to Service Cloud User.
- Set the Employee Number field to have the same Employee Number as their existing Employee user.
- Click Save & New.
- Repeat steps 1–6 for all Service Agents in your organization.
- Assign the Service Agent permission set assignments for HR Service Center or Employee Concierge.
- Assign Service Agent permission set licenses for HR Service Center or Employee Concierge.
- Assign Service Agent user permission set groups for for HR Service Center or Employee Concierge.
Here’s an example of a Service Agent user.
