
You are here:
Configure Autonomous Scheduling for Field Service
You can modify the behavior of Autonomous Scheduling by configuring the agent and its various components. Your agent includes details and is composed of subagents that include actions that call flows. You can configure any of these components. For example, in the agent details you can configure the welcome message, in the subagent you can configure the instructions, and in the flows you can change the scheduling policy, operating hours and more.
Required Editions
| Available in: Lightning Experience |
| Available in: Enterprise, Performance, Unlimited, and Developer Editions with Field Service and Foundations, or Einstein 1 Field Service Edition or Agentforce 1 Field Service Edition. |
| User Permissions Needed | |
|---|---|
| To manage agents: | Manage Agentforce Service Agents AND Manage AI Agents OR Customize Application |
Watch the video to see some of the ways that you can configure your Autonomous Scheduling experience.
Get Started
To personalize your agent, follow these steps.
- From Setup, in the Quick Find box, enter Agentforce, and then select Agentforce Agents.
- Open your agent.
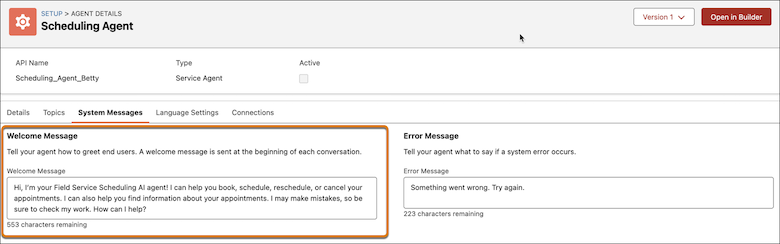
- From Agent Details, modify the details that you entered when you created the agent and additional details, such as the messages that your customers see. For example, from System Messages, modify the Welcome Message.
-
Modify the subagents that this agent uses. For example, modify a subagent’s instructions.
- Click Open in Builder.
- Click a subagent.
- Click New Version.
- Modify the details.
- Save your changes.
-
Modify the flows. For example, modify the scheduling policy or operating hours.
- Click This Subagent’s Actions.
- Open the action that contains the flow that you want to update.
-
From the Reference Action box, click
 .
. 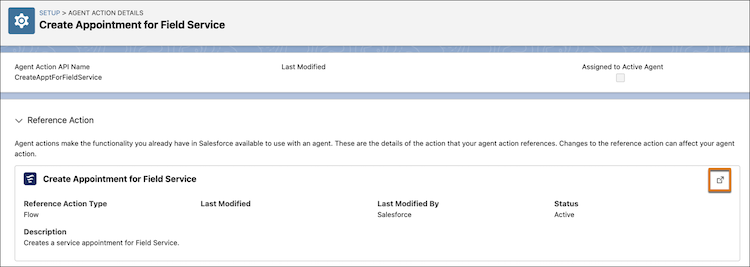
- In Flow Builder, modify the various elements.
Here are some examples of components that you can personalize to reflect your org’s preferences.
Address
By default, the customer's address is taken from the contact record. If your org uses the account record for storing addresses, follow these steps.
- From the list of subagents in Agentforce Builder, click Appointment Management for Field Service subagent.
- Click New Version.
- From the list of actions, open the Create Appointment for Field Service action.
- From Reference Action, open the Field Service: Create Service Appointment flow.
- Configure the flow to use the address defined in the account record instead of the contact record.
Appointment Identifier
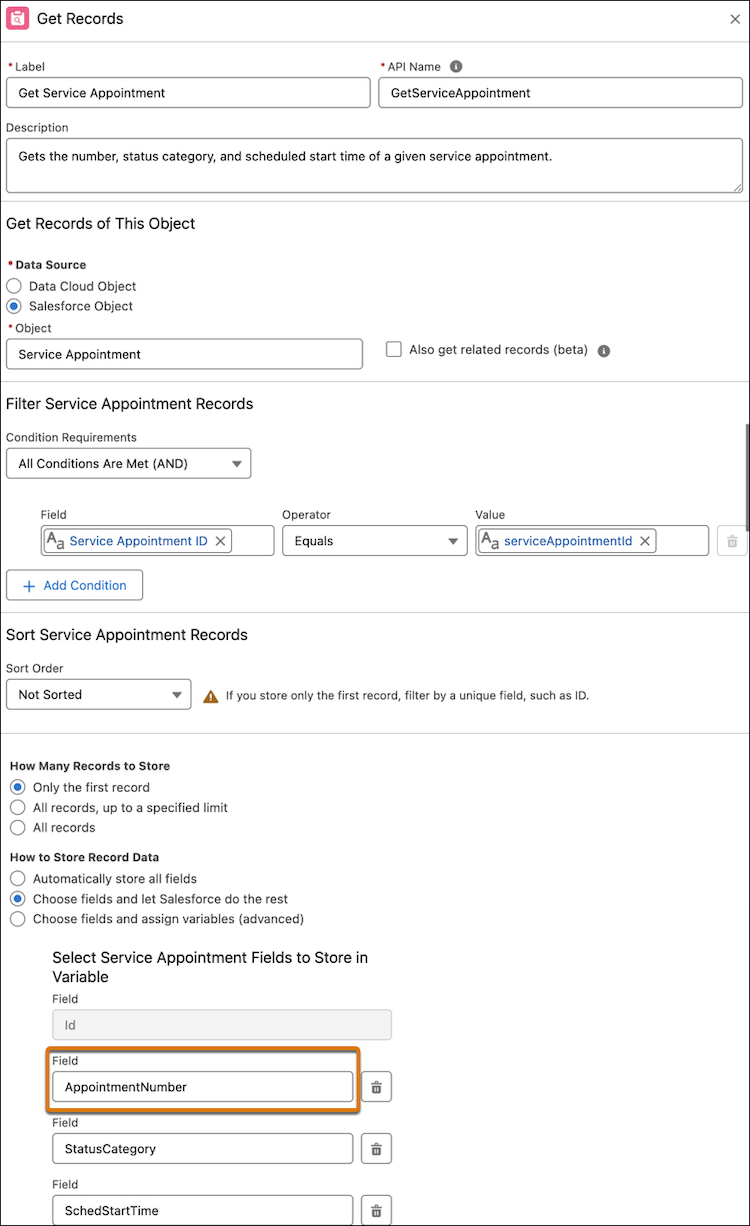
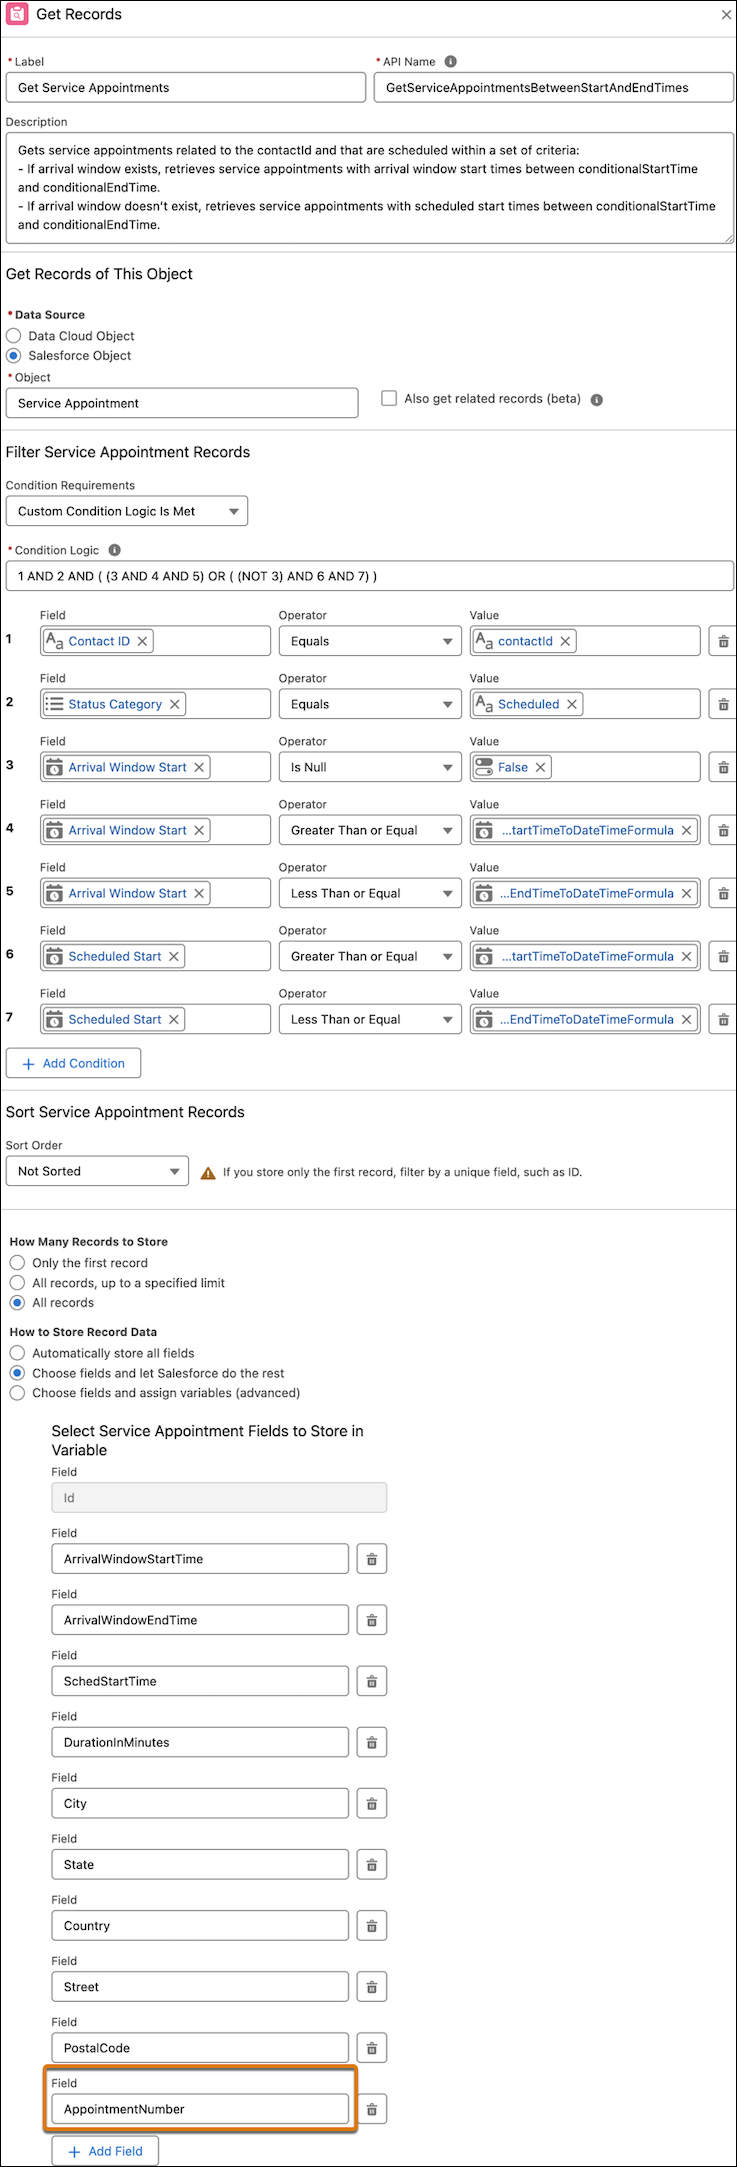
By default, the appointment identifier that’s displayed to customers is the Service Appointment Number. If you want to use a different appointment identifier or remove the appointment identifier, follow these steps.
-
Edit these flows to modify the following elements.
- Flow:Field Service: Get Service Appointment
Identifier
Element: Get Service Appointment (API Name: GetServiceAppointment)

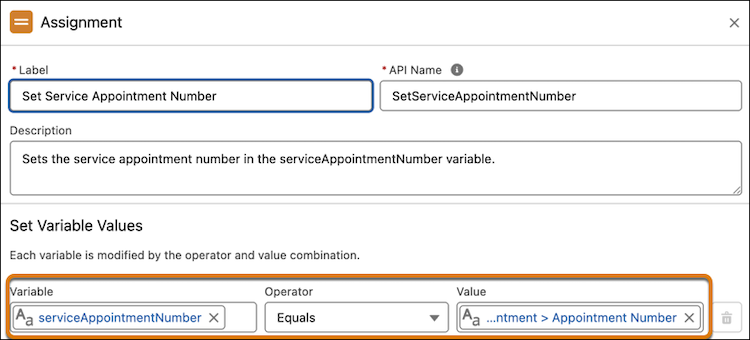
- Flows: Field Service: Cancel Service Appointment and Field
Service: Schedule Service Appointment
Element: Get Service Appointment (API Name: GetServiceAppointment)
Element: Set Service Appointment Number (API Name: SetServiceAppointmentNumber)
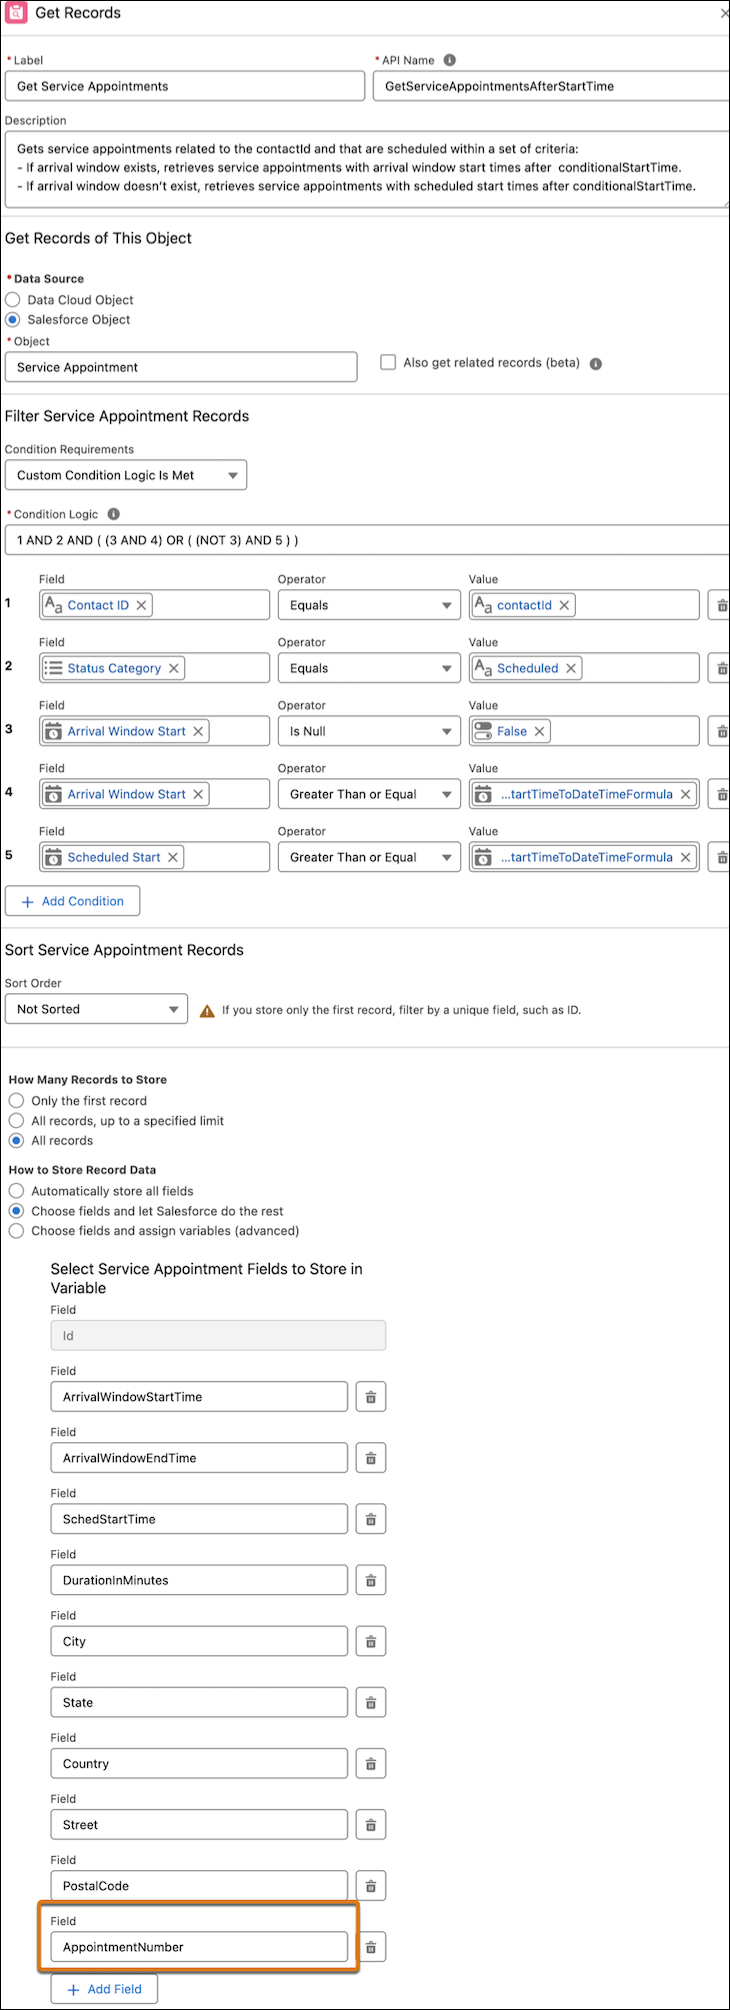
- Flow: Field Service: Get Appointment
Information
Resource in Toolbox: ComposeSingleAppointmentBasicInfoFormula formula

Element: Get Service Appointments (API Name: GetServiceAppointmentsAfterStartTime)
Element: Get Service Appointments (API Name: GetServiceAppointmentsBetweenStartAndEndTimes)
- Flow:Field Service: Get Service Appointment
Identifier
- Save and activate the flows.
-
If you chose to remove these elements from the flows because you don’t want the service
appointment number to be displayed to customers, you also need to edit the subagent
instructions. This step isn't required if you’re changing the appointment identifier.
- From the list of subagents in Agentforce Builder, click the Appointment Management for Field Service subagent.
- Click New Version.
-
Search for this in the instructions:
If successful, provide a complete message that confirms the cancellation: "I've canceled [value of 'serviceAppointmentNumber' from action output] that was scheduled for [value of 'formatted date and time' from the retrieved appointment]. Please let me know if I can help with anything else."
Enter this instead:If successful, provide a complete message that confirms the cancellation: "I've canceled the appointment that was scheduled for [value of 'formatted date and time' from the retrieved appointment]. Please let me know if I can help with anything else."
-
Search for this in the instructions:
After the customer has selected a time slot from the presented options, call the appropriate action to finalize the scheduling. - If scheduling was successful, you must send a confirmation message to the customer. This message must include the day, date, time, and the appointment number. - For example: "[value of serviceAppointmentNumber from the action output] has been scheduled for [Day of Week, Month Day] [Start Time] - [End Time].
Enter this instead:After the customer has selected a time slot from the presented options, call the appropriate action to finalize the scheduling. - If scheduling was successful, you must send a confirmation message to the customer. This message must include the day, date and time. - For example: "The appointment has been scheduled for [Day of Week, Month Day] [Start Time] - [End Time].
- Save and activate the agent.
Escalations
The Appointment Management for Field Service subagent includes various scenarios where a conversation is escalated to a representative. If you want to add, remove, or modify any of these scenarios, follow these steps.
- Review the current escalation scenarios.
- From the list of subagents in Agentforce Builder, click the Appointment Management for Field Service subagent.
- Click New Version.
- Search for escalate and escalation to locate all of the relevant instructions.
- Modify the instructions as needed. For ethics-related instructions, see Ethical Instructions.
Messaging Channels
When using an Enhanced Web Chat deployment, you can configure how information is displayed.
- From Setup, in the Quick Find box, enter Embedded Service Deployments, and select Embedded Service Deployments.
- Customize the settings of the messaging channel. For example, you can show typing indicators.
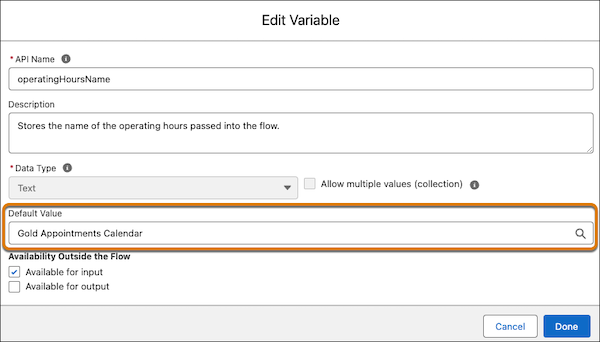
Operating Hours
By default, operating hours is set to Gold Appointments Calendar. We recommend replacing this value with the operating hours used in your org.
- From the list of subagents in Agentforce Builder, click the Appointment Management for Field Service subagent.
- Click New Version.
- From the list of actions, open the Get Appointment Time Slots for Field Service action.
- From Reference Action, open the Field Service: Get Appointment Time Slots flow.
- In Flow Builder, open the toolbox and edit the operatingHoursName variable.
-
Replace the default value of the variable with the name of your preferred operating hours.
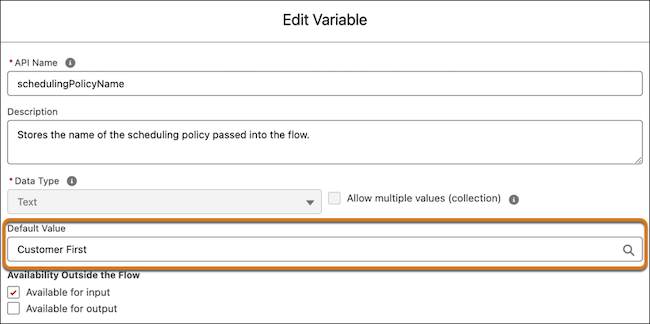
Scheduling Policy
By default, the scheduling policy is set to Customer First. We recommend replacing this value with the scheduling policy used in your org.
-
Edit the flow that gets the time slots.
- From the list of subagents in Agentforce Builder, click the Appointment Management for Field Service subagent.
- Click New Version.
- From the list of actions, open the Get Appointment Time Slots for Field Service action.
- From Reference Action, open the Field Service: Get Appointment Time Slots flow.
- In Flow Builder, open the toolbox and edit the schedulingPolicyName variable.
-
Replace the default value of the variable with the name of your preferred scheduling
policy.
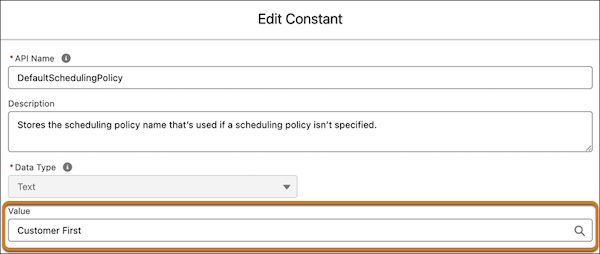
-
Edit the flow that schedules the service appointment.
- In Agentforce Builder, from the Appointment Management for Field Service subagent, open the Schedule Appointment for Field Service action.
- From Reference Action, open the Field Service: Schedule Service Appointment flow.
- In Flow Builder, open the toolbox and click the DefaultSchedulingPolicy constant.
-
Replace the value of the constant with the name of your preferred scheduling policy.
Service Provider Information
You can present personalized messages after customer verification.
- From the list of subagents in Agentforce Builder, click the Customer Verification subagent.
- Click New Version.
- Edit the instructions to present personalized messages after customer verification by adding service provider-specific information.
Time Slots
By default, customers are offered five time slots. If you want to change this number, follow these steps.
- From the list of subagents in Agentforce Builder, click the Appointment Management for Field Service subagent.
- Click New Version.
- To locate the relevant instructions, search for five.
- Modify the number of slots.
Welcome Message
By default, the welcome message is taken from the agent template that you selected when creating the agent. If you want to personalize the message, follow these steps. Note that this message should be empty for Customer Outreach because your company is approaching the customer with a specific predefined message.
- From Setup, in the Quick Find box, enter Agentforce, and then select Agentforce Agents.
- Open your agent.
- Click System Messages.
-
Replace the default welcome message.
Work Types
By default, all of the org’s work types are considered for scheduling. To include only relevant work types and improve the agent’s performance, follow these steps.
- From the list of subagents in Agentforce Builder, click the Appointment Management for Field Service subagent.
- Click New Version.
- From the list of actions, open the Get Work Types for Field Service action.
- From Reference Action, open the Field Service: Get Work Types flow.
- From Flow Builder, open the Assign Work Types element.
-
Click Add Assignment and for each work type define this condition.
Variable: workTypesOperator: AddValue: Work type’s name
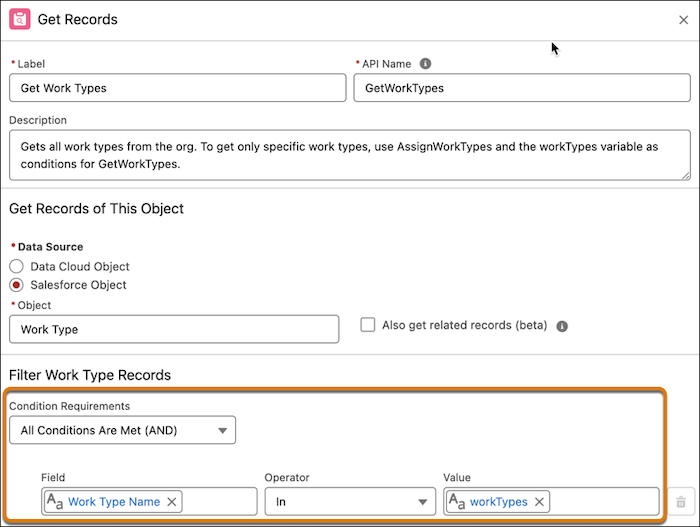
- Open the Get Work Types element.
-
Under Filter Work Type Records, change the Conditions Requirement to All
Conditions are met (AND) and define this condition.
Field: NameOperator: InValue: workTypes
Email Confirmation
Set up your Scheduling Agent so that it sends an email to your customers confirming that their request to schedule, reschedule, or cancel their appointment was successful.
Set Up the Flow
- In Setup, find and select Flows.
- Open the Field Service: Send Confirmation to Customer flow.
- Click Save as New Flow.
- Enter a label and API name, then save the flow.
-
Enable sending the confirmation emails.
- Open the Toolbox.
- Open the sendEmailOutcome variable.
-
Change the default value from False to
True.
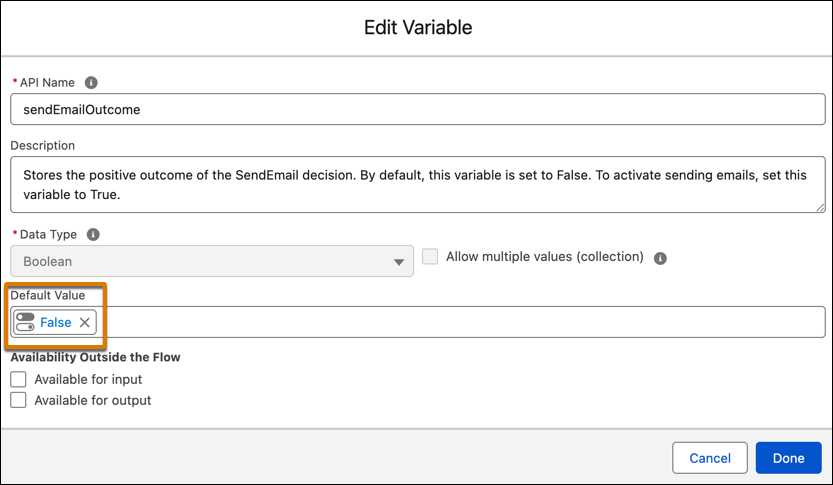
- Click Done.
-
Add your company name.
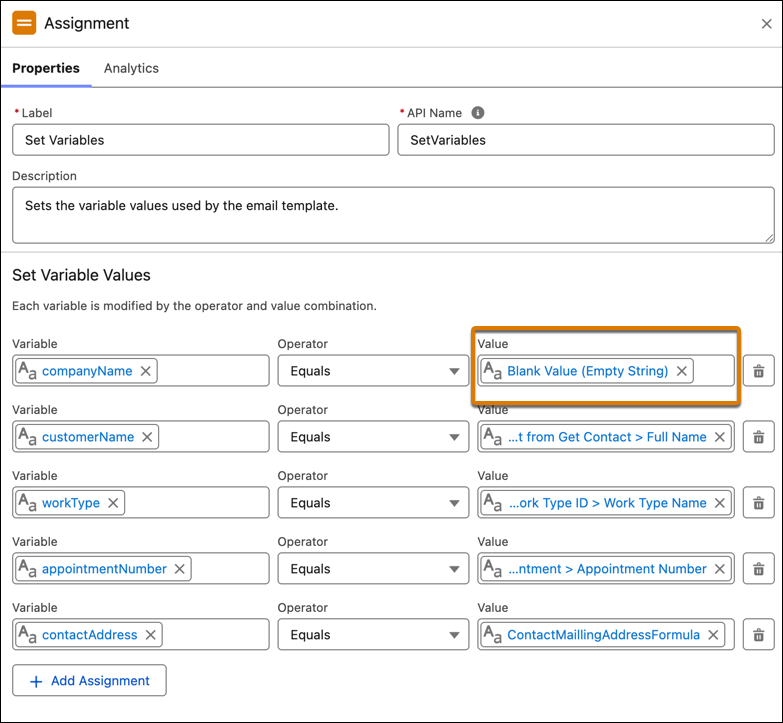
- Open the Set Variables element.
-
For the companyName variable, delete the value and enter the name of your company.
-
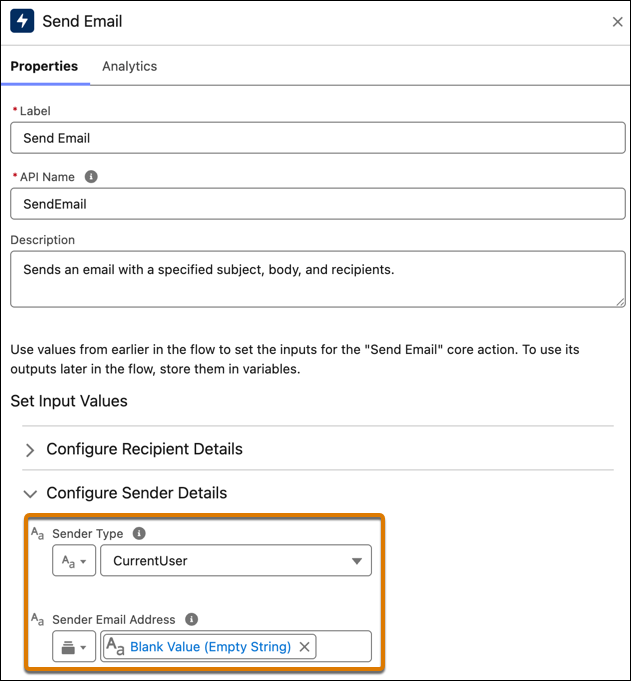
The sender’s email address is set to the current user. If you want to use an Organization-Wide Email Address, follow these
steps.
- Open the Send Email element.
- Under Configure Sender Details, for Sender Type, select OrgWideEmailAddress.
-
For Sender Email Address, delete the value and enter the required email address.
- Save and activate the flow.
Add Custom Labels
Create custom labels and modify them as needed.
- In Setup, find and select Custom Labels.
- Click New Custom Label.
- Copy the names from the table below and use them to create custom labels for the subject and body of these template types: Cancel, Schedule, and Reschedule.
| Short Description | Name | Value |
|---|---|---|
| Subject of the confirmation email for canceled appointments. | Email_Confirmation_Cancel_Subject_template | Your appointment with {Company Name} was canceled |
| Body of the confirmation email for canceled appointments. | Email_Confirmation_Cancel_template | Hi {FirstName LastName}, Your {Work Type} appointment {Appointment Number} that was originally scheduled for {Original Date & Time} is now scheduled for {Date & Time} at this address: {Street and Number}, {City}, {State} Thank you, {Company Name} |
| Subject of the confirmation email for scheduled appointments. | Email_Confirmation_Schedule_Subject_template | Your appointment with {Company Name} was scheduled |
| Body of the confirmation email for scheduled appointments. | Email_Confirmation_Schedule_template | Hi {FirstName LastName}, Your {Work Type} appointment {Appointment Number} is scheduled for {Date & Time} at this address: {Street and Number}, {City}, {State} Thank you, {Company Name} |
| Subject of the confirmation email for rescheduled appointments. | Email_Confirmation_Reschedule_Subject_template | Your appointment with {Company Name} was rescheduled |
| Body of the confirmation email for rescheduled appointments. | Email_Confirmation_Reschedule_template | Hi {FirstName LastName}, Your {Work Type} appointment {Appointment Number} that was originally scheduled for {Original Date & Time} is now scheduled for {Date & Time} at this address: {Street and Number}, {City}, {State} Thank you, {Company Name} |