
Create an Agentforce Service Agent for Customer Outreach
Create an additional agent that rebooks service appointments and coordinates asset maintenance appointments.
Required Editions
| Available in: Lightning Experience |
| Available in: Enterprise, Performance, Unlimited, and Developer Editions with Field Service and Foundations, or Einstein 1 Field Service Edition or Agentforce 1 Field Service Edition. |
| User Permissions Needed | |
|---|---|
| To build and manage Service Agents: | Manage Agentforce Service Agents AND Manage AI Agents OR Customize Application |

Important Customer Outreach requires a separate agent to the
Customer-Initiated Scheduling agent.

Note Although the Scheduling Agent and Agentforce Service Agent are available in the new Agentforce
Studio, we still recommend building new agents in the legacy Agentforce Builder as described
in this section. If you choose to use Agentforce Service Agent in Agentforce Studio, you
need to add the Appointment Management for Field Service subagent to it.
If you’ve used Salesforce Go to create the agent, skip to step 4.
- From Setup, in the Quick Find box, enter Agents, and then select Agentforce Agents.
- Click New Agent.
-
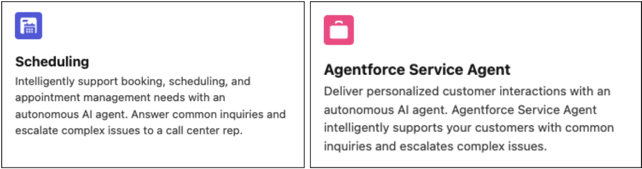
In the step for selecting an agent, select one of these templates:
Scheduling or Agentforce Service Agent.
 If you want to use the Create with Gen AI option, make sure these subagents are included: Appointment Management for Field Service, Escalation, and General FAQ.
 - In the step for selecting your subagents, remove the Customer Verification subagent. In Customer Outreach there’s no need to verify the customer’s identity, so we want to make sure to remove all the elements that cause this to happen.
-
In the step for customizing your agent, pay attention to the Agent User that’s
selected. When you’re finished creating the agent, you must give this user the required
permissions.
To securely access data and perform actions, Service agents operate as an agent user–a Salesforce integration user with all the permissions that the agent needs to do its job. Creating a new agent user in the guided setup creates an agent user record with minimal access so that your agent is secure by default. Grant the agent the additional access that it needs. See Best Practices for Agent User Permissions.
-
You can skip the step for selecting data sources. Optionally, select a data source to
ground your agent responses with the Answer Questions with Knowledge action. Then click
Create.
If you don't want to use any of the available data sources, you can create a library to limit Agentforce Service agents to specific articles or uploaded fields. See Assign a Data Library to Your Agent.
- Define your agent's settings, such as system messages and language settings. These settings determine how agents behave and present themselves in conversations.
-
After creating the agent, open your agent in Agentforce Agents and modify these
settings.
-
Under System Messages, delete the welcome message. In Customer Outreach, you
approach the customer with a predefined message, so the default welcome message isn't
required.

-
Under Connections, turn off adaptive response formats.

-
Under System Messages, delete the welcome message. In Customer Outreach, you
approach the customer with a predefined message, so the default welcome message isn't
required.
-
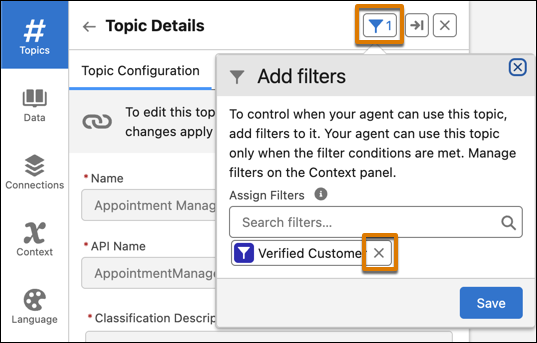
Remove the filter that enforces customer verification:
- Open the agent in Agent Builder.
- Open the Appointment Management for Field Service subagent.
- Click the filter icon.
-
Remove the Verified Customer filter and save your changes.
- Create and assign permissions.
- Set up your messaging channel. The default messaging channel is SMS. To use a different channel, see the Messaging Channels for Customer Outreach section in Configure Autonomous Scheduling.
- Activate your agent
- Set up omni-channel flows to route conversations to the relevant agent and from the agent to an escalation queue, rep, or other destination you specify.
- Optionally, configure your agent to suit your needs.
-
Test your
agent in Agentforce Builder to confirm that your agent performs as expected and meets your
security standards.
The service agent operates in the same Agent User context here as it does when deployed in messaging channels, so design-time testing reflects how your service agent behaves when deployed.
- Monitor your agent.
Did this article solve your issue?
Let us know so we can improve!
