
Set Up Customer-Initiated Scheduling for Field Service
Customer-Initiated Scheduling can be implemented using Agentforce Service Agent or Scheduling agent. You can use any supported messaging channel or Enhanced Chat. Common use cases include allowing customers to interact with the agent directly in the various channels, or allowing contractors and internal employees, who don’t have direct access to the org, to interact with the agent via the Partner Community.
Required Editions
| Available in: Lightning Experience |
| Available in: Enterprise, Performance, Unlimited, and Developer Editions with Field Service and Foundations, or Einstein 1 Field Service Edition or Agentforce 1 Field Service Edition. |
| User Permissions Needed | |
|---|---|
| To build and manage Service Agents: | Manage Agentforce Service Agents AND Manage AI Agents OR Customize Application |
Before you begin, review the prerequisites for Autonomous Scheduling. If you’ve used Salesforce Go to create the agent, skip to step 4.
- From Setup, in the Quick Find box, enter Agents, and then select Agentforce Agents.
- Click New Agent.
-
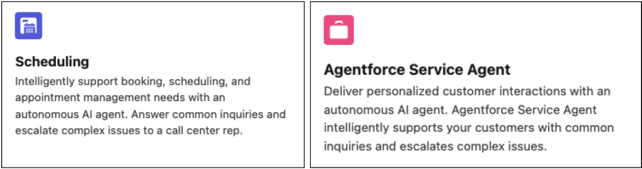
In the step for selecting an agent, select one of these templates:
Scheduling or Agentforce Service Agent.
- In the step for customizing the agent, pay attention to the Agent User that’s selected. When you’re finished creating the agent, you must give this user the required permissions. To securely access data and perform actions, Service agents operate as an agent user–a Salesforce integration user with all the permissions that the agent needs to do its job. Creating a new agent user in the guided setup creates an agent user record with minimal access so that your agent is secure by default. Grant the agent the additional access that it needs. See Best Practices for Agent User Permissions.
- You can skip the step for selecting data sources. Optionally, select a data source to ground your agent responses with the Answer Questions with Knowledge action. Then click Create. If you don't want to use any of the available data sources, you can create a library to limit Agentforce Service agents to specific articles or uploaded fields. See Assign a Data Library to Your Agent.
- Define your agent's settings, such as system messages and language settings. These settings determine how agents behave and present themselves in conversations.
-
Edit the Customer Verification subagent.
- In Agentforce Builder, open the Customer Verification subagent.
- Click New Version.
-
In Classification Description, enter this description instead of the current one:
Verifies the customer's identity before scheduling a repair, scheduling maintenance, scheduling an installation, or granting access to sensitive data, service appointments, appointment booking, or providing any service to a customer. Sensitive data includes confidential, private, or security-protected information, such as business-critical data, personally identifiable information (PII). After verification is successful, don't repeat the process within the same session.
 Note You might need to modify this text according to your business needs. If you modify the text, test the agent afterward.
 -
In the instructions, replace this:
If verification is successful, proceed with the requested action and complete the task the user intends to perform.With this:If verification was successful, you must tell the customer: "Please enter your request again."
- Activate your Customer-Initiated Scheduling agent.
- Set up your messaging channel.
Now that you’ve finished setting up Customer-Initiated Scheduling, you can move on to setting up Customer Outreach.
- Connect the Agent to Your Messaging Channel
Now that you’ve created your agent, you’re ready to connect it to your messaging channel. - Route Your Customer-Initiated Scheduling Conversations
Set up Omni-Channel flows to route conversations to and from your agent.