
You are here:
Create and Send Authentication Requests in Messaging Sessions
Let service reps verify a customer’s identity during an enhanced Apple Messages for Business messaging session. Using an authentication messaging component and an Apex class, prompt the customer to log into an authentication provider such as Google.
Required Editions
| View supported editions. | |
 This article applies to:
|
Enhanced Apple Messages for Business channels |
 This article doesn’t apply to:
|
Enhanced In-App Chat, Enhanced Web Chat v1, Enhanced Web Chat v2, Enhanced WhatsApp, Standard and Enhanced Facebook Messenger, Standard and Enhanced SMS, Enhanced LINE, and Bring Your Own Channel |
| User Permissions Needed | |
|---|---|
| To create messaging components: | Customize Application AND View Setup and Configuration OR System Administrator |
| To send and receive messages in Messaging: | Messaging Agent |
You can authenticate users with one of Salesforce’s standard authentication providers, such as Google, Salesforce, and Facebook. Or, you can create a custom authentication provider, which involves a few extra steps.
Step 1: Prepare for Authentication
To get started adding an authentication option to your enhanced Apple Messages for Business channel, configure the app you’ll use for authentication, create an Apex class, add your authentication provider in Setup, and update your settings in Apple Business Register.
- In the settings of your external identity provider, create an authentication app.
- In your authentication app settings, copy these values and save them for later: App Client ID, App Client Secret, OAuth URL, Token URL.
-
In Salesforce, configure a standard or custom authentication provider.
For steps, see Configure a Predefined Authentication Provider or Create a Custom Authentication Provider. If you use a custom authentication provider, you must also create a custom metadata type.
-
On the Apex Classes page in Setup, create an Apex class to be used during authentication.
The class must implement the
RichMessaging.AuthRequestHandlerinterface. For details and an example, see AuthRequestHandler Interface. - If you’re using a custom authentication provider and your Apex class makes any HTTP callouts to fetch information, add each HTTP base URL as a corresponding remote site on the Remote Site Settings page in Setup.
-
If you didn’t already, add and configure your authentication provider in Setup.
- On the Auth Providers page in Setup, click Edit next to an existing authentication provider or click New to add one.
- Select Link to messaging components.
- In the Registration Handler field, select the Apex class that you created.
- In the Token Endpoint URL field, add the Token URL that you copied from your authentication app.
- Complete the remaining fields and save your changes.
-
Configure your Apple Messages for Business channel to allow authentication.
- Go to register.apple.com and sign in with the Apple ID of the administrator or technical contact for the Messages for Business account.
- Open the channel that you want to configure.
- In the Integrated Oauth2 Authentication section, click Edit.
- Update the Oauth URL, Token URL, and Client Identifier with your app’s Authorize Endpoint URL, Token Endpoint URL, and Client Identifier.
- Save and submit the updates for review by Apple. This process may take a few days.
Step 2: Create an Authentication Messaging Component
After completing the preparation steps, create an authentication messaging component that service reps can use to verify customers’ identity in messaging sessions.
- Go to the Messaging Components page in Setup.
- Click New Component.
- Click Authentication, and then click Next.
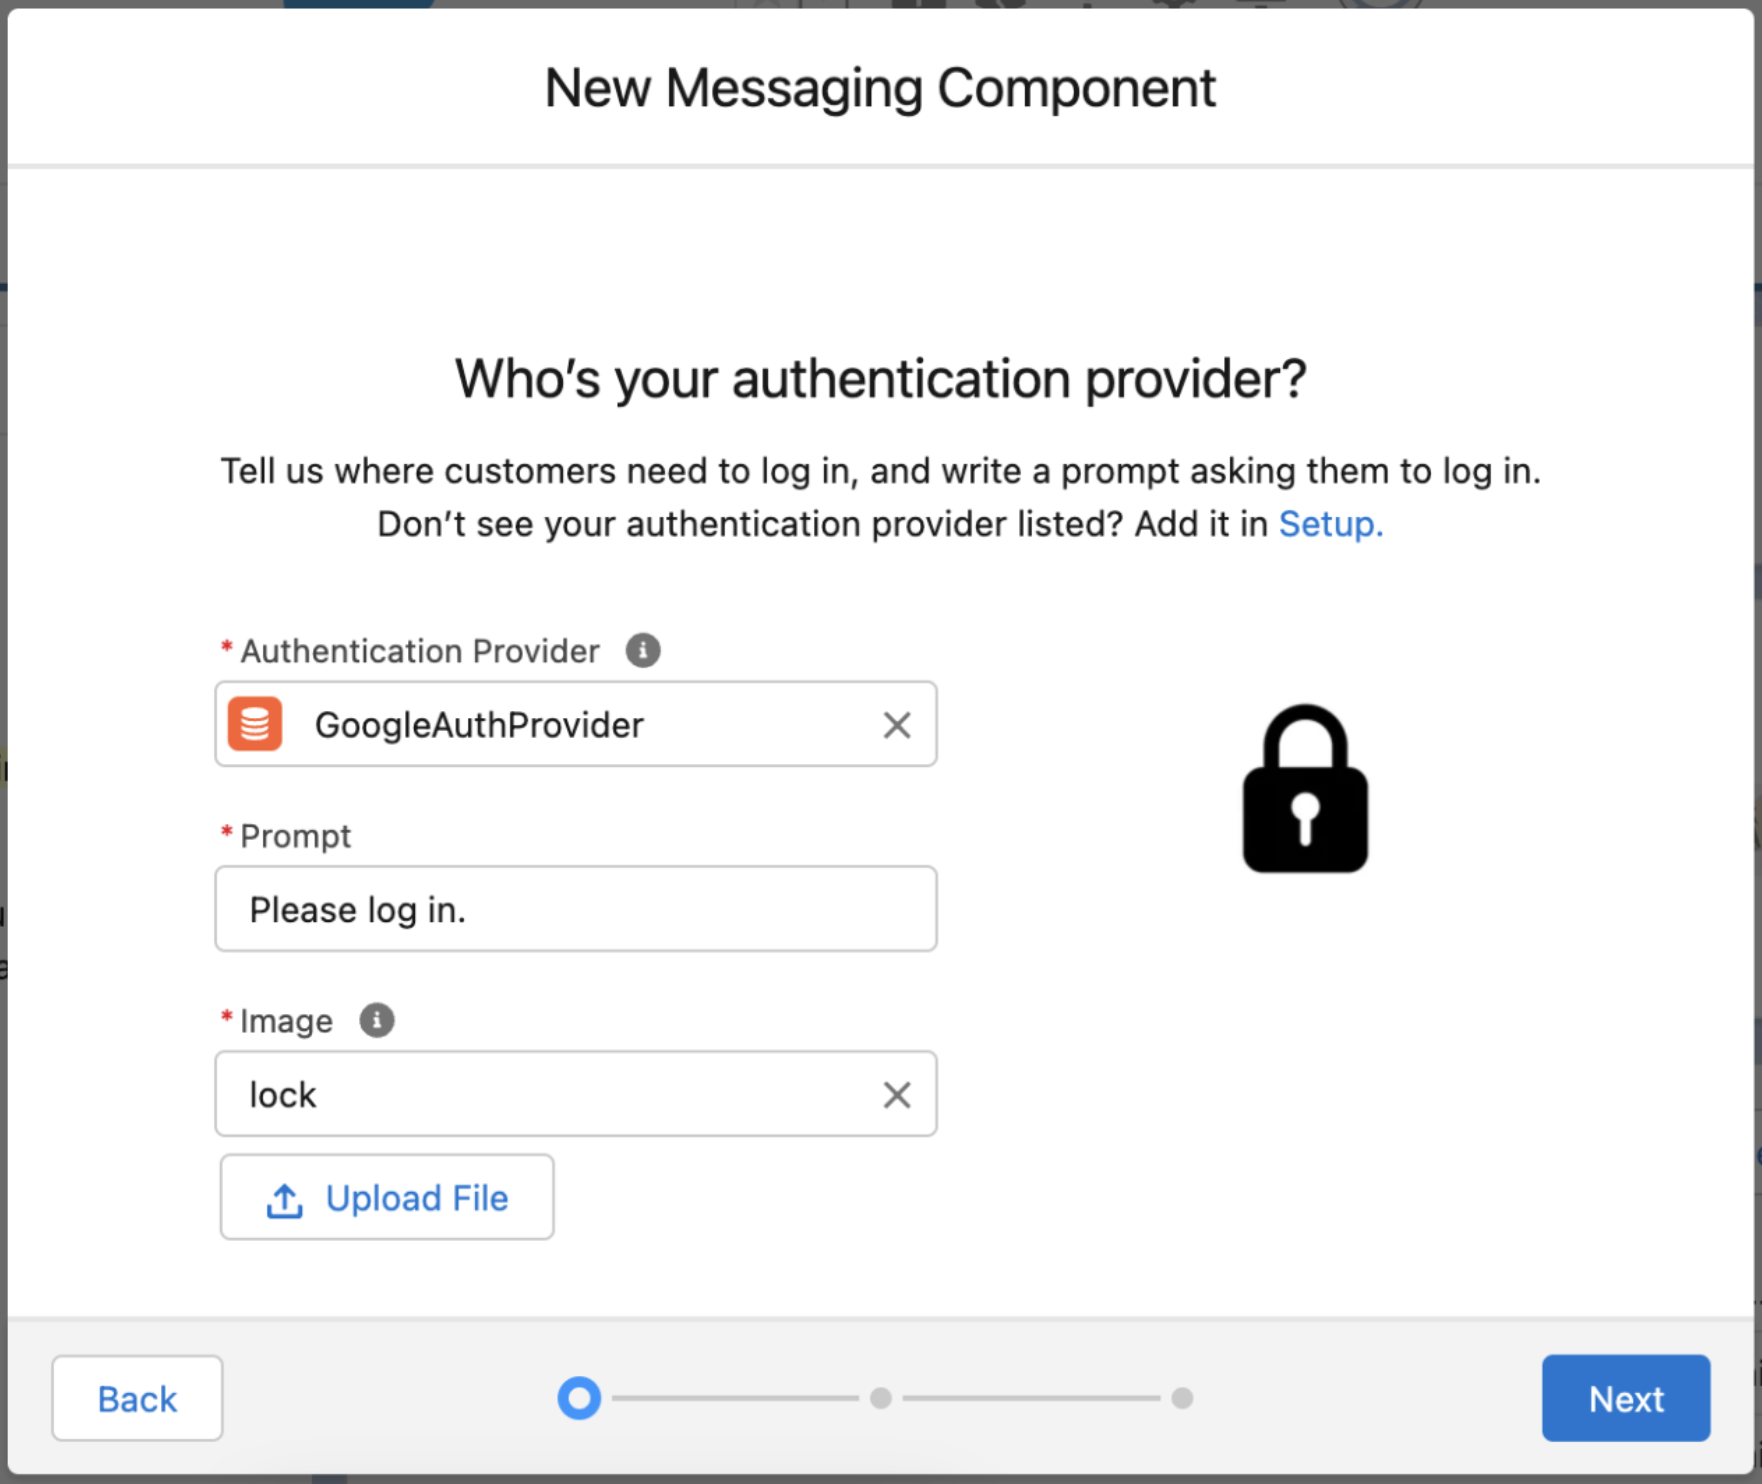
-
Select your authentication provider, enter a prompt, and upload an image that appears with
the authentication request. Then, click Next.
- Leave the plain text version of your component as is, and click Next.
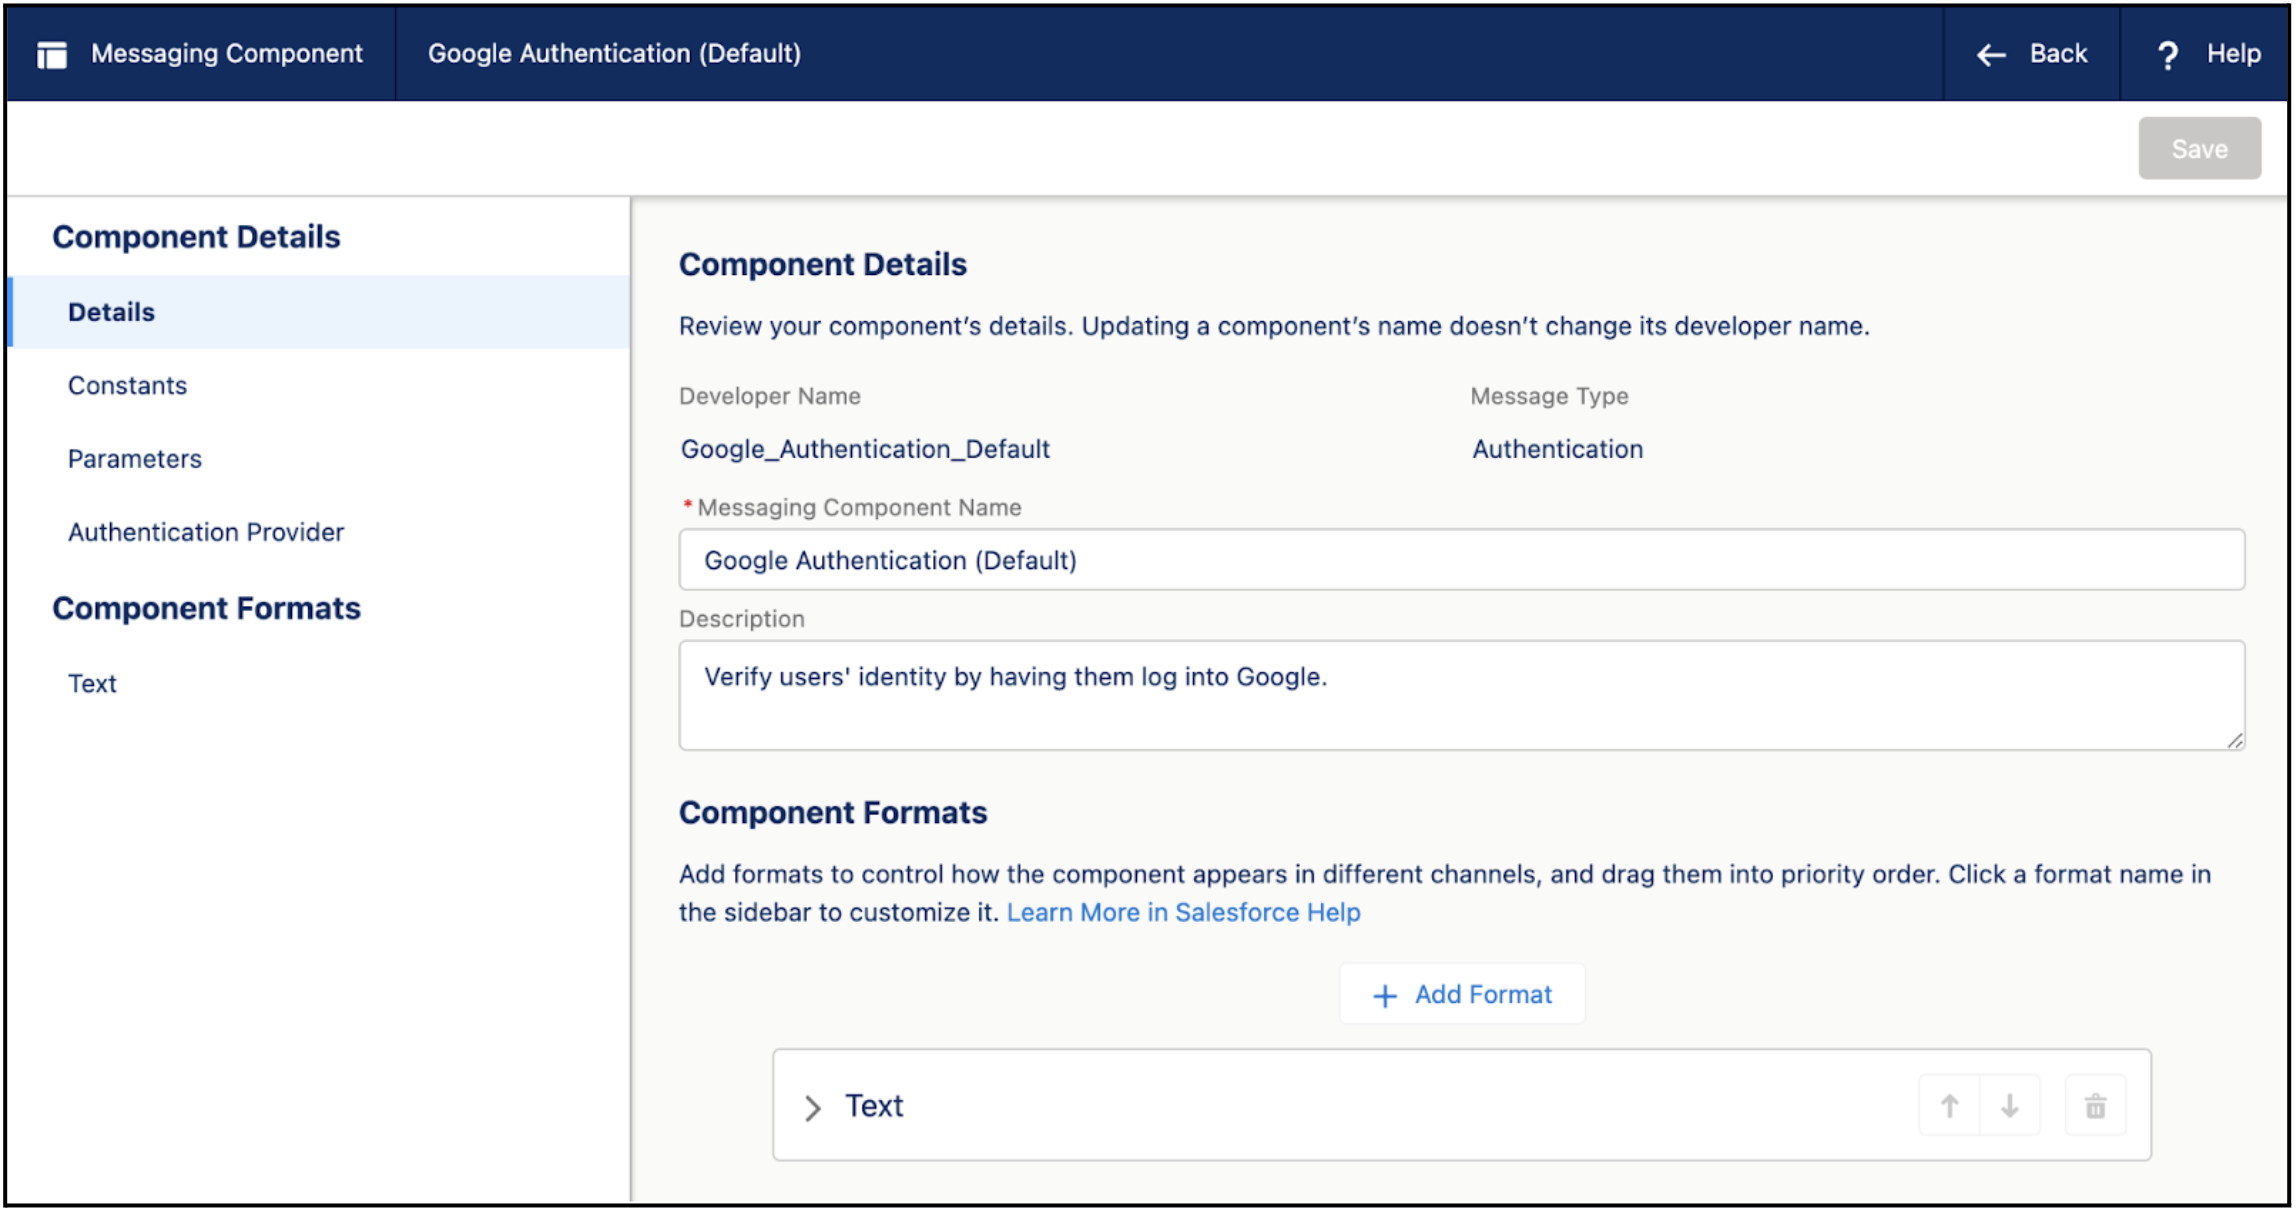
-
Add a name and description for your component.
These values aren’t visible to customers, but service reps see the name in the list of messaging components in the Service Console. Assign a name that indicates the component’s purpose so service reps know when to use it.
-
Click Done. The Messaging Component Builder opens.
-
In the Component Formats section, control how the component looks in messaging sessions.
Click Add Format, select Authentication, and then
click Done.
 Note Each messaging component is available in one or more formats, such as Authentication, and some formats work only in certain channels. For a list of formats that each channel supports, see Messaging Component Types and Formats. It’s a good idea to add at least one supported format for each channel where the component will be sent. If no formats are added, the component uses the default text format.
 -
In the left-hand sidebar, click the Authentication format type to update its
properties.
- Leave the Authentication Configuration section, which shows your authentication provider’s scope and secret as read-only values, as is.
- In the Message Configuration section, provide a prompt that asks the customer to enter their login credentials. Customers click the prompt to view the login screen. To use the prompt that you entered when you created the component, select Constant and select the only available constant.
- In the Confirmation Configuration section, select Literal and enter a message to show to customers after they enter their login credentials.
- In the Image Configuration section, provide an image to show with the component. To use the image that you uploaded when you created the component, select Constant and select the only available constant.
- Optionally, in the left-hand sidebar, click the Text format type to update the plain text version of your component.
- In the Details section of your component, find the Callback URL field and copy the URL.
- Click Save.
-
Your component is saved in a draft state. When you're ready to make it available to
your support team, click Activate at the top of the page.
If you ever need to take the component offline—for example, to give you time to reconfigure it—open it in the Messaging Component Builder and click Deactivate. When you're ready, activate it again.
-
Add two redirect URLs to allow the identity provider to communicate with Salesforce.
- In the settings of your external identity provider, go to the authentication app you created.
- Add two URLs to the list of redirect URLs: https://auth.businesschat.apple.com and the callback URL that you copied from your authentication component details.
Step 3: Send an Authentication Request in a Messaging Session
You can send authentication messaging components to customers in enhanced Apple Messages for Business channels.
-
During an active messaging session, click the messaging component action in the messaging
window.
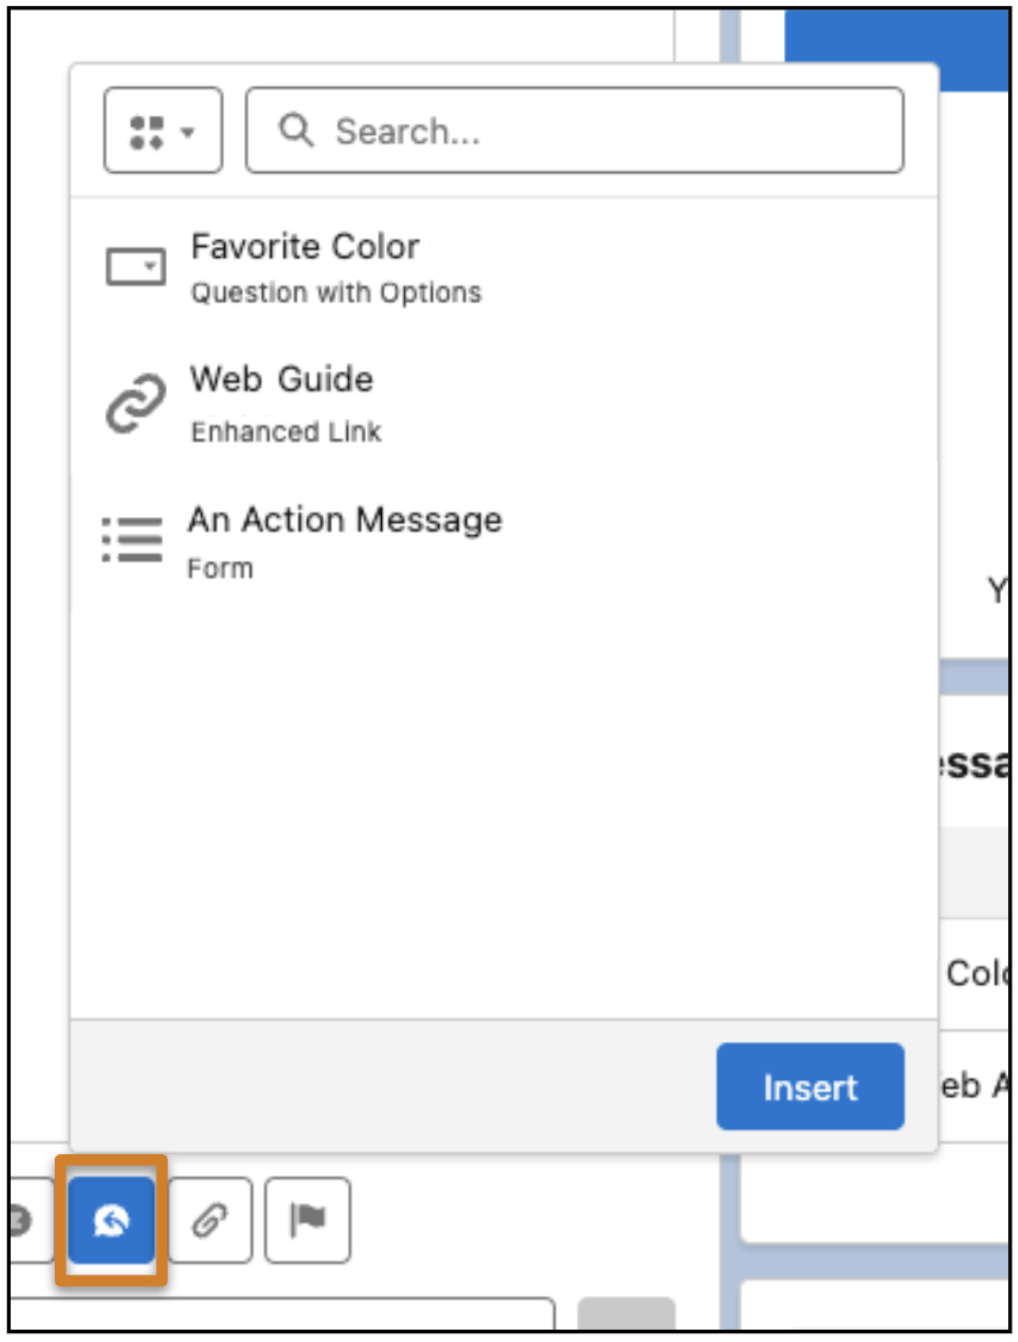
- Optionally, use the filter at the top to show only authentication components.
-
Select the component that you want to share and click Insert.
A placeholder appears below the message field. No preview of the component is available.
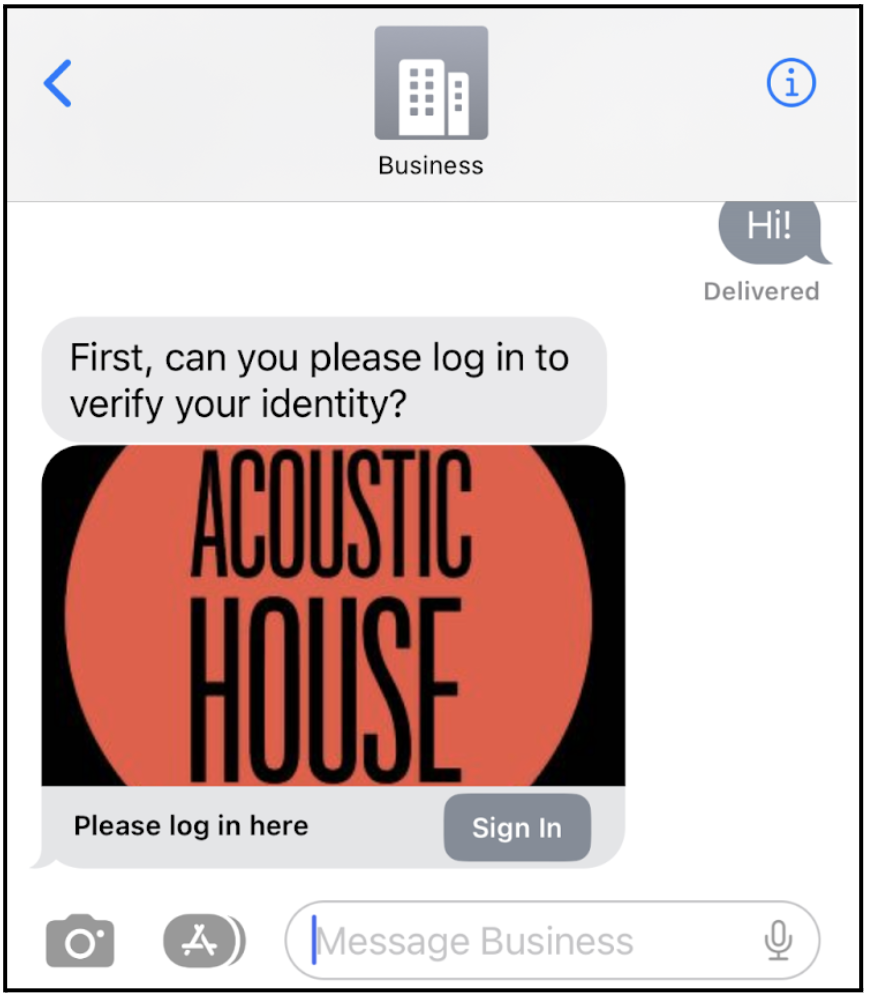
- Click Send.
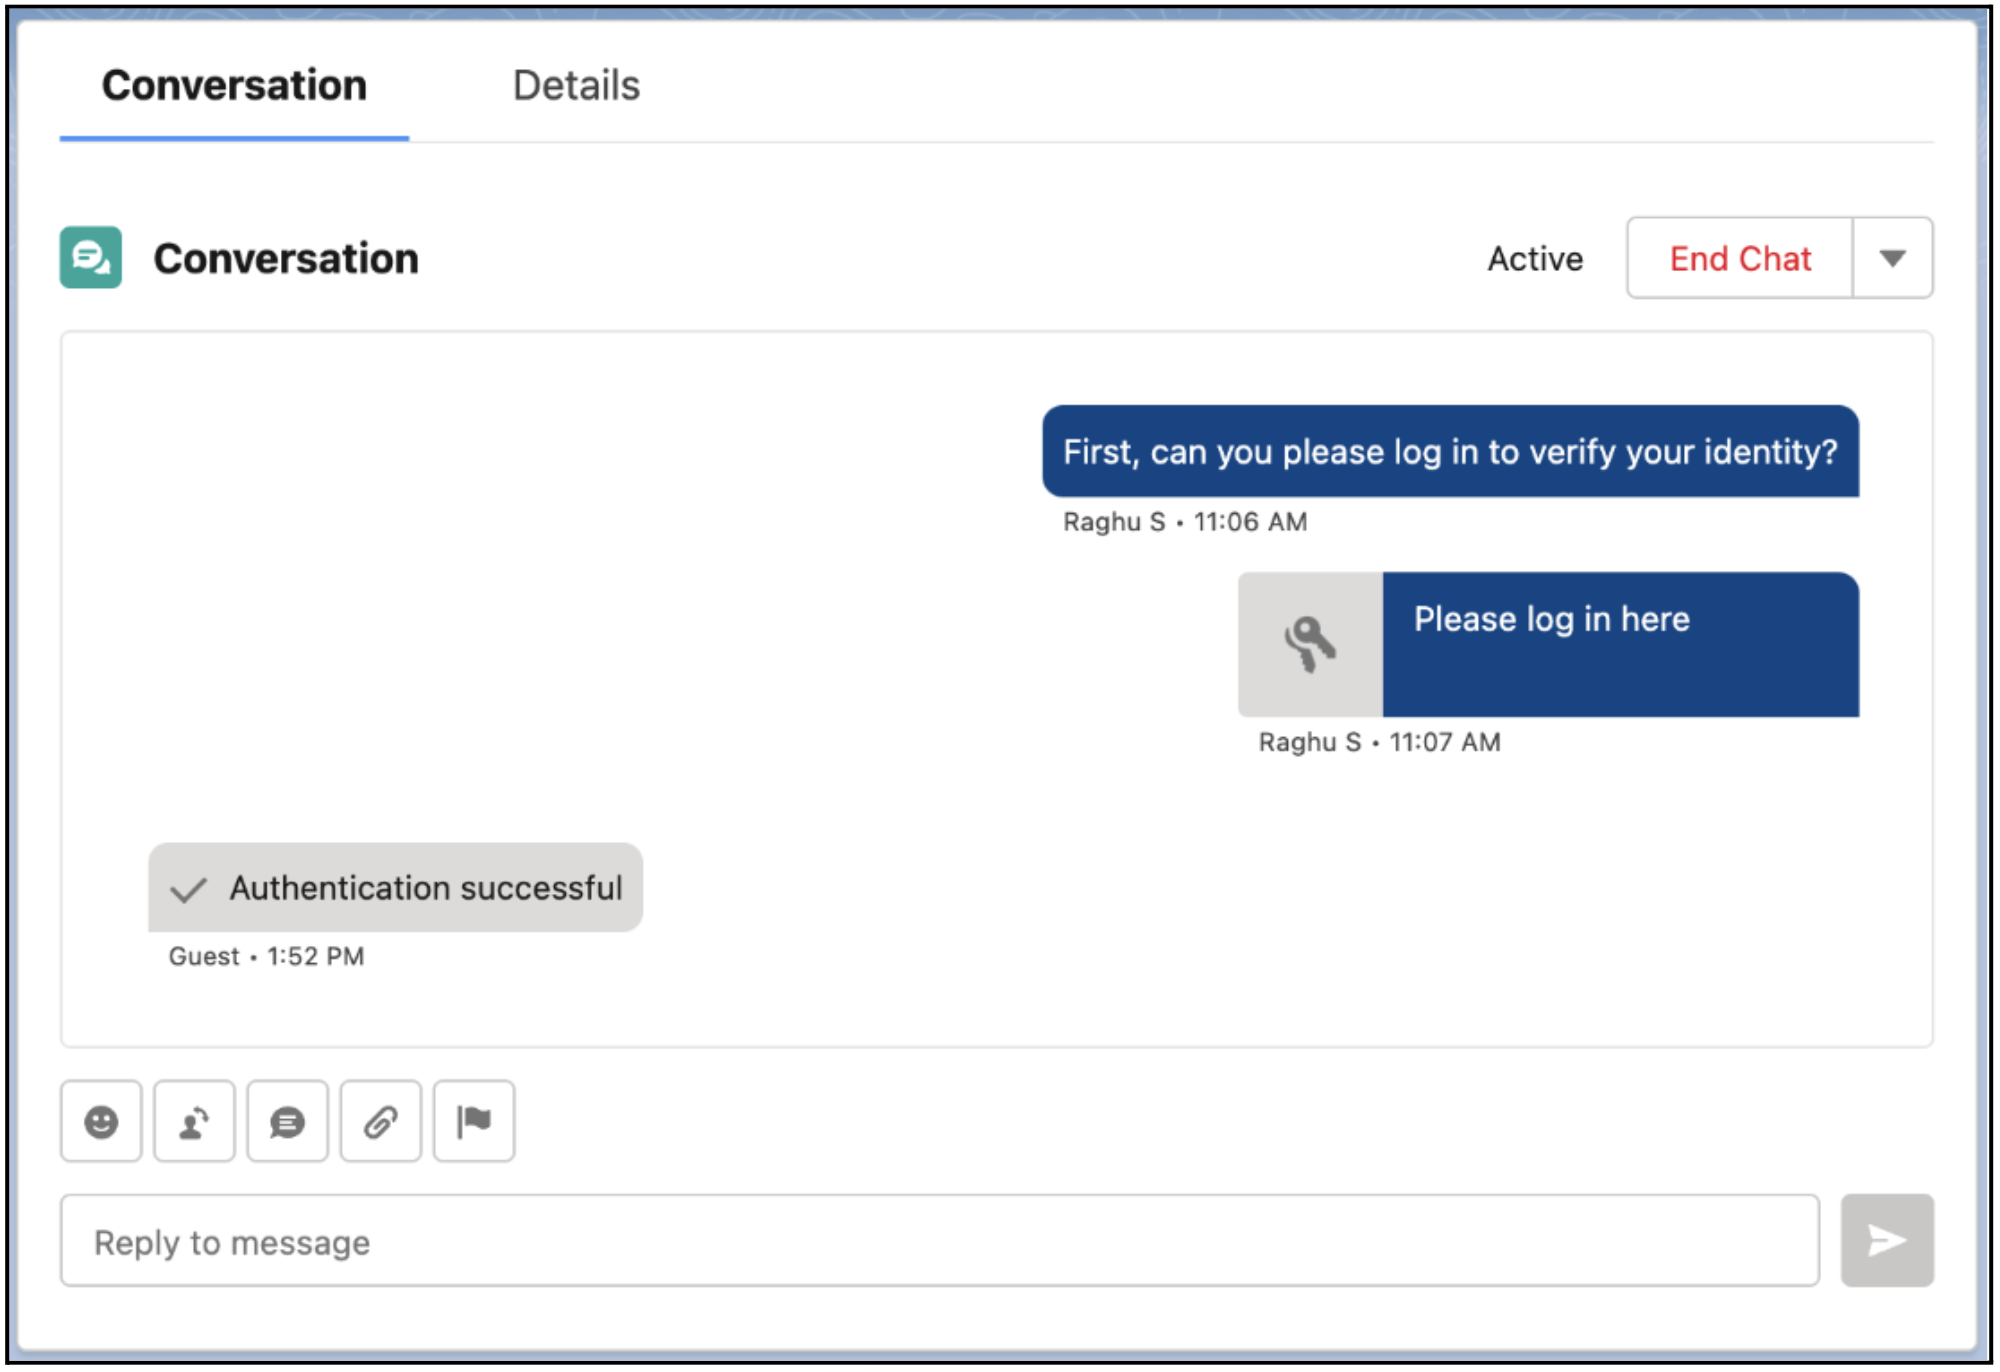
- The customer clicks the component link and enters their login credentials.
- If the credentials are correct, you—the service rep—see an Authentication successful message. If the credentials are incorrect, you see an Authentication denied message. You can give them a second chance by sending the authentication component again.
The service rep sees:
To view all authentication attempts made in a messaging session, go to the Messaging Session Authentication Results related list on the messaging session record. Each record in this list shows the verification level, status of the authentication request (active or expired), and the time that the request expired or will expire.
By default, authentication requests that use Salesforce-supported authentication providers expire after one hour, but you can change this limit using Apex. External authentication providers have their own expiration limits.