
You are here:
Set Up Post-Conversation Surveys for Enhanced Chat
At the end of an Enhanced Chat session, automatically send the customer a link to a Salesforce Feedback Management survey.
Required Editions
| View supported editions. | |
 This article applies to:
|
Enhanced In-App Chat and Enhanced Web Chat channels |
 This article doesn’t apply to:
|
Enhanced WhatsApp, Standard and Enhanced Facebook Messenger, Standard and Enhanced SMS, Enhanced Apple Messages for Business, Enhanced LINE, and Bring Your Own Channel |
| User Permissions Needed | |
|---|---|
| To create messaging components: | Customize Application AND View Setup and Configuration OR System Administrator |
| To view channels: | View Setup and Configuration |
| To access customer feedback on messaging sessions page | Salesforce Advanced Features Starter OR Salesforce Surveys Advanced Features |
Step 1: Create Your Survey
You can send post-chat surveys created in Salesforce Feedback Management or via a third-party solution. This article focuses on surveys created in Salesforce Feedback Management.
- Ensure that you have the correct licensing for Salesforce Surveys, then create a survey in Salesforce. Optionally, include merge fields to personalize the text shown in the survey.
- Generate and copy your survey link. The link automatically contains several parameters, such as an invitationId, surveyName, and UUID.
Step 2: Create an Auto-Response Messaging Component
Create an auto-response messaging component that’s linked to your survey. This component is used to send the survey at the end of a messaging session.
- From Setup, enter Messaging Components in the Quick Find box, and then select Messaging Components.
- Click New Component.
- Select Auto-Response, and then click Next.
-
Enter your introductory text without your survey link.
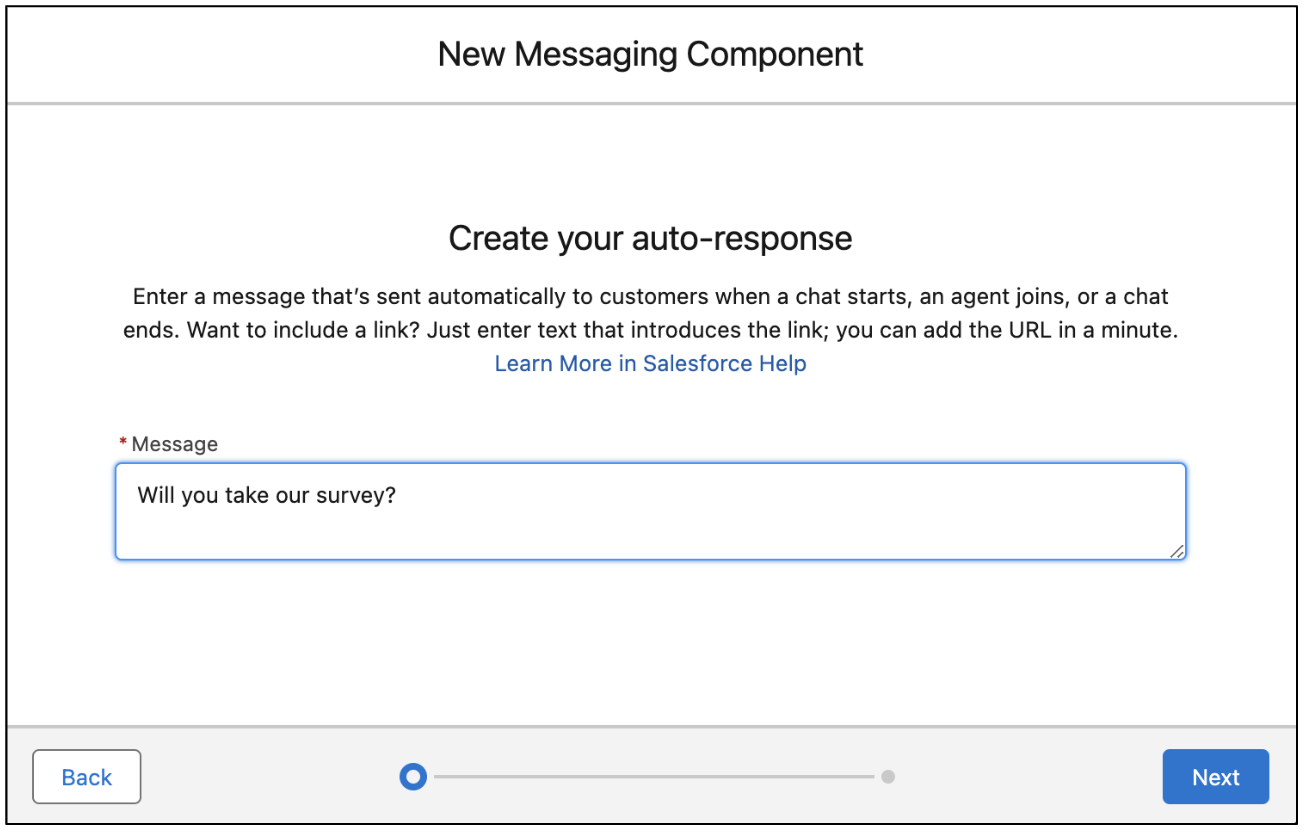
-
Enter a name and description for your component, and click
Done.
The Messaging Component Builder opens.
-
On the Component Details page, further customize your auto-response.
- Click Add Format, select Web Page, and then click Done.
-
Select Web Page in the left-hand menu and configure its
properties in the Component Properties pane.
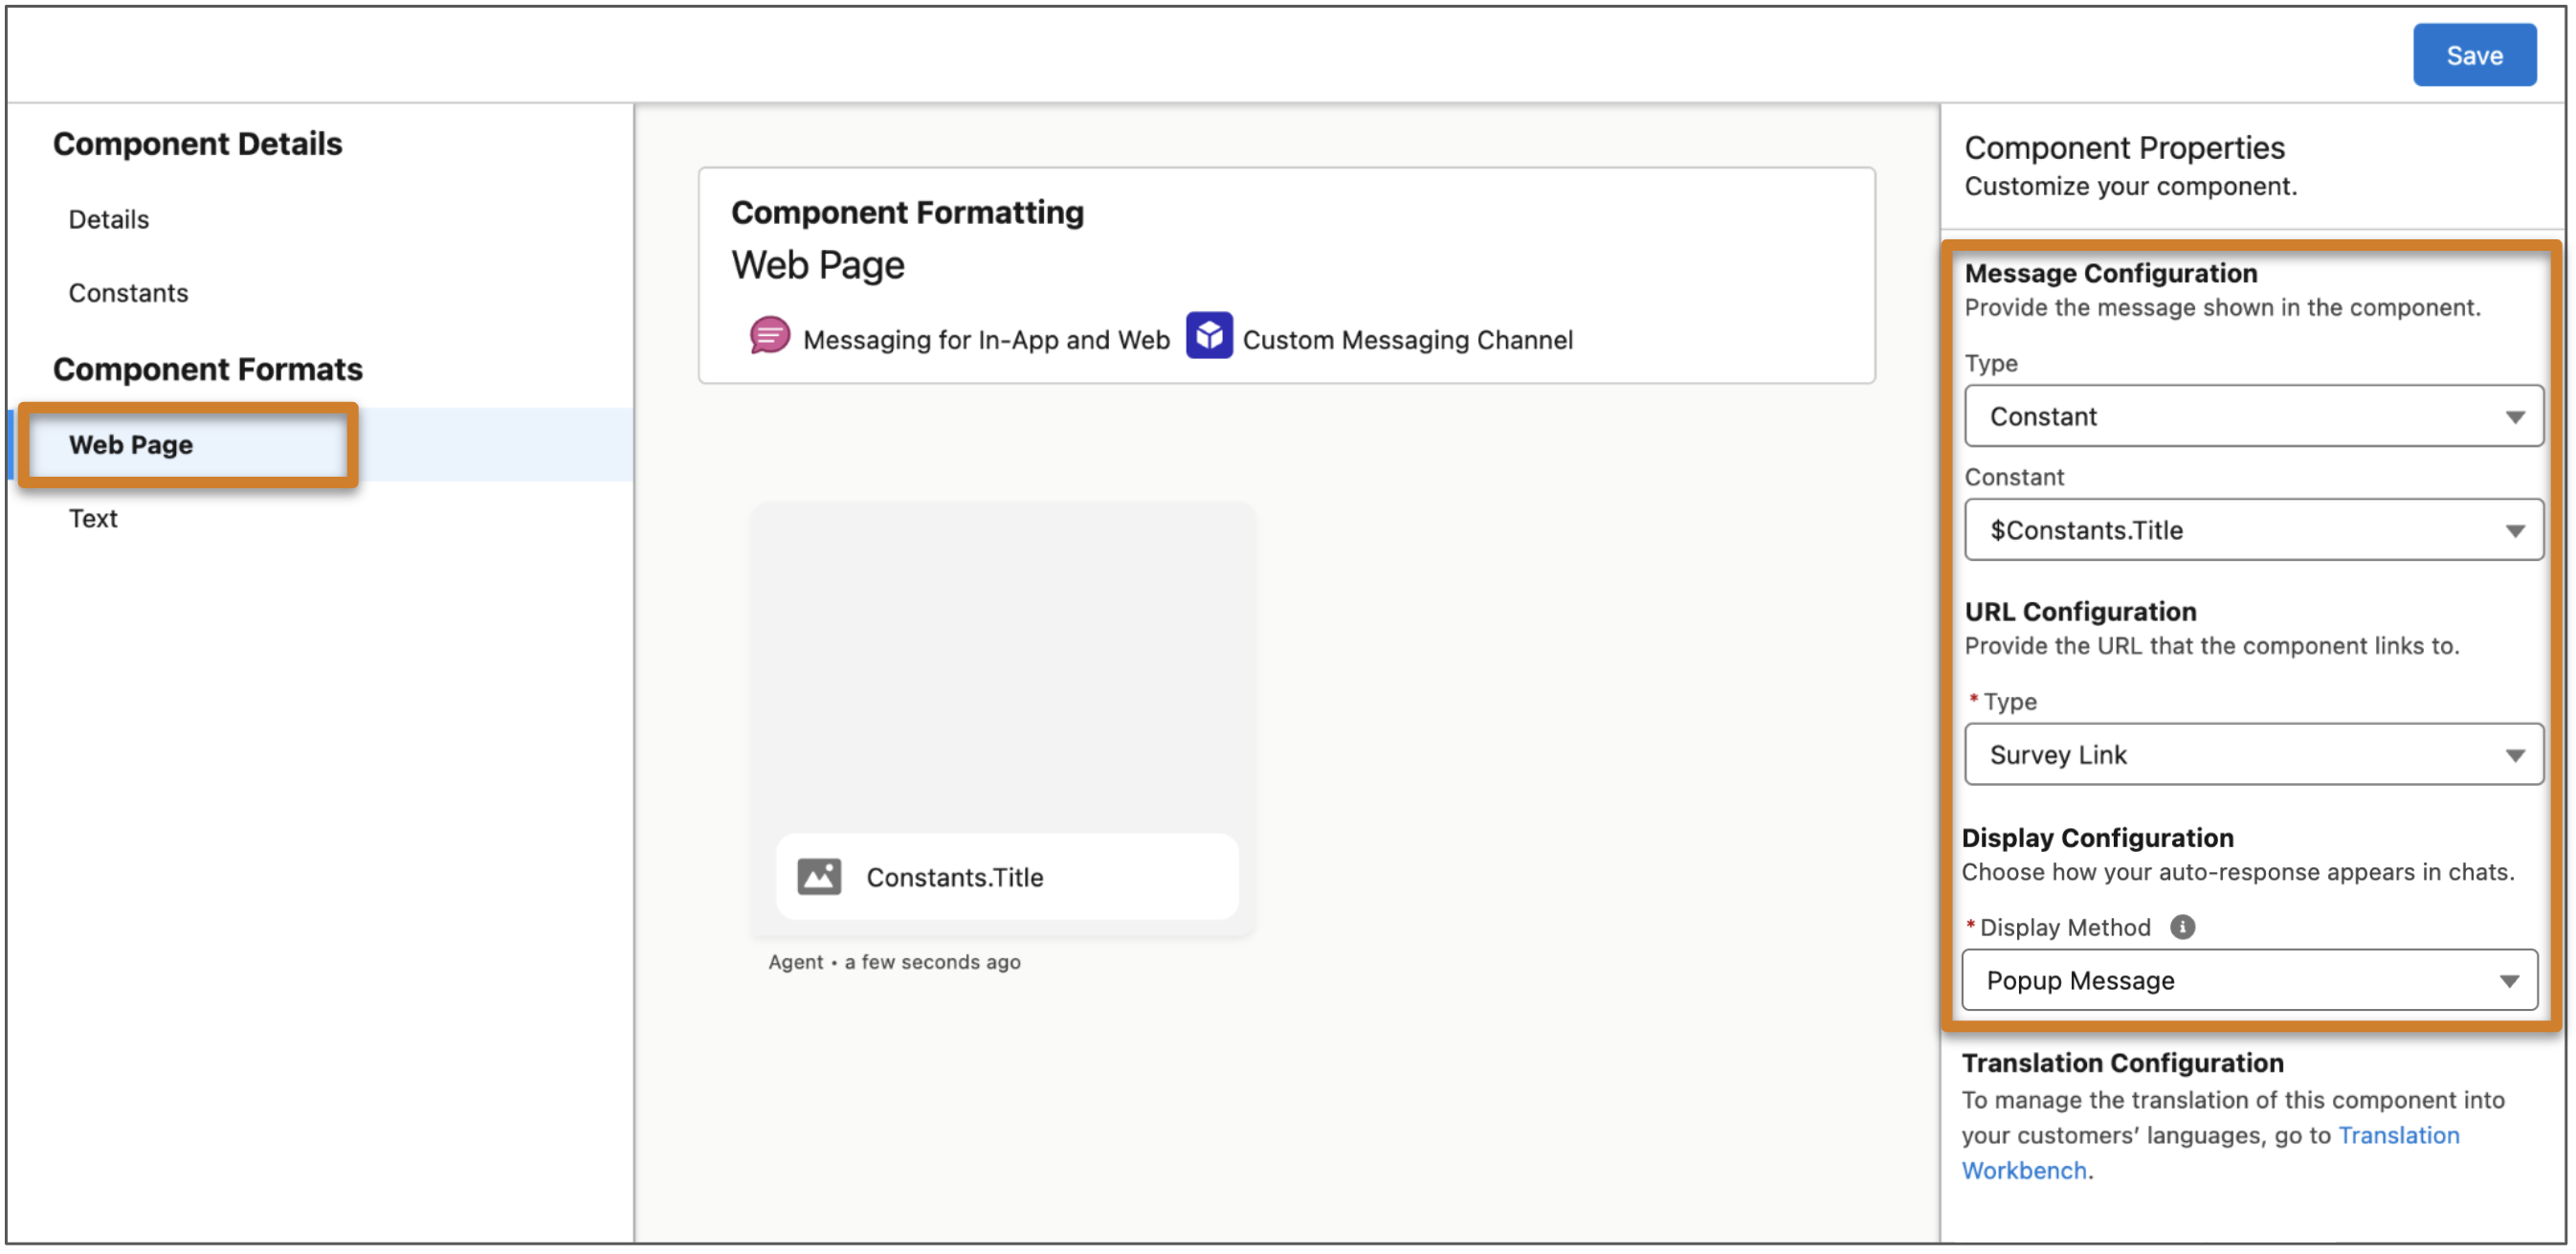
- Under Message Configuration, select Constant for Type and $Constants.Title for Constant. Completing this step ensures that your survey introductory text appears above the link.
- Under URL Configuration, select Survey Link for Type.
- Under Display Configuration, select Popup to open the survey link in the chat window, or Chat Message to show the survey link as a clickable link preview. In Enhanced In-App Chat, all auto-responses appear as chat messages regardless of this setting.
- Save your changes.
-
Update the plain text version of your component, which is used if the Web Page format
isn’t available.
- Click Text in the left-hand menu.
-
The Formula Template field contains your survey introductory text. After the
text, add the survey URL that you copied from the Survey Builder.
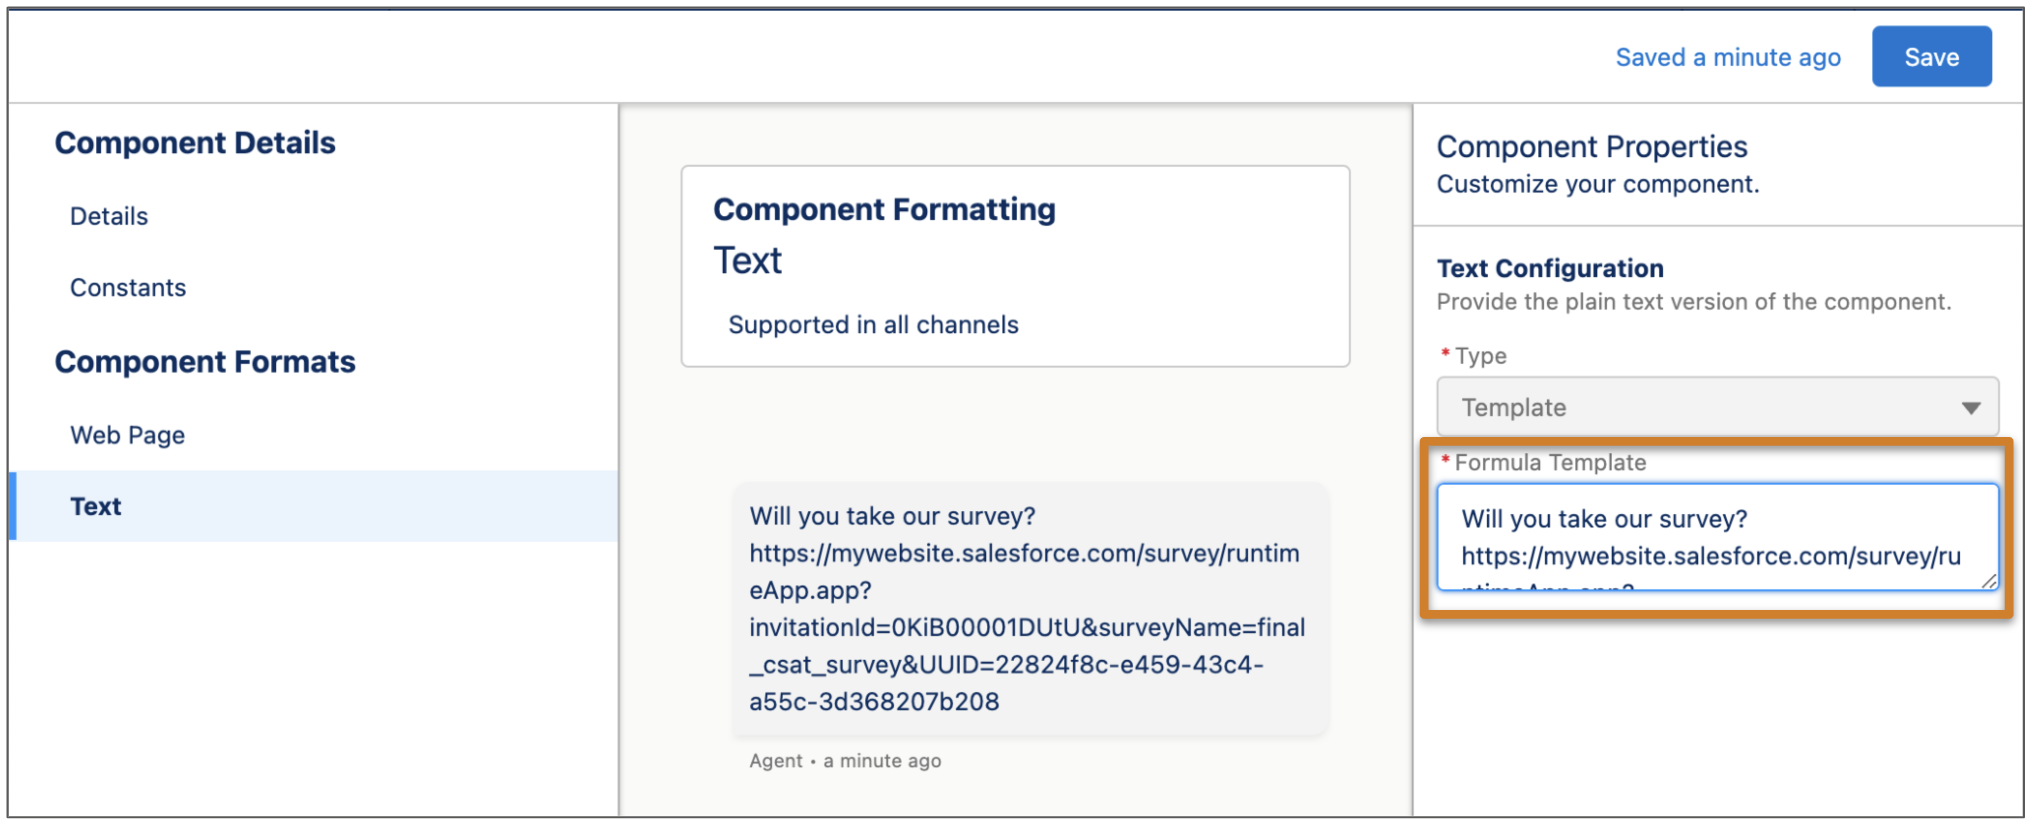
- Save your changes.
Step 3: Update Your Channel Settings
Associate your messaging component with the Enhanced Chat channel where you want customers to receive the post-chat survey link.
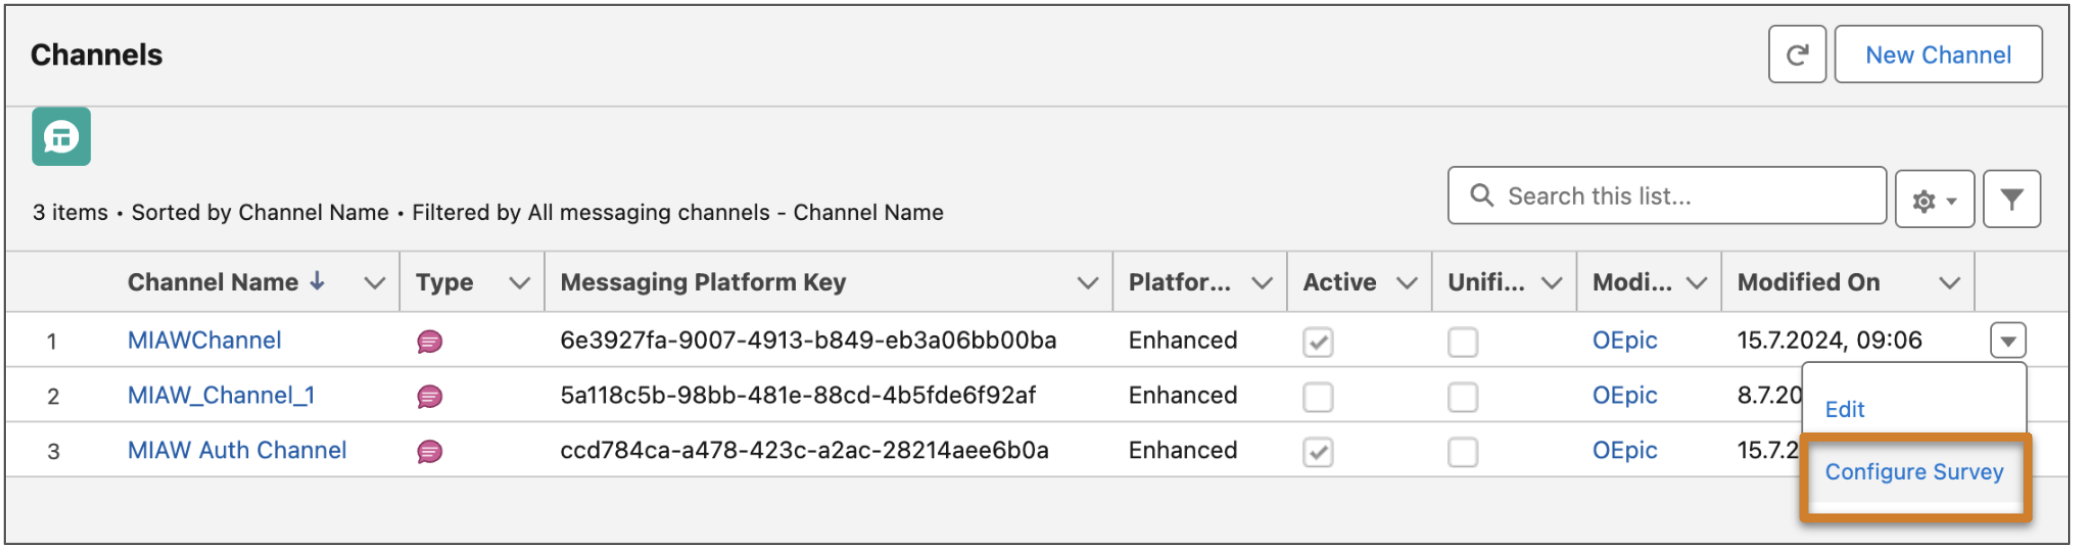
- From Setup, enter Messaging Settings in the Quick Find box, and then select Messaging Settings.
- Find your Enhanced Chat channel in the list, and click Configure Survey in its dropdown action menu.
- Select the survey you created, and click Save to return to the list of channels.
- Click the name of your Enhanced Chat channel.
- Scroll to the Automated Responses section of the channel settings.
- In the End Conversation field, select your auto-response component.
-
Save your changes.
The survey link is sent to customers when an Enhanced Chat session ends.
 Note If you are using a third-party site to send a survey, the site domain must be added as a Trusted URL. Follow the steps in Manage Trusted URLs to add the domain, then set CSP Context to All, and check the box next to frame-src (iframe content) under CSP Directives.
Step 4: Test Your Post-Chat Survey
Verify that your survey works as intended.
- Start and then end a sample Enhanced Chat session.
- Verify that the survey was sent.
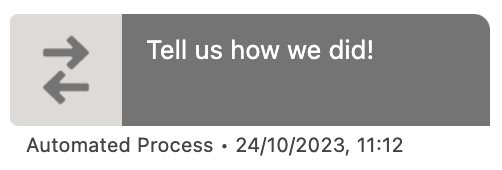
When an auto-response component containing a Salesforce Feedback Management survey is sent, here’s how it looks in the Enhanced Conversation component.
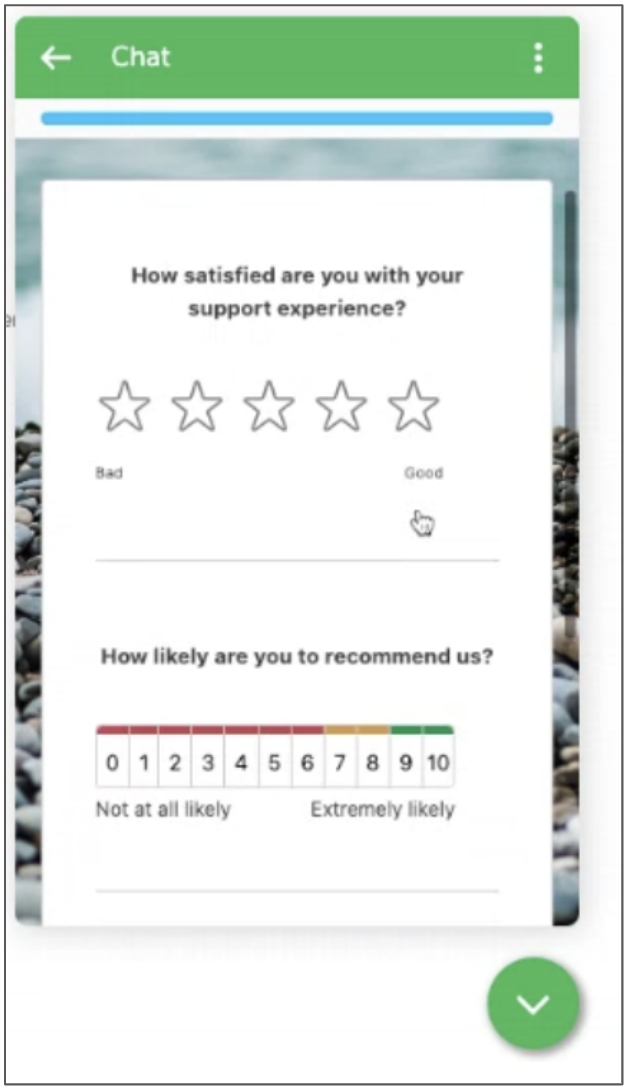
Here’s how one of the survey screens might look to an Enhanced Web Chat customer.
When the auto-response is sent in an Enhanced Chat session and the user completes the survey, a survey invitation record is automatically created.
- If the messaging user is associated with a contact, lead, or case that includes a contact, the identifying record is associated with the survey response. When you view the survey responses in the Analyze tab of the Survey Builder, the Participant ID is the record ID of the contact, lead, or case.
- If the messaging user is anonymous, meaning it isn’t associated with a contact, lead, or case that includes a contact, the survey response isn’t linked to the messaging user. As a workaround, include a required survey question where the person provides their name, and use the name and survey response date to match the response to a contact or messaging session.
Step 5: Access Customer Feedback from the Messaging Sessions Page
Track survey invitations and review the responses directly from the Messaging Session page.
- In Setup, click Object Manager.
- In the Quick Find box, enter Messaging Session, and select Messaging Session.
- In the left pane, select Page Layouts.
- Click Messaging Session Layout and then select Related Lists.
- Drag Survey Invitations and Responses to the Related Lists section at the bottom of the page.
- Save your changes.