
You are here:
Translate Messaging Components into Your Customer’s Language
Show messaging components in a customer’s preferred language with the help of Translation Workbench. For example, when you send a French-speaking customer a question with three options, show the question and options translated into French.
Required Editions
| View supported editions. | |
 This article applies to:
|
Enhanced In-App Chat, Enhanced Web Chat v1, Enhanced Web Chat v2, Enhanced WhatsApp, Enhanced Facebook Messenger, Enhanced Apple Messages for Business, Enhanced LINE, and Bring Your Own Channel |
 This article doesn’t apply to:
|
Standard Facebook Messenger, and Standard and Enhanced SMS channels |
| User Permissions Needed | |
|---|---|
| To create messaging components: | Customize Application AND View Setup and Configuration OR System Administrator |
| To send and receive messages in Messaging: | Messaging Agent |
| To import and export translation files: | Manage Translation AND Customize Application |
See Also
Step 1: Set Up Translation Workbench
To get started, enable Translation Workbench and select your languages.
- Enable Translation Workbench in Setup.
- Add one or more languages. For example, if your default org language is English but you want messaging components to be available in French and Spanish, add French and Spanish.
Step 2: Prepare Your Messaging Components for Translation
Two parts of a messaging component can be translated:
- The component name, which service reps see in the Service Console.
- All constant values, which are managed from the Constants tab in the Messaging Component Builder. Constants determine the text in the messaging component that customers receive in a message. Several standard constants are automatically added when you first create a component. You can also add custom constants.
If any text in a messaging component is literal, rather than determined by a constant, it can’t be translated and remains in the default org language. To verify that a messaging component uses constants for all text that you want translated, create or open the component in the Messaging Component Builder.
- In Setup, go to the Messaging Components page.
- Click the name of the messaging component that you want to be translated.
- In the left-hand sidebar, click the Text format.
-
In the properties pane, review each Formula Template field. If the formula template
contains literal text instead of constants, create a custom constant that can replace the
literal text. For example, in this question with options component, a constant must replace
the phrase “Select an option” in the first formula template so it can be translated.
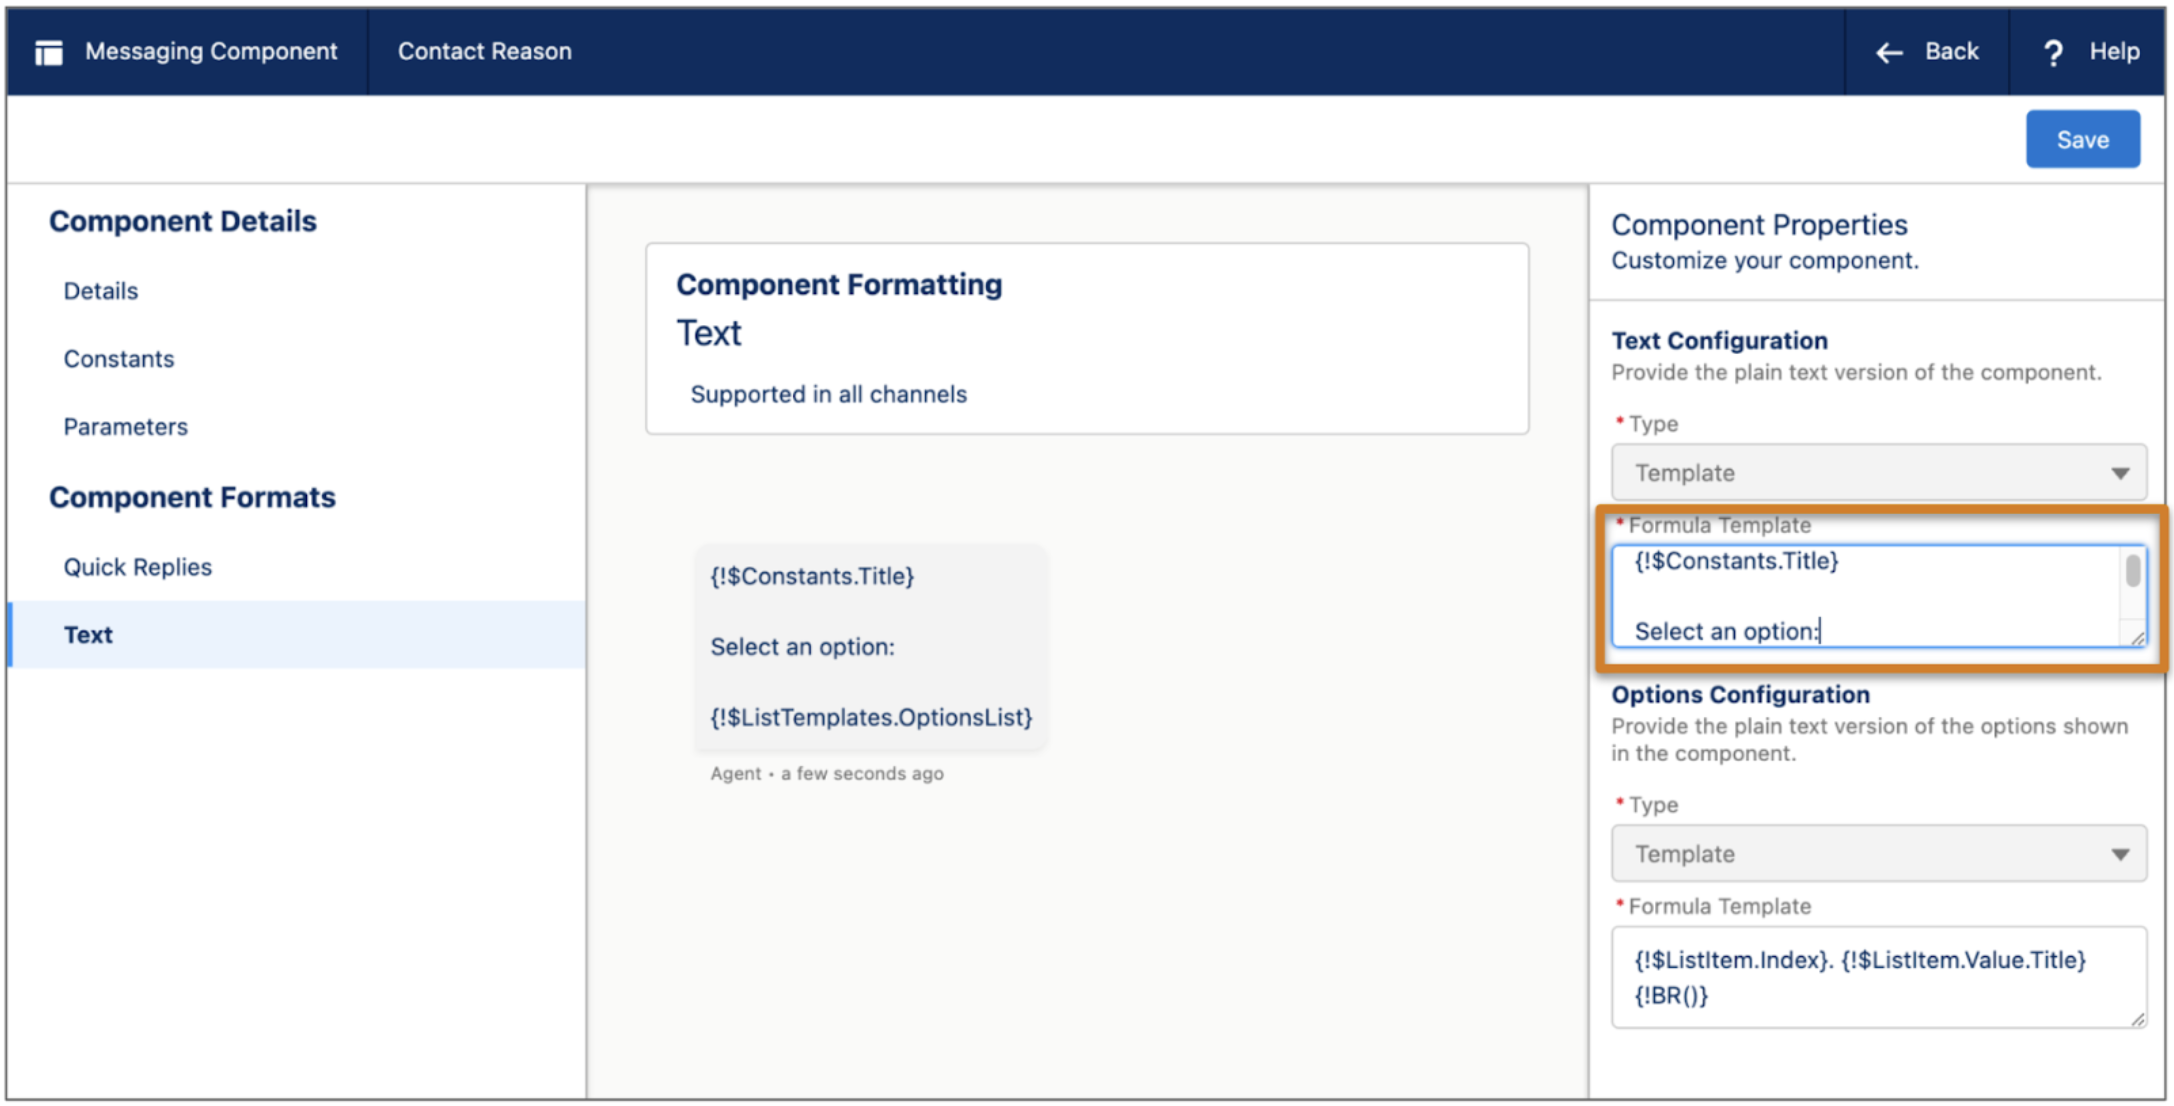
- In the left-hand sidebar, click Constants.
- Click New.
- Give your constant a name, such as SelectionPrompt, and save it.
- Click the Text format again.
- In the formula template, replace the literal text with your constant. In this example, Select an option becomes {!$Constants.SelectionPrompt}.
- Save your changes.
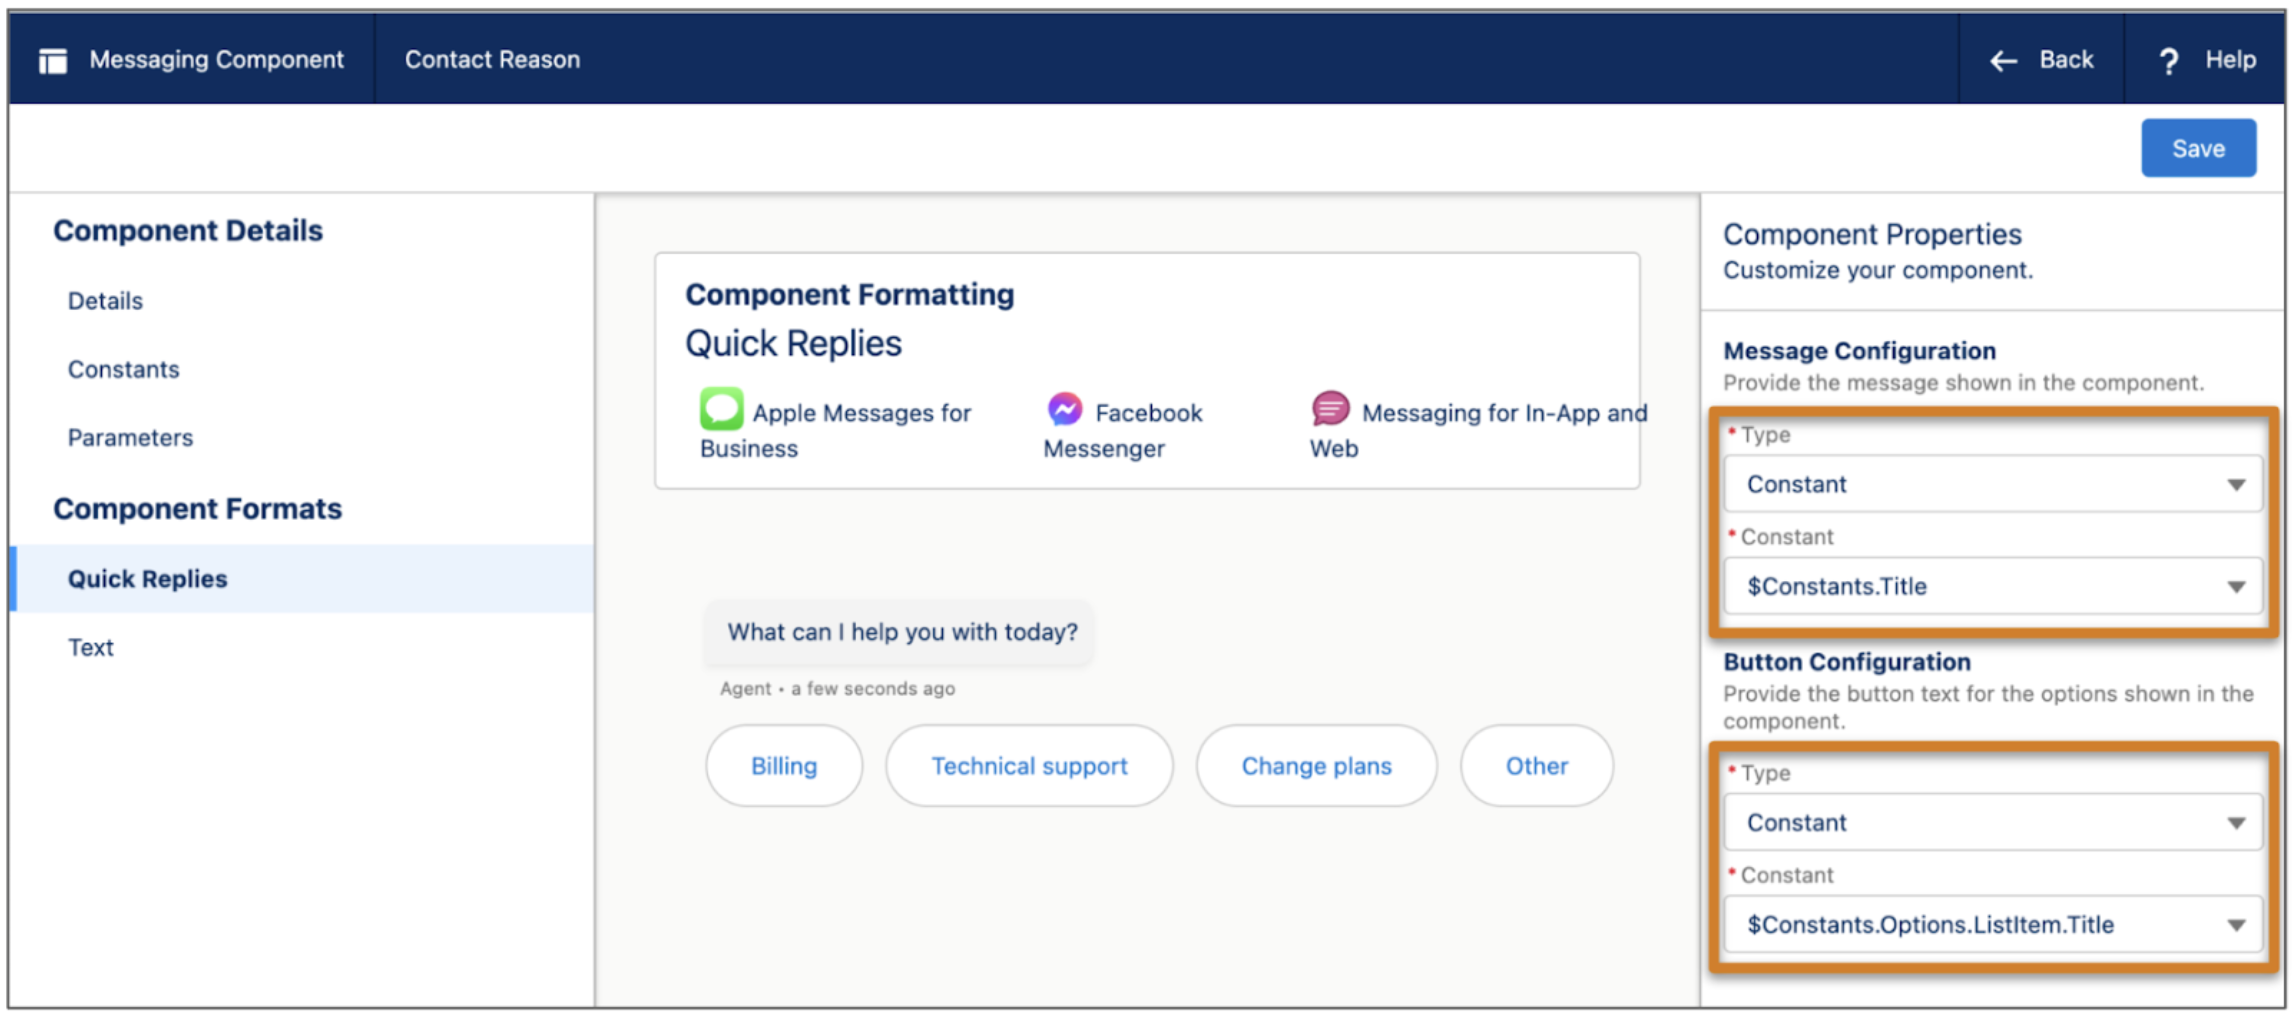
- If another format was added, click the format name in the left-hand sidebar.
-
In the properties pane, verify that the Type field for all text to be translated is set to
Constant and that a constant is selected in the field after it. In this example, the Quick
Replies format on a question with static options component is correctly configured.
- After you configure the properties of all formats added to your component, save your changes.
Step 3: Translate Your Component Text
To provide translated versions of a messaging component, manually enter the translation or import a batch of translated text. If you plan to translate multiple messaging components or translate to multiple languages, importing is faster.
Provide translations manually:
- In Setup, go to the Translate page under Translation Workbench.
- In the Language field, select the language to which you want to translate your messaging component; for example, French.
- In the Setup Component field, select Messaging Component.
- In the Messaging Component field, select the developer name of the component to be translated.
- In the Object field, select Messaging Component Name. The component name appears in a table.
- Hover over the table and click the pencil icon, then enter the translation of the messaging component name. For example, service reps whose language is set to French see the French name of the component in the Service Console.
- In the Object field, select Constant Values. All of the component’s constants appear in a table.
- Hover over the table and click the pencil icon, then enter the translation of each constant.
- Save your changes.
To provide translations in a batch, export a data translation file from the Export page in Setup under Translation Workbench. When exporting, select the Messaging Component Name or Constant Values object. After completing one file per language, import them on the Import page.
Step 4: Send Translated Messaging Components
After you provide translated versions of your messaging components, your support team can send them to customers.
- (Admin task) Enable access to the Messaging User Language field for service rep profiles, and then add it to the Messaging Session page layout. Service reps need edit access to this field to send translated messaging components.
-
At the start of a messaging session, update the Messaging User Language field on the
messaging session record to list the customer’s preferred language. You can gather this
information contextually or via a bot question that auto-completes the field.
If you enabled the Identify preferred language of messaging users option in Setup, you can skip this step.
- Click the messaging component action and click Insert on a component to send.
- Click Send. If Translation Workbench contains a version of the component in the customer’s preferred language, the customer sees the messaging component in their language.
When a customer initiates a messaging session with a French message, the service rep updates the Messaging User Language on the session record to French. Any components that the rep sends during the session appear to the customer in French.
If a component is available in a service rep's default language, the rep sees the component name in their language in the list of messaging components shown in the Service Console. Otherwise, it shows the original component name.
Step 5: Keep Translations Up to Date
If a messaging component is updated in the Messaging Component Builder, it’s important to update translations of the component to reflect the changes. Regularly check for outdated translations and update them as needed.
On the Translate page in Setup, Out of date is selected on any translations whose original language underwent an update after the translated version was saved. You can manually update individual translations on the Translate page. Or, go to the Export page and export a list of messaging component translations marked Out of date.