
You are here:
Add Contactless Signature to Your Experience Builder Site
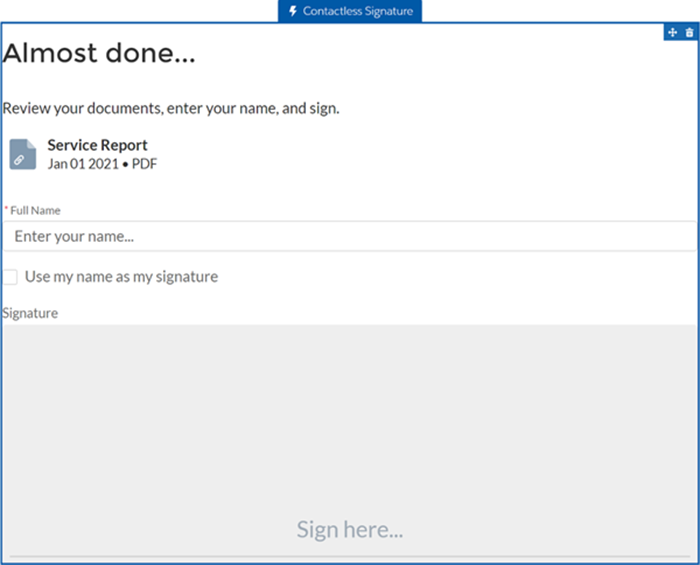
To enable Appointment Assistant Contactless Signature, add it to your Experience Builder site.
Required Editions
| Available in: both Salesforce Classic (not available in all orgs) and Lightning Experience |
| The Field Service core features, managed package, and mobile app are available in Enterprise, Unlimited, and Developer Editions. |
| The Field Service Guest User license is required. |
| User Permissions Needed | |
|---|---|
| To add components to sites: | Create and Set Up Experience Sites AND View Setup and Configuration |
- From Setup, in the Quick Find box, enter Digital Experiences, and then select All Sites.
- In the row for your site, click Builder.
-
Add the Contactless Signature component.
-
From Experience Builder, click Components
 .
.
- From Custom Components, locate the Contactless Signature component.
-
Drag the component onto the site.
-
To open the settings panel, click anywhere in the Contactless Signature component.
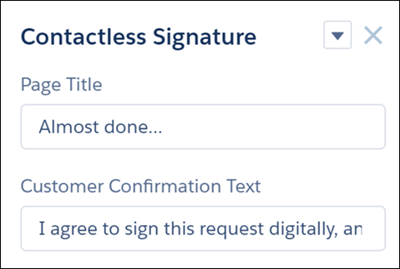
- A default page title is provided. To use your own text, enter it in the Page Title field.
- For Customer Confirmation Text, review the suggested text, and replace it as needed.
-
From Experience Builder, click Components
-
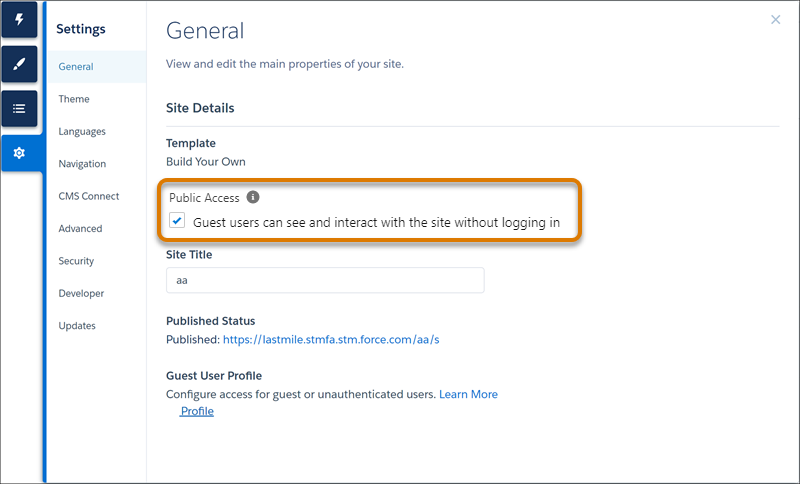
Enable guest user permissions.
-
From Experience Builder, click Settings
.
-
Enable public access.
-
In Guest User Profile, click <Your Site Name> Profile.
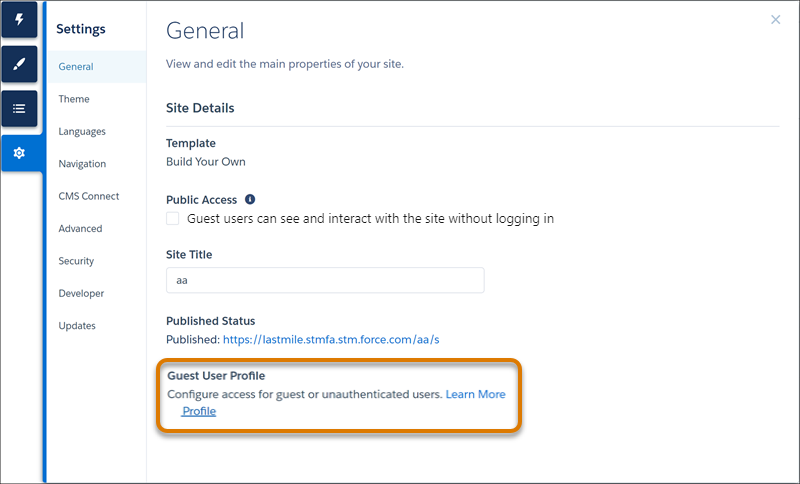
-
Grant read permission.
- From Profile Detail, click Edit.
- Under Standard Object Permissions, grant read permission for Document Recipients, Service Appointments, and Work Orders.
- Save your changes.
-
Enable the Apex classes.
- From Enabled Apex Class Access, click Edit.
- Add these Apex classes:
FSAA.TouchlessSignEncryptionServiceandFSAA.TouchlessSignServiceReportHandler. - Save your changes.
-
Set field-level security.
- Under Field-Level Security, click View next to Document Recipient.
- Click Edit.
- Grant read access to the Status field.
- Save your changes.
-
Grant permission set license assignments.
- From Profiles, click View Users, and then click the user’s name.
- From Permission Set License Assignments, click Edit Assignments.
- Select Field Service Guest User.
- Save your changes.
-
Grant permission set assignments.
- From Permission Set Assignments, click Edit Assignments.
- Add the Field Service Guest User Permissions permission set.
- Save your changes.
-
From Experience Builder, click Settings
- Publish the site.
Did this article solve your issue?
Let us know so we can improve!