
You are here:
Set Up Secondary Routing Priority
Let your support reps tackle the right cases first with secondary routing priority.
Required Editions
| View supported editions. |
| User Permissions Needed | |
|---|---|
| To set up Omni-Channel: | Customize Application |
In a queue, priority is determined by how long the work item has been waiting—first in, first out. However, while a work item is pending in the queue, new work could come in that is more urgent. For example, transferred work, an item that has been waiting on someone’s response, or work that is about to reach a service agreement deadline. You can shift an item to a different queue, but within that queue, it’s behind older items. Also, some queues might have the same priority. Secondary Routing Priority solves this problem by moving a work item forward in a queue over older items and resolving conflicts across queues for items with the same routing configuration priority.
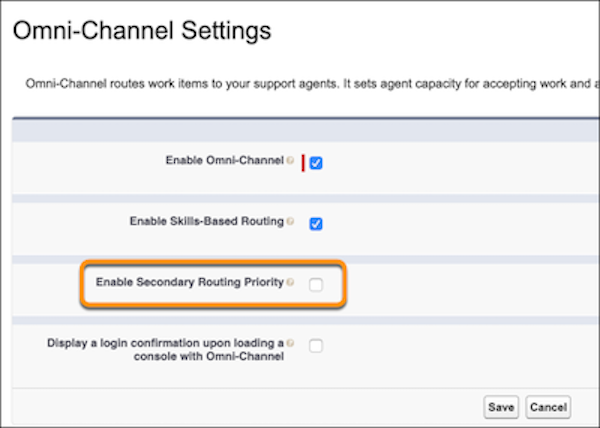
- From Setup, enter Omni-Channel in the Quick Find box, then select Omni-Channel Settings.
-
Select Enable Secondary Routing Priority.
You can now configure secondary routing priority mappings for each channel.
- From Setup, enter Service Channels in the Quick Find box, then select Service Channels.
- Edit an existing service channel or add a new one.
-
In the Secondary Routing Priority section, select a priority field. Then map field values
to priorities.
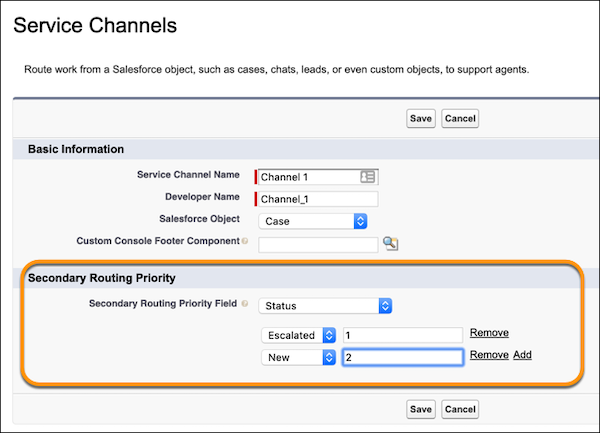
To prioritize escalated cases first and new cases next, select Status as the priority field. Then set the Escalated field value to priority 1, and the New field value to priority 2. The highest priority is 0.