
You are here:
Manage Field Service Crew Membership
Efficiently manage your service crews to accommodate a fast-changing field service schedule. Create crews, find and add members with the right skills, adjust membership dates to match appointment times, and view all crews’ schedules and members in one place.
Required Editions
| Available in: both Salesforce Classic (not available in all orgs) and Lightning Experience |
| The Agentforce Field Service and Operations core features, managed package, and mobile app are available in Enterprise, Unlimited, and Developer Editions. |
| User Permissions Needed | |
|---|---|
| To view service crew members: | Read on service crews AND Read on service resources |
| To create service crews using the crew management tool: | Create on service crews AND Create on service resources AND Edit on service territories |
| To create, update, or delete service crew members: | Edit on service crews |
While you can manually manage service crew membership from the Service Crew Members related list on service crew records, we recommend using the drag-and-drop crew management tool.
 This is a Field Service managed package feature.
-
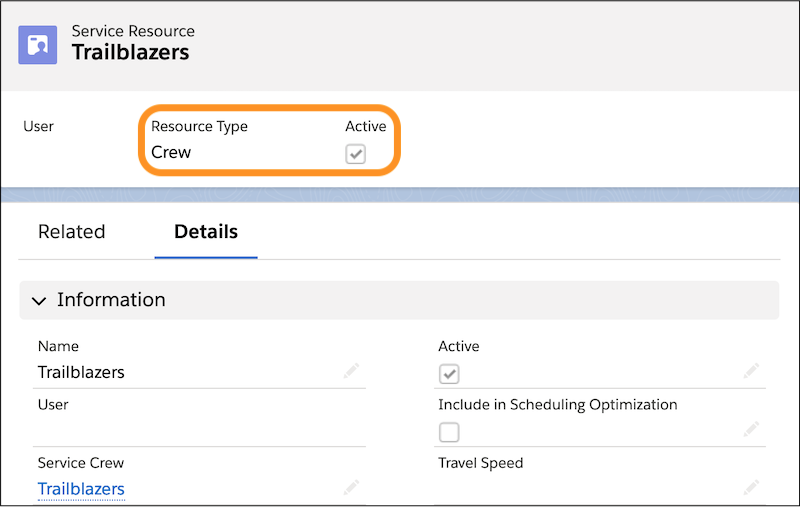
Create your service crews. The crew management tool only shows crews with
an active service resource of type Crew.
-
Open the crew management tool by clicking the Crew Management tab or
opening the Lightning page that contains it.
 Note If you have trouble finding it, ask your admin to follow the steps in Set Up Crew Management and let you know where the tool is located.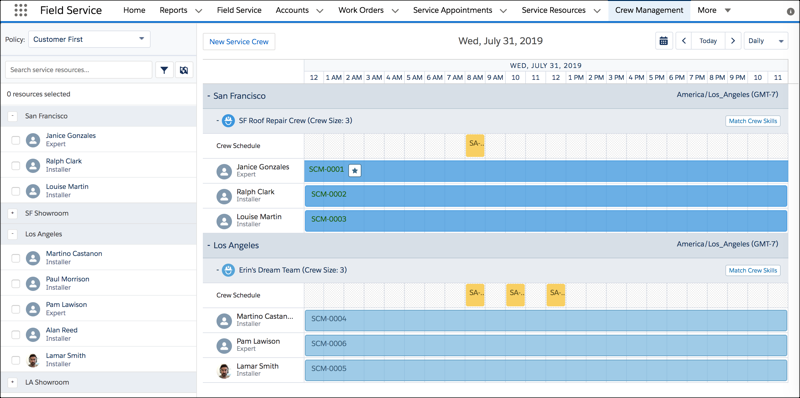
- In the top-right corner, select a date and number of days to display.
- In the sidebar, click the map icon to view a list of service territories with active service crews. Select service territories whose crews you want to see and click Save. After you select service territories, each crew’s schedule and members appear in the chart. If you set the Gantt Color field, crew member absences appear in the same color as they do in the Classic Dispatch Console Gantt.
Now that your dates and service territories are selected, it’s time to manage crew membership.
- View Crew Details
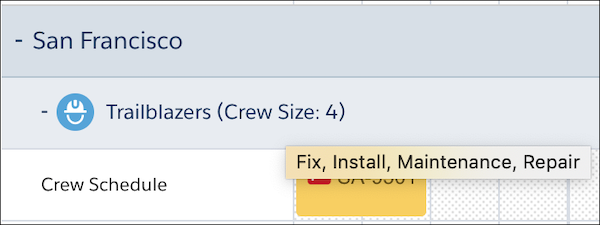
- Hover over a crew name in the chart to see the skills that its members need. To update
these skills, navigate to the associated service resource record of type Crew and update the
Skills related list.
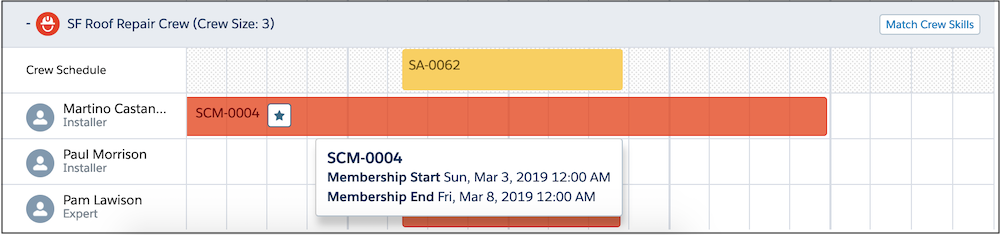
- Hover over a service crew membership in the chart to view the membership start and end
dates. Crew leaders appear with a star.
- View Appointment Details
- In any Crew Schedule row, hover over an appointment to view its details. A red flag icon
means that the assigned service crew doesn’t yet comply with the minimum crew size or skill
requirements listed on the appointment’s parent record. View skill and crew size alerts at the
bottom of the hover window. You can determine which details to show using the Crew Management Tooltip field set.
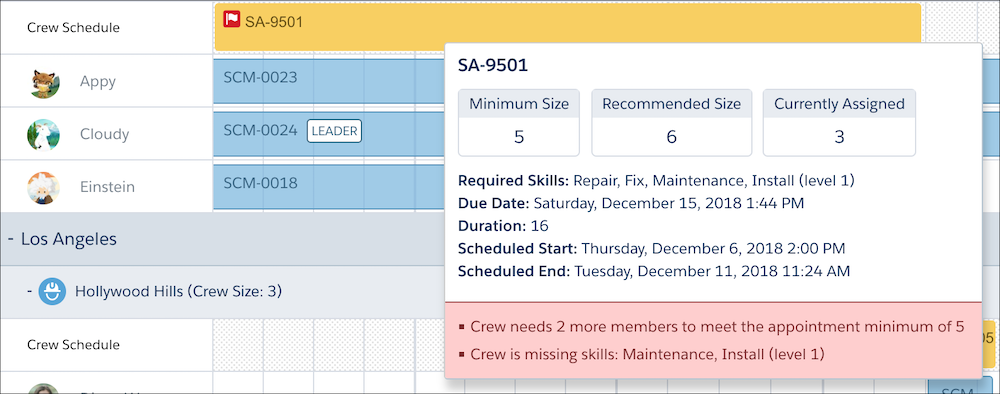
- Double-click an appointment to open a window that shows the appointment’s fields and its parent record’s fields and related records.
- Find the Right Crew Member
- If the territory filter is visible in the sidebar, click the map icon to hide it and show
the service resource list. The sidebar shows service resources who are members of the selected
service territories during the dates shown on the chart.
- Click a service resource’s name in the sidebar to view their skills, service territory membership, and service crew membership. Click the card icon to the right of their name to view the service resource record.
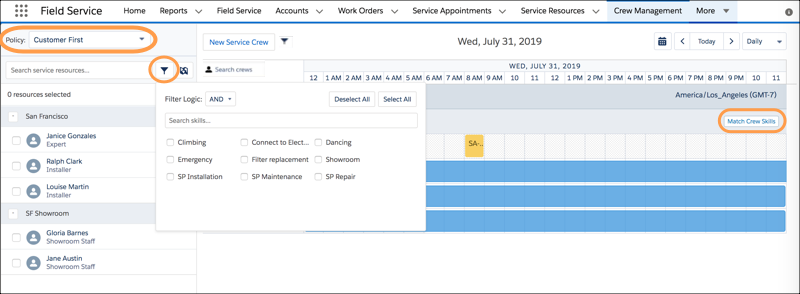
- Select a scheduling policy using the Policy dropdown menu.
- Filter service resources by skill in one of two ways:
- Click the filter icon in the resource list to select skills to filter for.
- Click Match Crew Skills on a crew to show only service resources with the skills listed on the crew’s service resource record of type Crew.
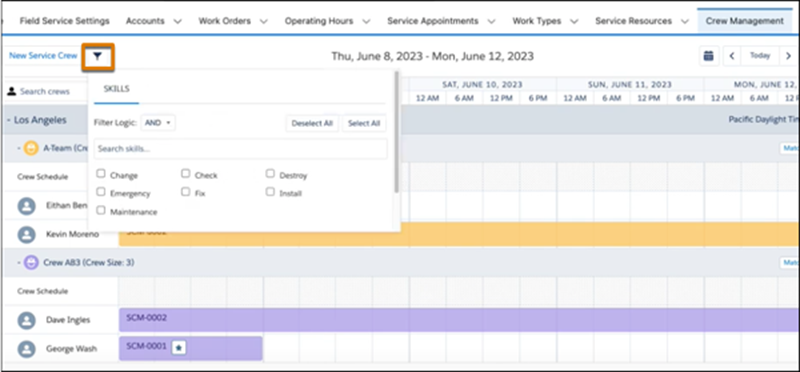
- To filter crews by skills, click the crew filter icon. Then, search for and select the
required skills.
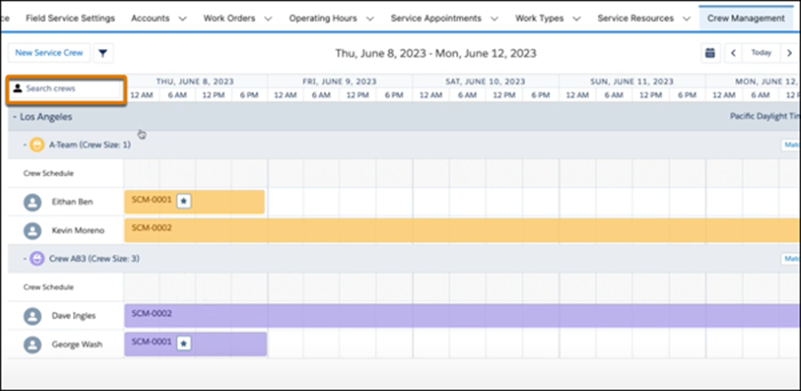
- Search for crews and crew members. You can search for multiple resources by separating
the names with a comma. Each crew is marked with a different color on the Gantt.
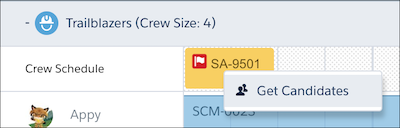
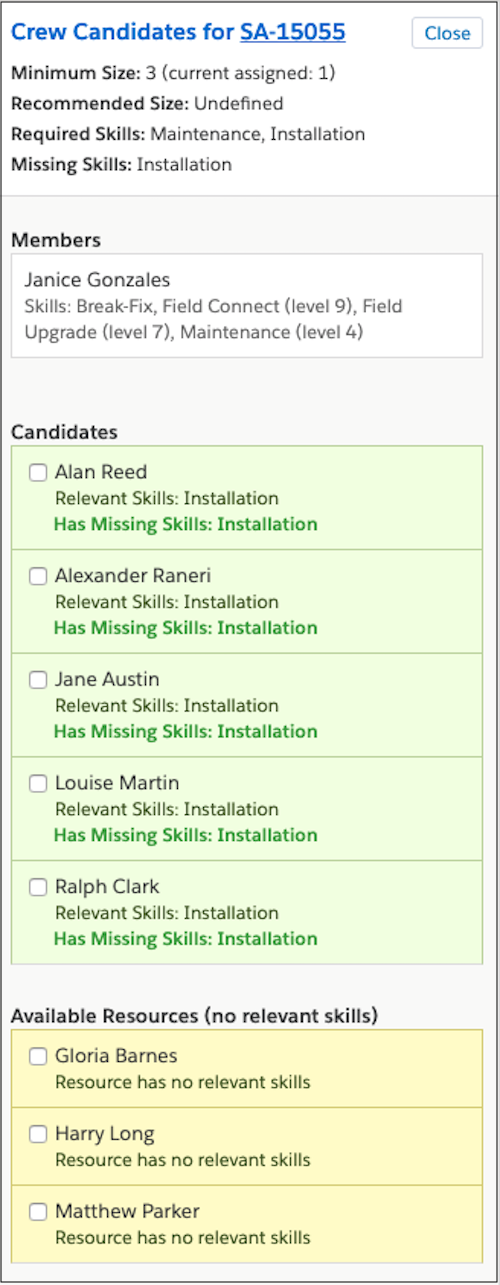
- If an appointment shows missing skills or members, right-click the appointment and click
Get Candidates to filter the resource list based on skills,
availability, and operating hours. If the crew just needs members, all available resources
are shown. If skills are missing, available service resources with the missing skills are
shown first. Select one or more resources and click Assign Selected
to add them to the crew for the appointment’s time frame.
- Add a Service Resource to a Crew
- Add service resources to crews by dragging them from the resource list. To add multiple
resources at once, select them in the list before dragging.
- Drag a resource onto a crew’s name to add them to the crew for the dates shown on the chart. A window opens where you can update crew membership dates and make the resource the crew leader.
- Drag a resource onto another resource’s service crew membership to create an identical crew membership.
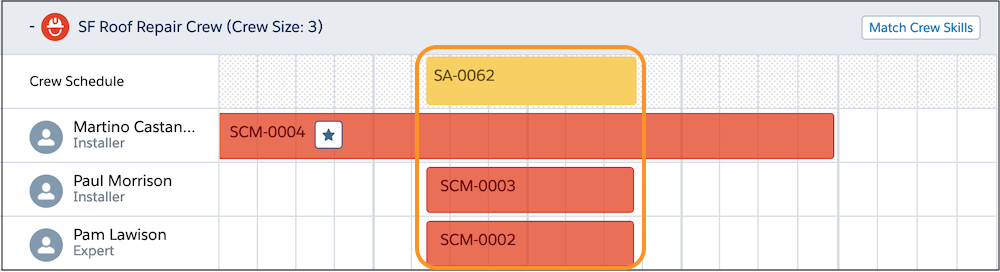
- Drag a resource onto an appointment to create a crew membership for the appointment’s
time frame.
Note If you're not using Enhanced Scheduling and Optimization, when creating a service crew membership, align it with the resource’s start of day. We recommend using 00:00 because it aligns with Field Service’s default Start of Day. However, you can set a custom Start of Day on Service Resource Availability work rules if the default doesn’t make sense—for example, if your team typically works night shifts. To enforce a custom Start of Day, from the Field Service Admin app, click Field Service Settings | Scheduling and select Set the hour that starts a new day based on the Availability rule(s). If the applied scheduling policy uses a custom Start of Day, set your service territory memberships to start and end at that time rather than at midnight. - Edit or Delete Crew Membership
- Double-click a crew membership in the chart to edit its dates, make the resource the crew leader, or delete the membership.
