
You are here:
Create an Embedded Service Deployment
Create an Embedded Service deployment for each embedded chat window that you’re using.
Required Editions
| View supported editions. |
| User Permissions Needed | |
|---|---|
| To set up Embedded Chat: | Customize Application AND Modify Metadata |
Legacy Chat will be retired on February 14, 2026. To avoid service interruptions to your end users, switch to enhanced Chat (formerly Messaging for In-App and Web). Enhanced Chat offers many of the legacy Chat features that you love plus asynchronous conversations that can be picked back up at any time. Learn about migrating in Help and Trailhead.
The Embedded Chat setup uses an Experience Builder site or Salesforce site, so that you can associate users with a guest user profile. Check if you already have any sites that you can use. If a site is already available, you can use that as your endpoint. Otherwise, create a site for this purpose.
- From Setup, enter Embedded Service in the Quick Find box, then select Embedded Service.
- In the Embedded Service configuration page, click New Deployment.
-
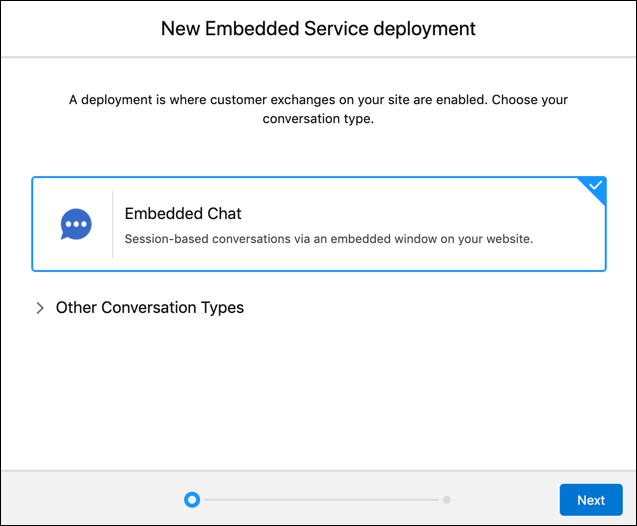
Choose a conversation type for your deployment by selecting Embedded
Chat and click Next.
-
In the Embedded Service Deployment Name field, enter a name for
your chat deployment.
 Tip The deployment is shown in a list on the Embedded Service page. If you have several deployments, use a descriptive name so it’s easy to distinguish each one.
 - The API Name field is automatically populated.
-
In the Site Endpoint menu, select an Experience Builder site or
Salesforce site from the drop-down list.
If nothing appears in the menu, it’s because there aren’t any sites configured in your org.
- Click Save.