
You are here:
Configure Voicemail with Omni-Channel Unified Routing
Configure voicemail support for a contact center that is set up for Omni-Channel Unified Routing.
Required Editions
This article applies to:
- Salesforce Voice with Amazon Connect
- Salesforce Voice with Partner Telephony from Amazon Connect
| View supported editions. |
| User Permissions Needed | |
|---|---|
| To view the Amazon Contact Centers page: | Customize Application AND Manage Call Centers |
| To create and manage a contact center: | Salesforce Voice Contact Center Admin |
Before you begin, Configure Unified Routing for a contact center.
- In Amazon Connect, select Routing and then select Flows.
 Note These instructions reference sample Amazon Connect flows for admins setting up Omni-Channel Unified Routing in a brand new contact center. For a contact center with preexisting flows, interpret the steps and referenced flows according to your current setup.
 - If you’re using our sample flows, open the Sample SCV Voicemail Subflow for Omni Routing flow. Otherwise, edit your preexisting flow. If needed, import the sample flow into your Amazon Connect instance by downloading it from GitHub and then selecting Create flow and Create customer queue flow in Amazon Connect. For instructions on how to import flows, see the Import/export flows page in the Amazon Connect Administrator Guide.
-
Update the sample subflow or your preexisting flow.
-
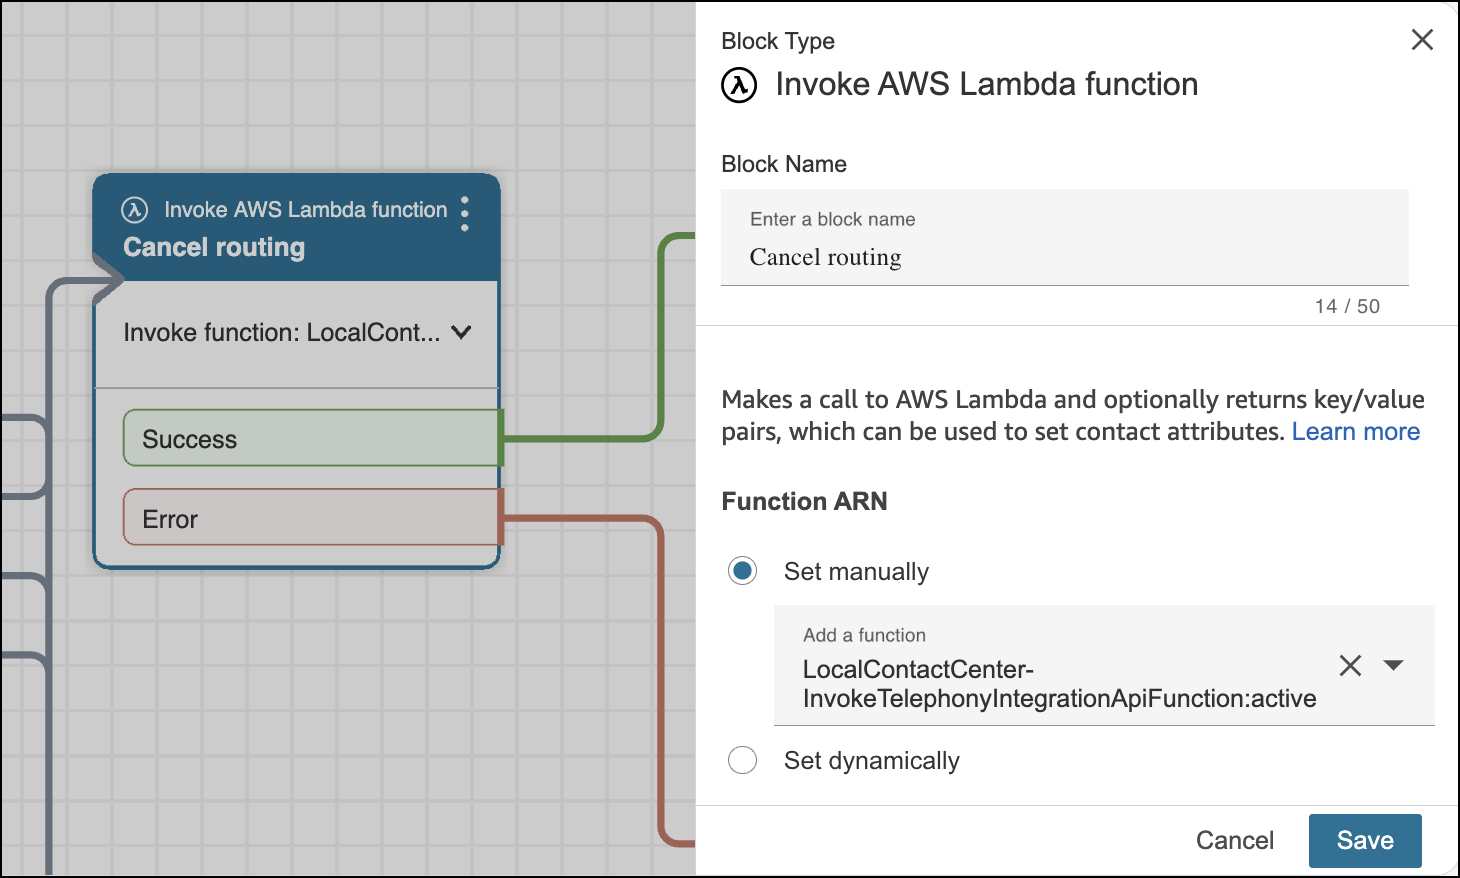
In the Invoke AWS Lambda function block named Cancel routing,
update the Function ARN. Under Set manually, select a function that is
prepended with the name of your contact center instead of a placeholder function name.
-
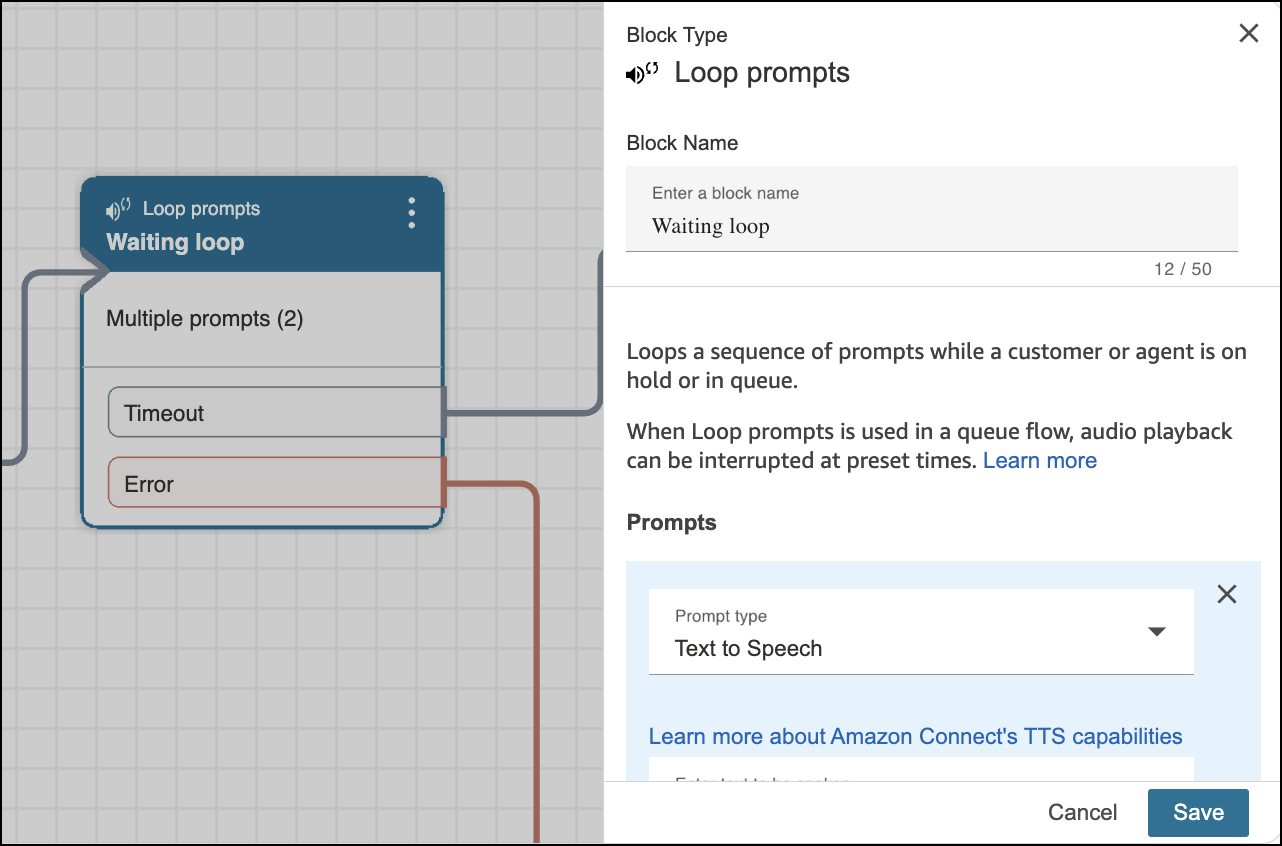
Optionally, to change the greeting prompts or adjust the interruption period for how
often the IVR menu plays, update the Loop prompts block named Waiting
loop.
-
In the Invoke AWS Lambda function block named Cancel routing,
update the Function ARN. Under Set manually, select a function that is
prepended with the name of your contact center instead of a placeholder function name.
- In Amazon Connect, select Routing and then select Flows.
-
If you’re using our sample flows, edit the Sample SCV Omni-Channel Subflow -
Omni Routing With Case Creation flow. Otherwise, edit your preexisting inbound
flow.
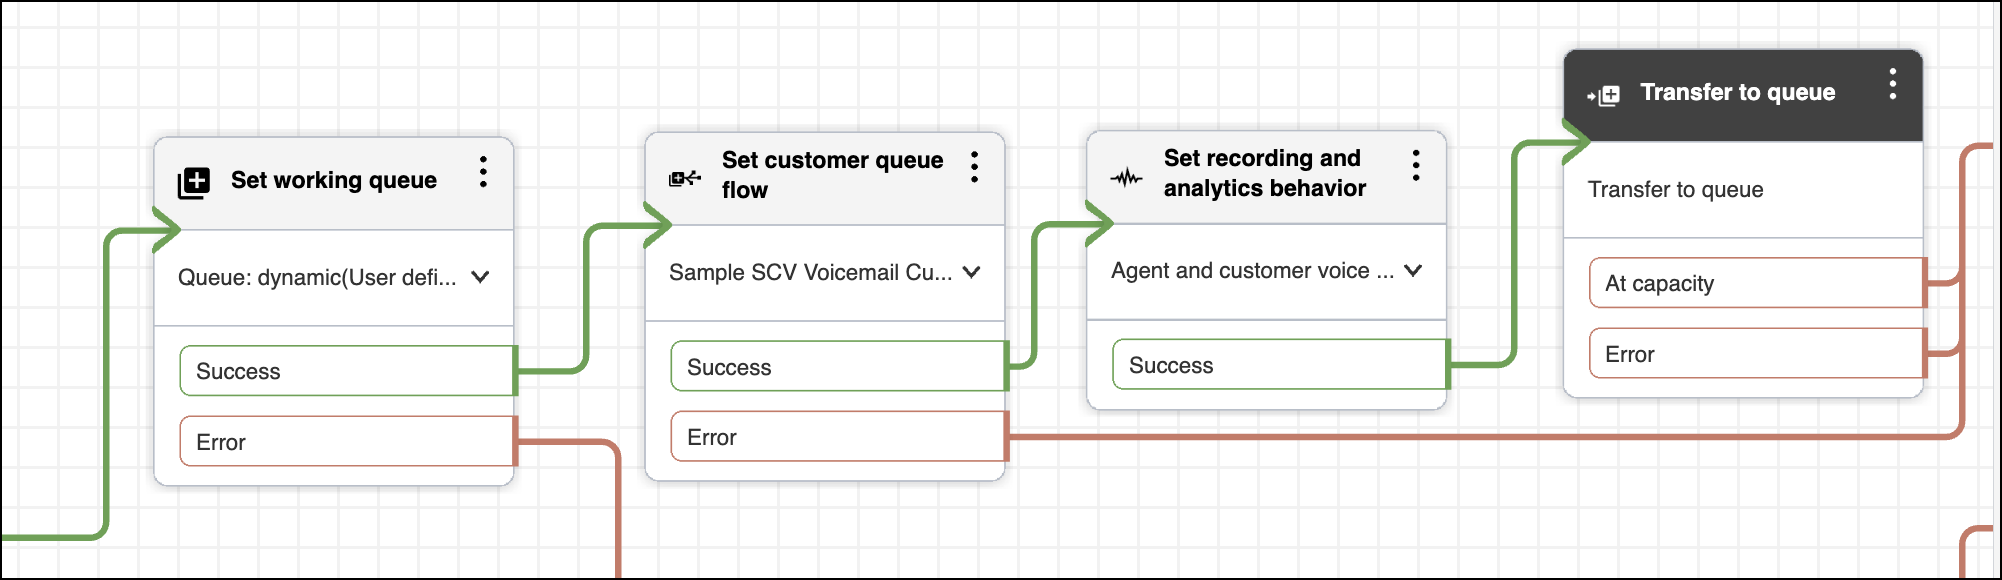
- Delete the Transfer to flow block that appears after the Set working queue block.
- Add a Set customer queue flow block, and place it in the flow after the Set working queue block. In the Set customer queue flow block, select the customer queue flow you created and imported in Step 3.
- Add a Set recording and analytics behavior block, and place it in the flow after the Set customer queue flow block. Configure this block according to your business needs.
-
Add a Transfer to queue block, and place it in the flow after the
Set recording and analytics behavior block.
Here’s an example of a modified flow.
- Save your work and publish the flow.
Did this article solve your issue?
Let us know so we can improve!
