
You are here:
Set Up Connectors with Google OAuth
To create a connection in Data Cloud securely without sharing passwords, some external connectors allow access using OAuth (Open Authorization). If using OAuth, there are several prerequisite implementation steps to complete before you connect the source to Data Cloud.
Required Editions
| Available in: All Editions supported by Data 360. See Data 360 edition availability. |
Follow these prerequisite steps before connecting to the data source in Data Cloud Setup. To complete these steps you must have admin access.
 Bookmark this page or keep it open to refer to this topic as you complete these
tasks.
Bookmark this page or keep it open to refer to this topic as you complete these
tasks.
Create a Custom OAuth Application
Before you can define your authentication provider in Salesforce, you can optionally create a custom OAuth application on your provider's website. The process can vary depending on your provider.
- According to your provider's documentation, create a private app on their website.
- Write down these configuration values:
- Client ID
- Client Secret
Configure an Authentication Provider
Create an authentication provider in Salesforce and then update your provider with the callback URL.
- From Setup, in the Quick Find box, enter Auth. Providers, and then select it.
- Click New.
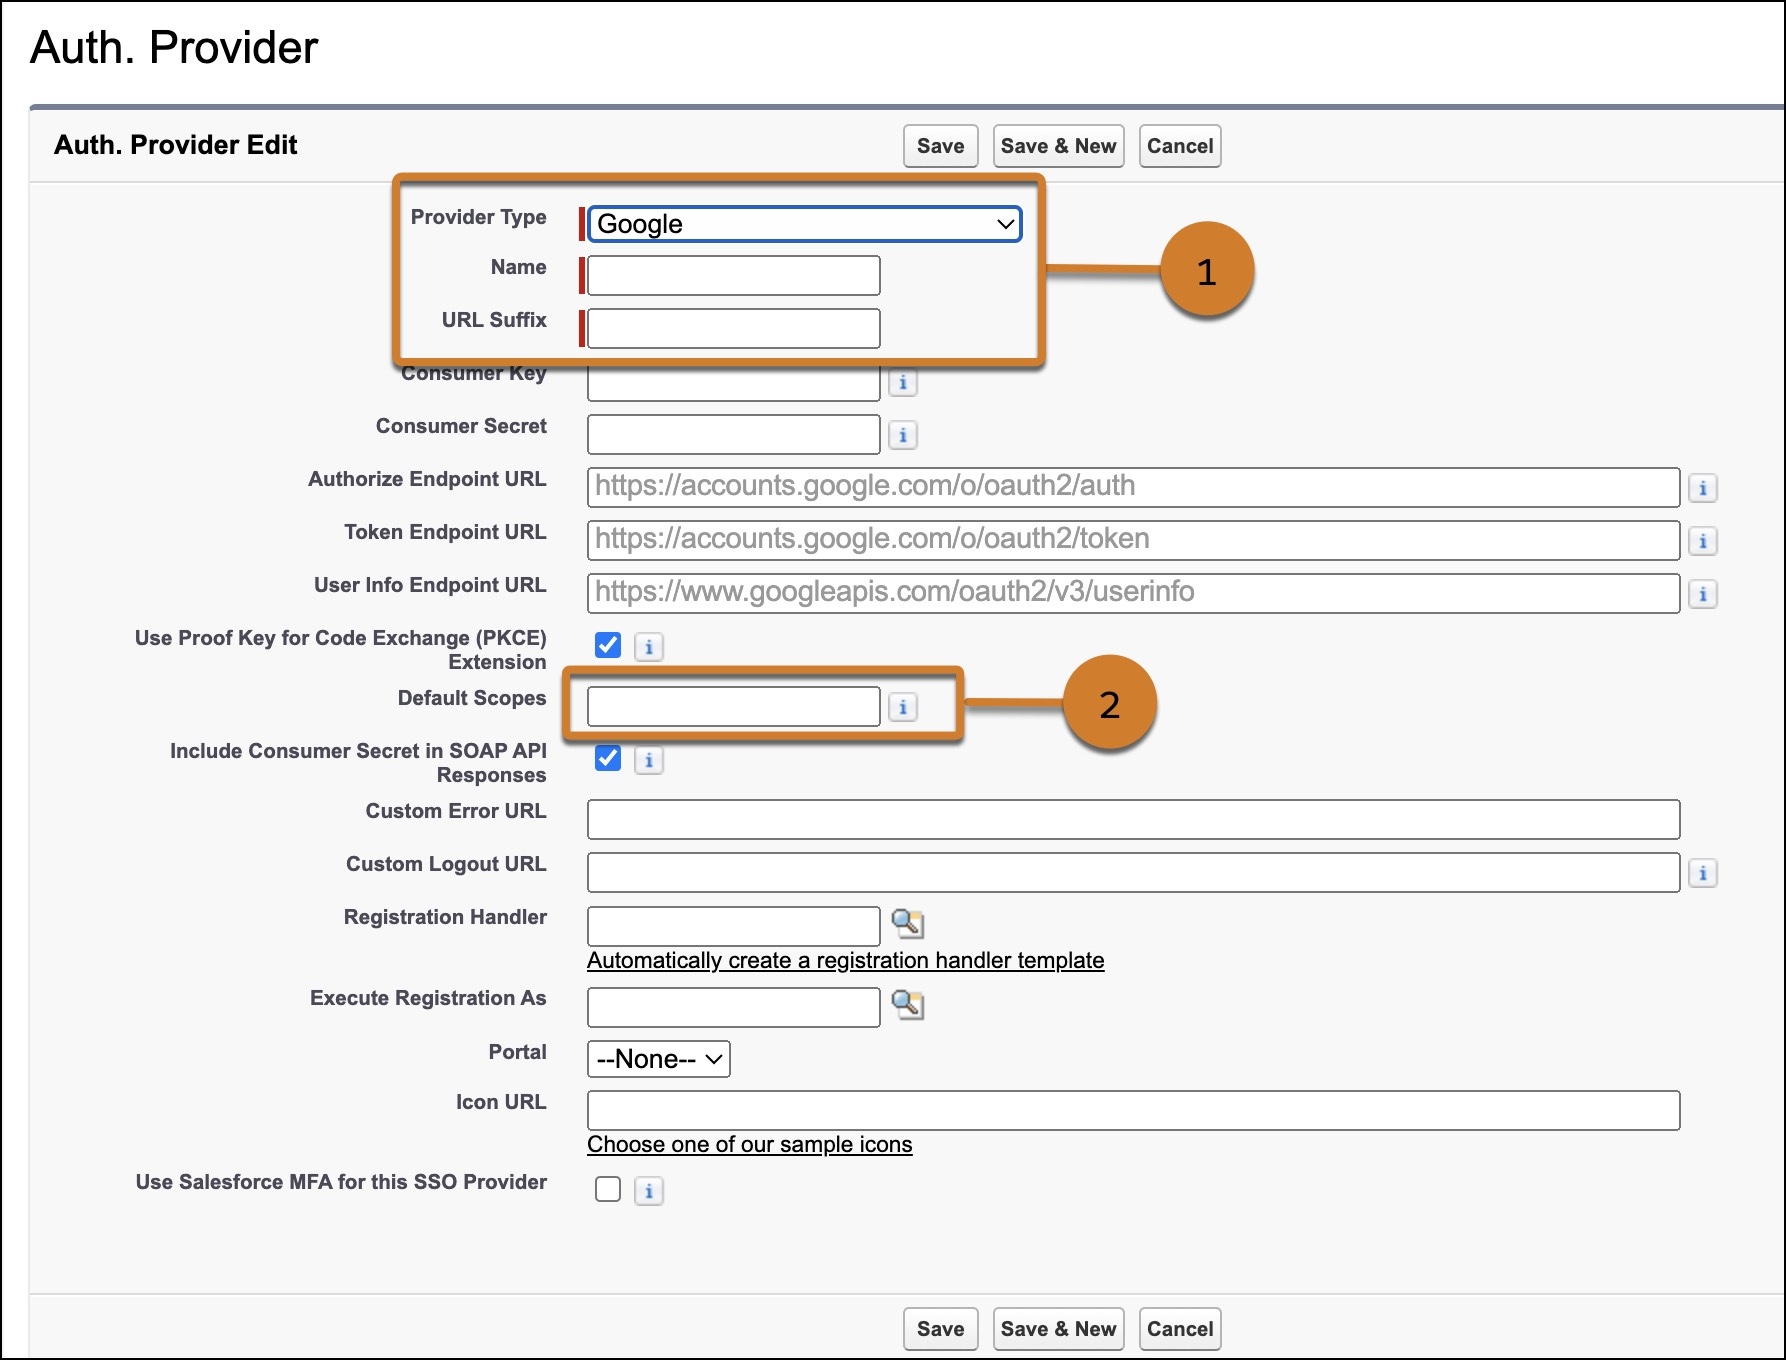
- Select Google from the provider type dropdown.
- Fill out the required information (1).
- Name—Enter a name for the Authentication provider.
- URL Suffix—The URL automatically gets suffixxed with the name you have given to the Authentication provider.
- Complete these fields.
- Consumer Key—Add Google App's Application ID.
- Consumer Secret—Add Google App's Client Secret Value.
-
(For unstructured data ingestion) Set the Authorize Endpoint URL to
https://accounts.google.com/o/oauth2/v2/auth?access_type=offline&prompt=consent. - Update the Scope (2) for the connector you’re using. All start with:
https://www.googleapis.com/auth/[VARIABLE]. Find the variables listed for each
connector.
- Google Ad Manager: analytics.readonly
- Google Analytics: analytics.readonly
- Google Contacts: userinfo.email, userinfo.profile, or contacts
- Google Campaign Manager: dfatrafficking, drareporting, or ddmconversions
- Google Drive: userinfo.email, userinfo.profile, drive.readonly
- Google Sheets: userinfo.email, userinfo.profile, drive.readonly
- Google Spanner: spanner.data
- Click Save.
Several client configuration URLs are generated after defining the authentication provider. Write down the callback URL from the Salesforce configuration after you save your work.
After defining the authentication provider in Salesforce, go back to your provider and update your app's callback URL.