
You are here:
Plan Your Applicant Experience
Learn how to set up an applicant portal for Admissions Connect.
- Use the Applicant Portal Template
To help you build your applicant experience, Admissions Connect provides a pre-built portal that you can use as a template. - Define the Basics of Your Applicant Portal
When it comes to planning your portal, first answer these basic questions. - Control What Applicants See in the Portal
When creating your Application Material Mapping records, use fields to control what applicants see in the portal. - Allow Applicants to Edit Fields
There is no field on the Application Material Mapping record to control whether an applicant can edit a specific item. Instead, applicants must be the owner of the Task and have the appropriate field access. - Review Portal Considerations for Ad Hoc Items
Ad hoc items don't have mapping records, so you can't control applicant settings such as custom messaging or file upload. - Define an Application Submission Window
Use the Open Date and Due Date fields on the Application object to define an application submission window. The Open Date is the first date that applicants can submit their Applications, and the Due Date is the last date that they can submit. - Create a Portal Planning Spreadsheet
Plan your applicant portal settings far in advance of launch. If you're creating a planning spreadsheet for your mapping records, make sure to include the applicant portal setting fields.
Use the Applicant Portal Template
To help you build your applicant experience, Admissions Connect provides a pre-built portal that you can use as a template.
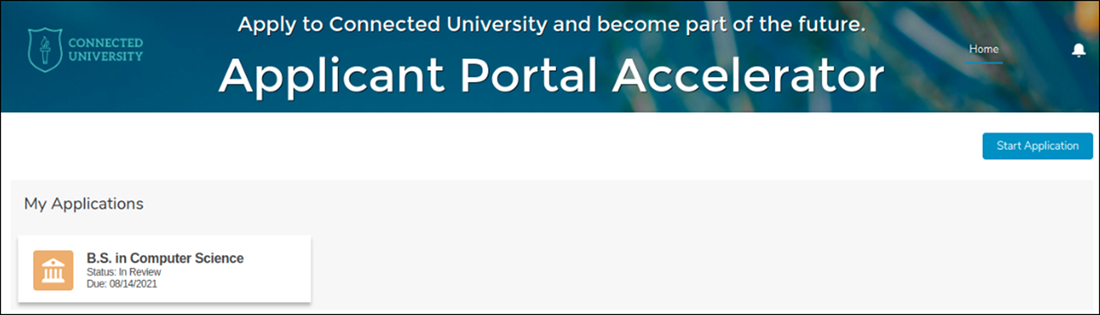
The template provides these key components.
-
A Home page where applicants see submitted applications and their status.
-
A Start Application button that allows applicants to begin a new application.
The steps for creating an applicant portal with the Applicant Portal Template are similar to creating any portal. However, there are a few things to keep in mind.
-
The Applicant Portal Template is included when you Install the Admissions Connect Package. However, if you installed Admissions Connect version 1.16 or earlier, access the Applicant Portal Template by installing Admissions Connect in a sandbox, and then use a change set to move the template into production.
-
Use OmniStudio to create application forms to add to the portal.
-
Be sure to grant applicants access to the ApplicantCommunityHomePageController apex class.
Define the Basics of Your Applicant Portal
When it comes to planning your portal, first answer these basic questions.
-
How will applicants enter and access the portal?
-
How will Application and other related records, such as Account, Contact, Education History, and so on, get created? And who will own these records?
Admissions Connect doesn’t provide any components or functionality that allows applicants to create records. The Admissions Connect components work with existing Application records.
Typically, most institutions import applicant data and documents using a third-party tool, which means the Application record and all the applicant’s records are created during the import process. If you want applicants to create Application-related records, your institution can build a custom component, set up automation, or implement other functionality that allows applicants to create those records. If you choose this route, consider automating the sharing of applicant-created records with your admissions staff and external reviewers. Review Import Your Data into Admissions Connect for more information about creating records.
To support on-the-go applicants, the Admissions Connect components that you use in an applicant portal support mobile devices—and without any additional setup tasks. The components simply work as-is, with slight display differences. For more information, see Admissions Connect Components.
Control What Applicants See in the Portal
When creating your Application Material Mapping records, use fields to control what applicants see in the portal.
- Show Navigation to Applicants
- Determines whether an item is visible.
- Show Content to Applicants
- Determines whether an item’s content is visible. For example, whether an applicant can see teacher evaluations.
- Applicant Hidden Content Message
- Provides custom messaging if you decide not to show the contents for an item. For example, if applicants can’t see teacher evaluations, you can provide a custom message telling them why they can’t see these evaluations.
- Applicant Instruction Message
- Provides custom messaging about how applicants can submit documents or complete specific tasks.
- Let Applicants Upload Files
-
Determines whether applicants can upload files.
 Tip You can optionally restrict which file types they can upload. For more information, see Limit Files in Your Experience Cloud Site in Salesforce Help.
For full details about the applicant portal settings, including the prerequisites for these settings to work, see Set Up Application Requirements and Action Plans and Verify Your Applicant Portal Setup.
Allow Applicants to Edit Fields
There is no field on the Application Material Mapping record to control whether an applicant can edit a specific item. Instead, applicants must be the owner of the Task and have the appropriate field access.
The Assigned To field on a Task determines ownership, so make sure you specify the applicant in this field. Then ensure the applicant has Read and Edit access to fields shown in the applicant portal. We also recommend marking the fields that you want applicants to fill out as Required in the Task's coordinating field set.
When planning out the fields to include in the applicant portal, consider how EDA's triggers and other automation can impact the applicant's experience. For example, if your org has turned on EDA's CON_PreferredPhone_TDTM trigger handler and you use the Contact object's Preferred Phone field in the portal, applicants can't update this field if data is already populated in it because the trigger overwrites their edits upon save.
For more information about setting up Tasks in a portal, see Set Up Application Requirements and Action Plans and Set Up Security for an Admissions Connect Portal.
Review Portal Considerations for Ad Hoc Items
Ad hoc items don't have mapping records, so you can't control applicant settings such as custom messaging or file upload.
Ad hoc Tasks show in the applicant portal if the applicant has access to the Task's associated Application record and the Task is assigned to the applicant or marked as Public (isVisibleInSelfService). However, applicants can't edit Ad hoc Tasks in the portal, even with the appropriate field-level Edit access. Required ad hoc Tasks that show in the portal are included in the percent complete total that applicants see in the Checklist Progress, which means the Tasks are required for submission. Because of these considerations, we recommend not using ad hoc Tasks in the applicant portal. You can still use ad hoc Tasks in the Admissions Connect app, just make sure to assign these Tasks to admissions staff members and don't mark them as Public.
Ad hoc Document Checklist Items don't show in the applicant portal, which means Required ad hoc documents aren't actually required for application submission and they aren't included in the percent complete total reported in the Checklist Progress.
Define an Application Submission Window
Use the Open Date and Due Date fields on the Application object to define an application submission window. The Open Date is the first date that applicants can submit their Applications, and the Due Date is the last date that they can submit.
The submission window is just one of the factors that determines what applicants can see and do from the portal. For example, the Application is editable and the Submit Application button shows only when the submission window is open. If an applicant hasn’t finished their Application and the submission window closes, their Application becomes read-only and they can no longer submit.
We recommend that you set up automation to set the Open Date and Due Date fields on Application records. For example, create a flow that sets these fields based on the Term the applicant is applying to.
When creating portal Users for your applicants, make sure to set the correct time zone for each applicant based on their location. An applicant’s local time zone determines whether the submission window is open for them. For example, if you set your Due Date to February 1, 2022, and your institution is based in New York, an applicant from California can still submit their Application right up until January 31 at 11:59 PM and 58 seconds, Pacific Standard Time.
To learn more about the other factors that affect Application submission, see Verify Your Applicant Portal Setup.
Create a Portal Planning Spreadsheet
Plan your applicant portal settings far in advance of launch. If you're creating a planning spreadsheet for your mapping records, make sure to include the applicant portal setting fields.
See Plan Your Application Requirements.
We also recommend creating a separate spreadsheet or matrix for thinking through how applicants see Document Checklist Items and Tasks as they move through different Statuses during the admissions cycle. For example, if you configure an Application Material Mapping record for a Document Checklist Item with Show Navigation to Applicants and Show Content to Applicants both selected, as well as a custom instruction message, that message shows only when the document Status is New. After an applicant submits the document, the Status updates to Pending and the instruction message goes away. Thinking through all the statuses helps ensure applicants are successful.
See Also: