
You are here:
Set Up Quick Document Verification
Let verifiers and other members of your admissions staff verify application documents directly from the Application Checklist and Reviewer Application Reader components or the Document Checklist Item record page. From the Document Checklist Item record page, admissions staff can also upload new versions of documents and automatically see the updated document in the preview.
- How Document Verification Works
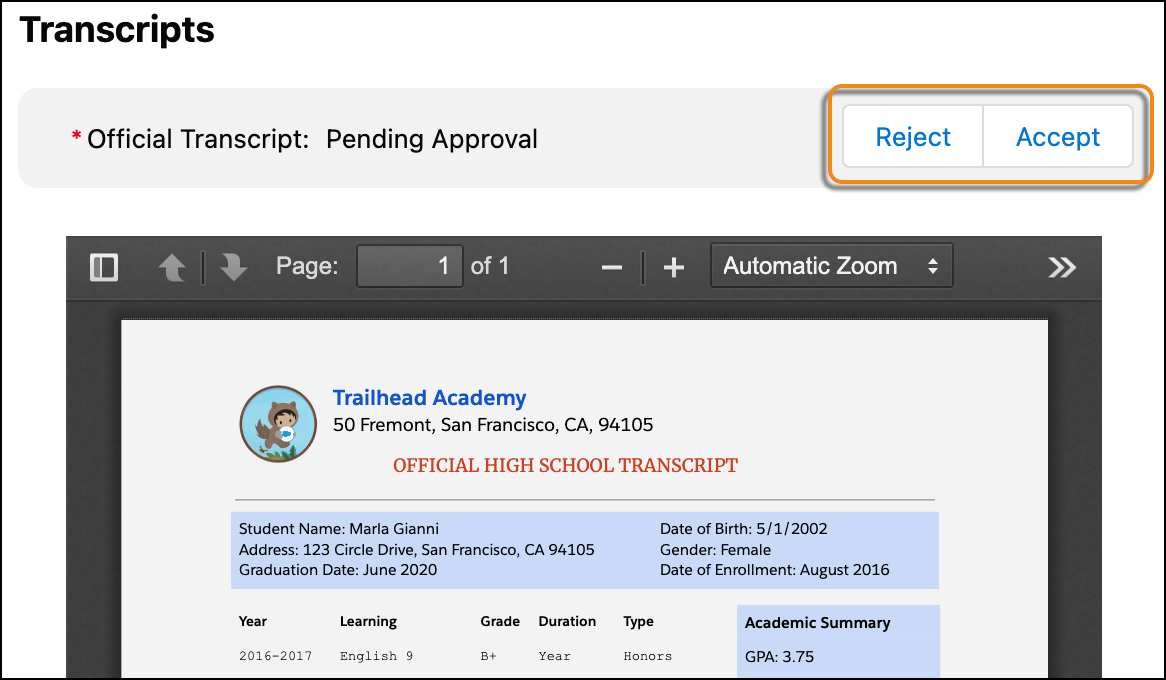
With the right permissions, Users see Accept and Reject buttons when viewing application documents. Clicking one of the buttons updates the Status field on the Document Checklist Item record. Keep in mind that once a User has the correct permissions, they see the document verification buttons on all Document Checklist Items. You can’t specify which Document Checklist Items show the buttons. - Verify Page Layouts
Make sure to assign your users the Document Checklist Item Layout - Admissions Staff page layout. Also make sure our Lightning record page for Document Checklist Items is the default page for the Admissions Connect app. - Configure Permissions and Sharing
Complete the tasks to allow staff to use the verification buttons. - Set Up a List View for Rapid Document Verification
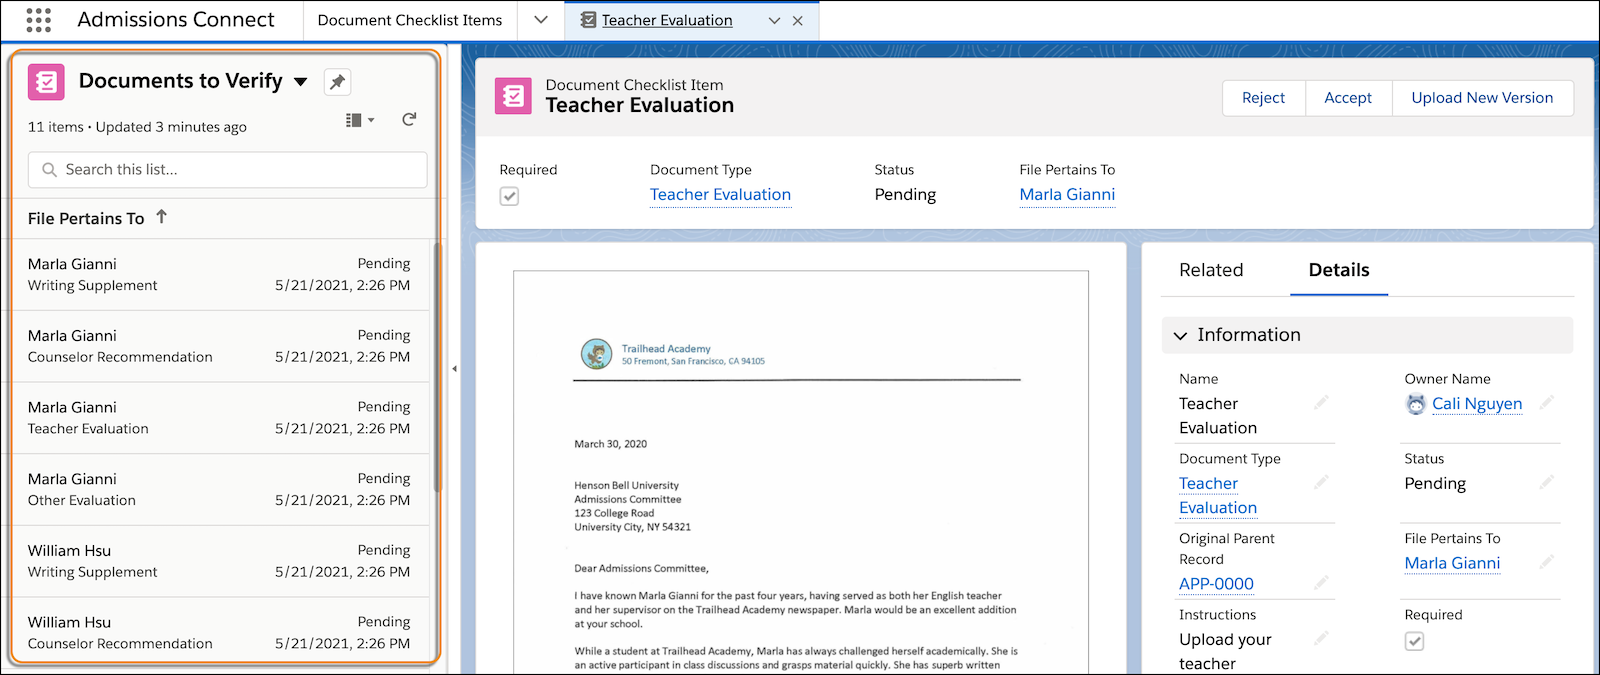
Let admissions staff verify documents in rapid succession using split view. Create a list view for Document Checklist Items that meet specific criteria, such as all Document Checklist Items with a Pending status. With split view open to your list view, staff can click each record and quickly accept or reject the documents. - Customize the Document Verification Experience
If you want users to update the status of documents only when certain conditions exist, set up validation rules on the Document Checklist Item object. For example, set up a validation rule so that staff can only accept or reject Document Checklist Items with files attached or for Applications with a certain status.
How Document Verification Works
With the right permissions, Users see Accept and Reject buttons when viewing application documents. Clicking one of the buttons updates the Status field on the Document Checklist Item record. Keep in mind that once a User has the correct permissions, they see the document verification buttons on all Document Checklist Items. You can’t specify which Document Checklist Items show the buttons.
When rejecting a document, staff members can select a reason the document was rejected and leave additional rejection comments. If you have an applicant portal, applicants see the rejection reason and rejection comments in the portal. You can't disable this visibility.
After a document is accepted or rejected, admissions staff can change its status or upload a new file using the View Record button in the Application Checklist and Reviewer Application Reader components.
Verify Page Layouts
Make sure to assign your users the Document Checklist Item Layout - Admissions Staff page layout. Also make sure our Lightning record page for Document Checklist Items is the default page for the Admissions Connect app.
See Set Up User Profiles for Admissions Connect and Set Up Admissions Connect App Basics.
Configure Permissions and Sharing
Complete the tasks to allow staff to use the verification buttons.
-
Assign users the Admissions Connect - Access Apex Classes for Document Verification permission set.
-
Ensure the user has these additional permissions.
-
Read and Edit on the Document Checklist Item object
-
Read and Edit on these Document Checklist Item fields: Accepted, Rejection Comment, Rejection Reason, and Status
-
Read and Edit on the Action Plan object
-
Edit on the Action Plan object field Status
-
-
Ensure the internal sharing settings for Action Plans and Document Checklist Items are set to Public Read/Write.
Set Up a List View for Rapid Document Verification
Let admissions staff verify documents in rapid succession using split view. Create a list view for Document Checklist Items that meet specific criteria, such as all Document Checklist Items with a Pending status. With split view open to your list view, staff can click each record and quickly accept or reject the documents.
To set up a list view, see Create and Customize List Views for Admissions Connect.
Customize the Document Verification Experience
If you want users to update the status of documents only when certain conditions exist, set up validation rules on the Document Checklist Item object. For example, set up a validation rule so that staff can only accept or reject Document Checklist Items with files attached or for Applications with a certain status.
For more information, see Validation Rules in Salesforce Help.
Lastly, consider customizing the picklist values for the Rejection Reason field or customizing the Reject action.