
You are here:
Review Applications
When you review an application, you make an admissions recommendation and leave supporting comments. Use a list view as your starting point, either for Applications or Application Reviews. You can use the default My Application Reviews list view, one created by your admissions team, or one that you created.
See Work with a List View for Rapid Reviews, Queue Pickup, and More.
- Access Your Review
We recommend opening the application page to start your review. From here you can familiarize yourself with the application. - Get Oriented with the Review Page
The three-part review page neatly organizes application materials for your review. - Assess the Status of Requirements
Are you asking yourself “What do the icons in the navigation mean?” Here’s a cheat sheet of how the requirement statuses map to the icons. - Review PDFs—Focus, Rotate Pages, and More
The PDF viewer includes tools to help your review go smoothly. You can focus (enlarge the document), rotate pages, skip to the first or last page in the document, zoom, and even see a document outline if there is one. Explore the toolbar to see what else you can do. - Submit Your Recommendation
Your admissions recommendation and comments are saved automatically while you review the application. You can make comments and a preliminary recommendation without submitting. - Update the Review Status
Back on the application page, update the Application Review Status based on your admissions process. - Considerations for Reviewing Applications
When you submit your admissions recommendation, the Review End Date is automatically filled out. You can’t edit this date unless you have special permissions.
Access Your Review
We recommend opening the application page to start your review. From here you can familiarize yourself with the application.
-
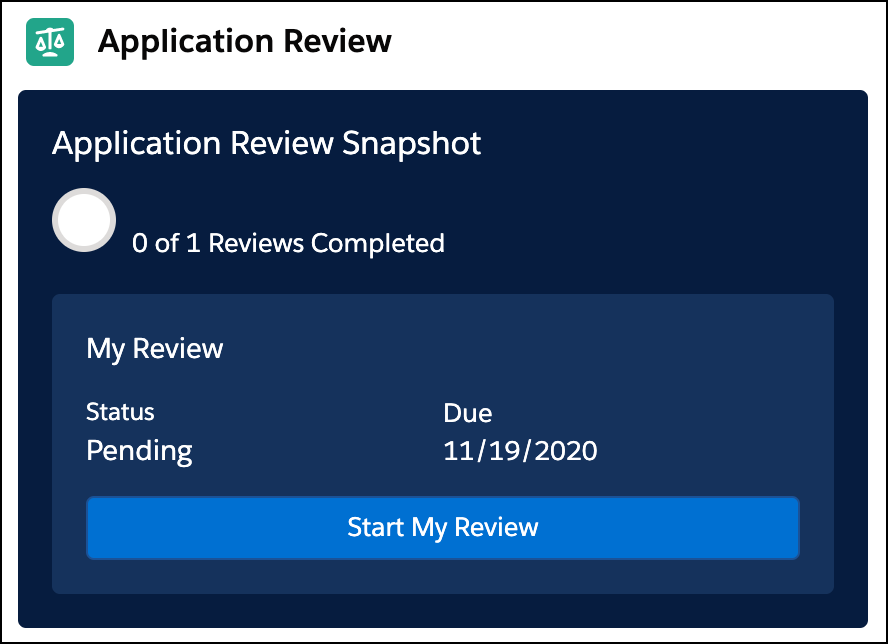
At the top of the page, note the current status of the application review process.
-
Review the overall progress and status of application requirements from the Application Checklist.
-
Check out comments from your peers in the Feed tab.
-
See a list of other reviewers assigned to the application from the Reviewers tab.
When you’re ready to begin your review, click Start My Review or Continue Review from the Reviewer Snapshot.
Get Oriented with the Review Page
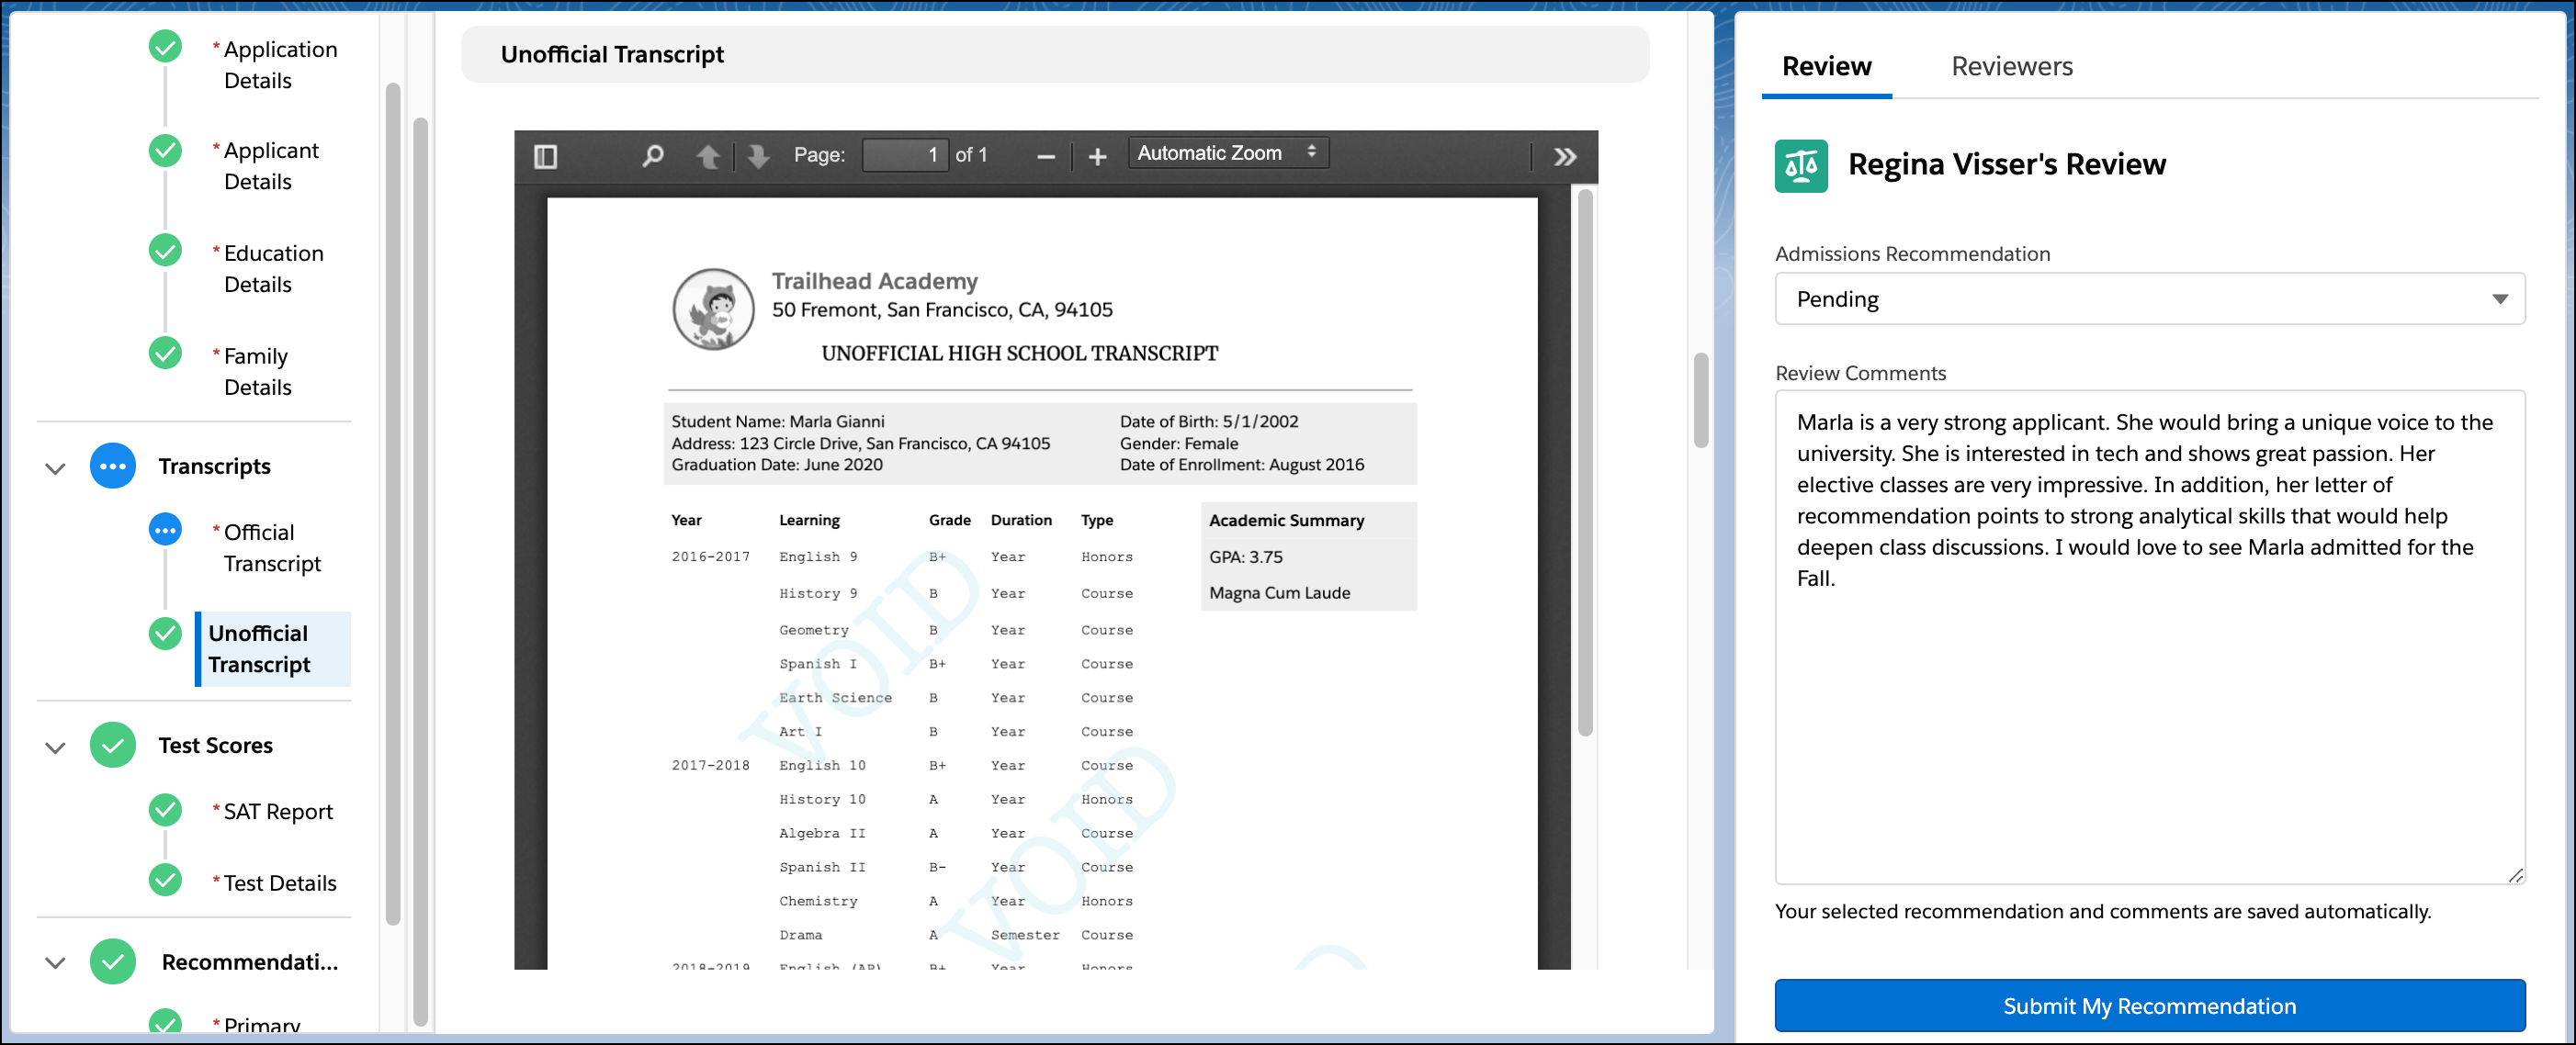
The three-part review page neatly organizes application materials for your review.
| Left Region—Navigation | Middle Region—Main Viewer | Right Region—Review |
|---|---|---|
The navigation region lets you quickly see the overall progress. Use the navigation tree, which is like a table of contents for all the requirements. Required items are noted with a red asterisk. Each item shows a status icon. Click any requirement to jump to it in the main viewer. Or use the Tab key to enter the navigation tree and the arrow keys to move around within the tree. |
The main region shows the selected requirement within a single scrollable view—which means that you can review each requirement without clicking to advance. PDFs display in a built-in viewer with tools like focus, zoom, and page rotation. Applicant-provided data, like their birthdate or other questions they answered, appear in line with documents. |
The review region lets you enter your review feedback. Just like an email draft, all of your comments and selections are saved automatically. So take notes as you go. You might see custom review questions based on how your team has configured the app. You can also view a list of other assigned reviewers from the Reviewers tab. |
Assess the Status of Requirements
Are you asking yourself “What do the icons in the navigation mean?” Here’s a cheat sheet of how the requirement statuses map to the icons.
| Icon | Checklist Status | Documents | Data | Requirement Heading |
|---|---|---|---|---|
|
|
Not Started | No file is attached. | The status is set to the default value. | None of the requirements in this area are started. |
|
|
Pending | A file is attached and the status is set to New or Pending. | The status is a non-default value, but has not been marked as Completed yet. | If at least one requirement is pending or has been rejected, the rollup heading is pending. |
|
|
Completed | A file is attached and the status set to Accepted. | The status is Completed. | All required requirements in this area are completed. |
|
|
Rejected | A file is attached and the status is set to Rejected. | Not applicable. | Not applicable. |
Review PDFs—Focus, Rotate Pages, and More
The PDF viewer includes tools to help your review go smoothly. You can focus (enlarge the document), rotate pages, skip to the first or last page in the document, zoom, and even see a document outline if there is one. Explore the toolbar to see what else you can do.
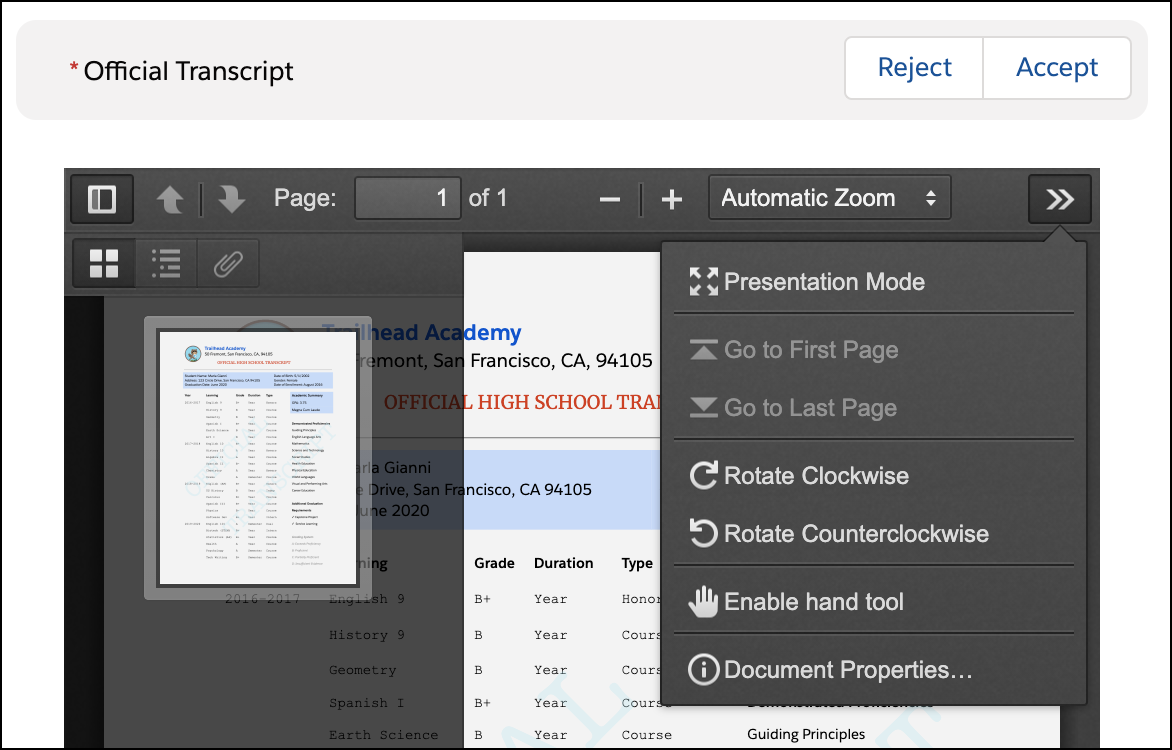
To see the Accept and Reject buttons, you need document verification permissions. These buttons let you verify documents without leaving the page. After a document is accepted or rejected, you see a View Record button. Use this button if you have to update the status again.
Submit Your Recommendation
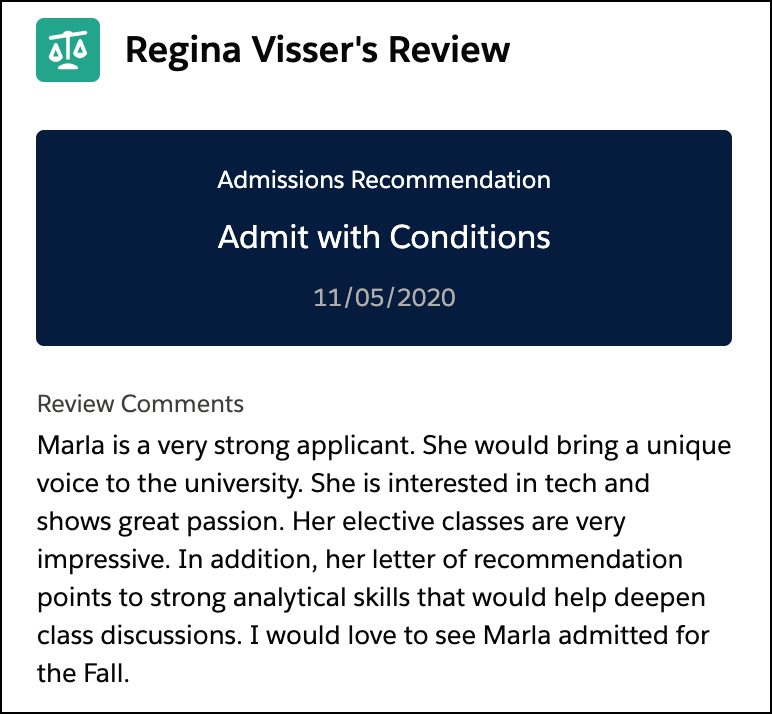
Your admissions recommendation and comments are saved automatically while you review the application. You can make comments and a preliminary recommendation without submitting.
When you’re ready to submit, click Submit My Recommendation.
Update the Review Status
Back on the application page, update the Application Review Status based on your admissions process.

Considerations for Reviewing Applications
When you submit your admissions recommendation, the Review End Date is automatically filled out. You can’t edit this date unless you have special permissions.
Your Admissions Connect administrator configures the record actions for the application review page. These actions may include, Edit, Change Owner, and Delete. Some of these actions require special permissions. Talk to your admissions team about what action you can take on the review page.