
You are here:
Configure an Applicant Portal for Third-Party Representatives
Use Omnistudio components to set up an applicant portal for parents, guardians, and commissioned agents to apply on behalf of students.
| Available in: Lightning Experience |
| Available in: Enterprise, Performance, Unlimited, and Developer Editions with Education Cloud |
| User Permissions Needed | |
|---|---|
| To configure an applicant portal for third-party access: | Education Cloud Full Access AND Create and Set Up Experiences AND View Setup and Configuration AND Omnistudio Admin AND Omnistudio User AND Be a member of the site AND View Setup and Configuration AND an experience admin, publisher, or builder in that site |
Who Is a Third Party?
A third-party user is someone who submits an application on behalf of an applicant. Here are some examples of a third-party user.
-
Parents
-
Guardians
-
Caregivers
-
External commissioned agents
Create a sharing set for third parties so they have access to the required records.
Security Considerations for Educational Institutions
If your institution is subject to the Family Educational Rights and Privacy Act (FERPA) requirements, consider those requirements as part of your security model. Make sure to account for the protection of Personally Identifiable Information (PII) in the education records of students. If your institution is a HIPAA-covered organization and is subject to the HIPAA requirements, consider those requirements as part of your security model. Make sure that you account for the protection of Protected Health Information (PHI) maintained outside of FERPA education records.
To secure your sensitive data, implement a host of security features available with Salesforce. Here are a few examples.
- Set your org-wide default sharing settings to Private, which is the most restrictive access possible.
- Identify the data access requirements for the users in your various departments. Create profiles for the roles in those areas, and permission sets to grant permissions to roles or individual users.
- Create a role hierarchy to give users the same level of access to the records owned by or shared with the users below them in the hierarchy.
- Set field-level security to control who can access and edit certain fields on specific records.
- Create sharing rules to open up record access to other users besides the record owners.
- Set up authentication and authorization methods to control who sees what data, when they see the data, and from which locations and devices they can access the data.
Every institution has unique privacy policies and regulatory requirements. We encourage you to consult with your security, legal, and regulatory specialists to use unique Salesforce configurations in combination with other information systems.
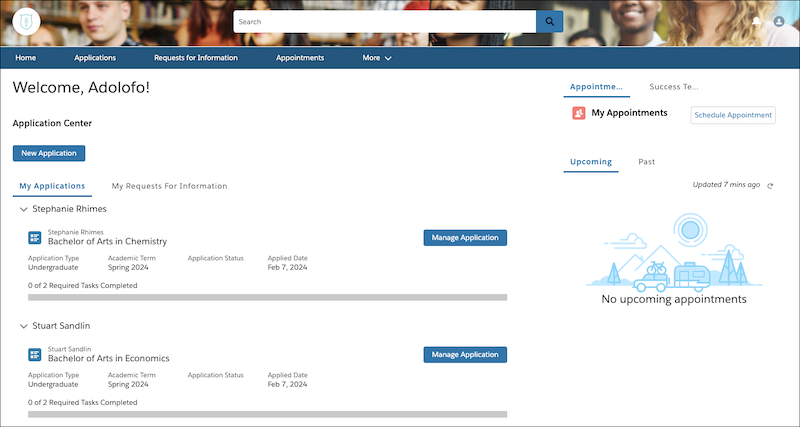
Customize the Applicant Portal Home Page
Update the Home page of your applicant portal so that third parties can enter information for the students that they represent and submit applications.
- From Setup, in the Quick Find box, enter Digital Experiences, and then select All Sites.
- Next to your learner portal site, click Builder.
-
On the Home page, click
 , and then drag the Flexcard component to just above
Start My Application in the Content area.
, and then drag the Flexcard component to just above
Start My Application in the Content area.
- For Flexcard Name, select EDUAdmissionsNoStudentData.
- For Exposed Attributes, enter {"ApiPageName": "Students__c"}.
- Preview and publish your site.
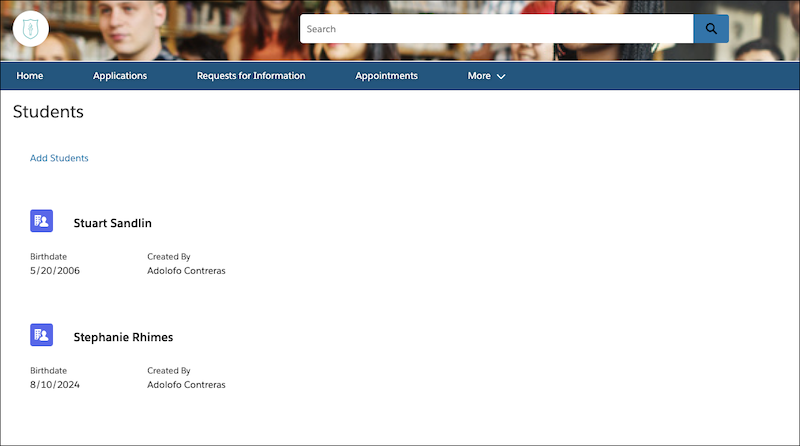
Create and Configure a Students Page
Add a page to your applicant portal where parents, guardians, and agents can manage the students that they represent. When a third party adds a student, the system creates Account Contact Relationship records to support the sharing application information.
-
In Experience Builder for your site, click
 , and then click New Page.
- Select Standard Page.
- Select 2 columns, 2:1 ratio, and then click Next.
-
For Name, enter Students.
The URL field fills automatically.
- For API Name, enter Students.
- Click Create.
- Click the menu bar, and then click Edit Default Navigation.
-
Click Add Menu Item, and then specify these values.
- For Name, enter Students.
- For Type, select Site Page.
- For Page, select Students.
- Save your changes.
-
On the Students page, click .
- Drag the Rich Content Editor component to the Content Header area.
- Click Edit Content, and enter Students. Apply any additional formatting that you want.
-
Click , and then drag the Flexcard component to just below the
Content Header section.
- For Flexcard Name, select EDUAdmissionsNewStudentButton.
-
Click , and then drag the Flexcard component to the Content
section.
- For Flexcard Name, select EDUAdmissionsMyStudents.
- Preview and publish your site.
Update Omnistudio Data Mapper for Third-Party Access
To connect a third party with the student that they're adding data for, create a separate cloned version of the EDUAdmissionsGetLoggedInUserPersonAccount Data Mapper for third-party access.
- From the App Launcher, find and select Omnistudio Data Mappers.
- Click your cloned version of the EDUAdmissionsGetLoggedInUserPersonAccount Data Mapper.
- For Account, set up the filter to Id=Contact:AccountId.
- Click Add Extract Step.
- For Select an Option, select Contact.
- For Extract Output Path, enter Contact.
- Set up the filter to Id=CurrentUser:ContactId.
- Drag the Contact step above the Account step.
- Click Output.
- For Account:PersonContactId, click Edit.
- For Extract JSON Path, select Contact:Id.
Update Integration Procedure for Third-Party Access
To reference the Data Mapper for third parties, update the Integration Procedure for processing and saving student application data submitted by a third party.
- From the App Launcher, find and select Integration Procedures.
- Click your cloned version of the EDUAdmissions/CreateMyStudents integration procedure.
- Click GetUserInfo.
- For Data Mapper Name, select your cloned version of the EDUAdmissionsGetLoggedInUserPersonAccount Data Mapper for third parties.
- From LoopStudents, select CreateUserToStudentAccountCCR.
- In the Additional Input section, for ContactId, replace the formula with =%GetUserInfo:Account:ContactId%.
- From LoopStudents, select CreateUserToStudentAccountACR.
- In the Additional Input section, for AccountId, replace the formula with =%GetUserInfo:Account:Id%.
- Click CreateUserConstituentRole.
- In the Additional Input section, for PersonId, replace the formula with =%GetUserInfo:Account:Id%.