
You are here:
Set Up the Recruiter Console
Create a home page for the Recruitment & Admissions app for recruiters.
| Available in: Lightning Experience |
| Available in: Enterprise, Performance, Unlimited, and Developer Editions with Education Cloud |
| User Permissions Needed | |
|---|---|
| To set up the Recruiter Console: | Education Cloud Full Access |
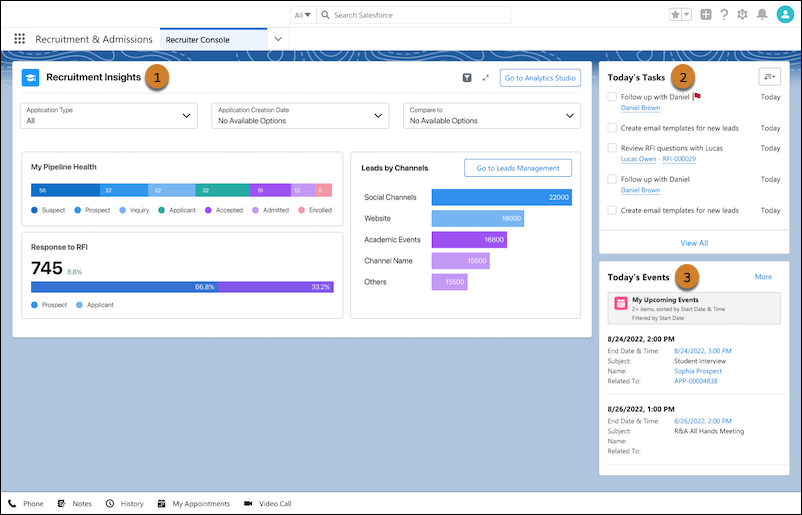
The recruiter console is where you can see recruitment analytics, along with daily and upcoming tasks and events.
- Create a Home Page
Use Lightning App Builder to create a recruiter console home page for the Recruitment & Admissions app. - Add Components to the Home Page
Configure Lightning web components on your Recruiter Console home page. - Activate the Home Page
Activate your home page and assign the home page to the profiles that you want to have access.
Create a Home Page
Use Lightning App Builder to create a recruiter console home page for the Recruitment & Admissions app.
- From Setup, in the Quick Find box, enter App Builder, and then select Lightning App Builder.
- Click New.
- Select Home Page and then click Next.
- In the Label field, enter Recruiter Console and then click Next.
- Select Standard Home Page and click Finish.
Now that you created your home page, add components to the console.
Add Components to the Home Page
Configure Lightning web components on your Recruiter Console home page.
Note You must customize some tabs when you replicate this template. See Add and Customize Tabs on Lightning Pages Using the Lightning App Builder.
- Drag the Education Analytics Dashboard component (1) to the top section.
- In the component properties to the right, for Dashboard, select Recruitment Insights. If you can't select a dashboard, make sure that Education Analytics is set up. See Set Up the Education Analytics App.
- Drag the Today's Tasks component (2) to the right column.
- Drag the List View component (3) to the right column, below Today's Tasks, and set these items:
- Object: Select Event.
- Filter: Select My Upcoming Events.
- Number of Records to Display: Enter 2.
After you add the components, save your changes and move on to the next section.
Activate the Home Page
Activate your home page and assign the home page to the profiles that you want to have access.
- Click Activate.
- Select App and Profile.
- Click Assign to Apps and Profiles.
- For Lightning Apps, select Recruitment & Admissions and click Next.
- For Profiles, select the profiles that you want to have access to the home page and click Next.
Did this article solve your issue?
Let us know so we can improve!