
You are here:
How Learners Experience the Intelligent Degree Planner
Learners access the Intelligent Degree Planner through your Education Portal. They can use the drag-and-drop interface to visualize their complete learning journey with your institution.
| Available in: Lightning Experience |
| Available in: Enterprise, Performance, Unlimited, and Developer Editions with Education Cloud |
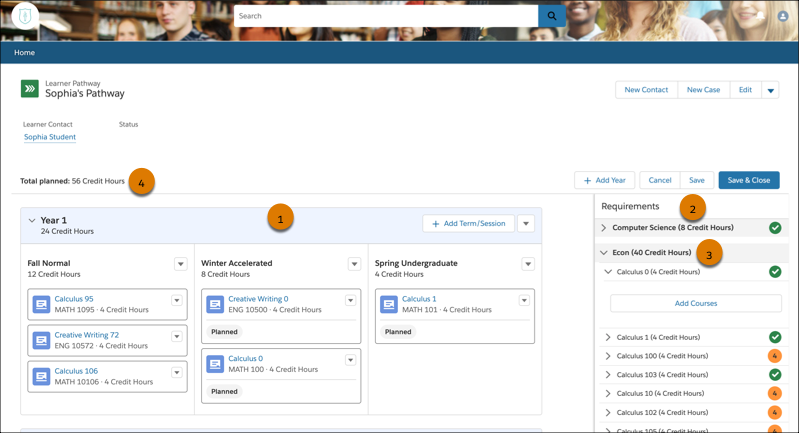
The Intelligent Degree Planner user interface includes these main components: the planning canvas (1) and the requirements panel (2).
If you create learner pathway templates, learners can start off with a template by using the Apply Template link. If there are no templates available, learners can create a pathway from scratch by clicking Add Year.
Learners begin planning by laying out years, terms, and sessions on the canvas. Terms and sessions are nested within years.
The requirements panel acts like a staging area for the canvas and tracks the number of unplanned units. Learners load the panel with up to 10 required courses, placeholders, and optional courses. They then drag each course to a session on the canvas.
As learners move courses from the requirements panel to the canvas, the number of unplanned units on the requirements panel (3) decreases and the number of planned units on the canvas (4) increases accordingly. Their saved changes are also reflected in the learner progress view.
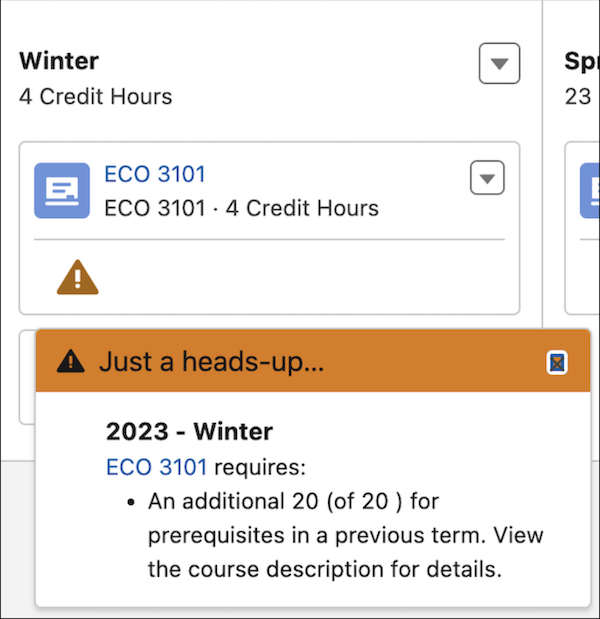
The Intelligent Degree Planner notifies learners if they plan a course without planning its associated prerequisites or corequisites. It also alerts learners if a planned course violates custom rules. Notifications include the names of missing requirements, their categories, or direct links to course detail pages. Learners can view the complete list of prerequisites and corequisites on the course detail pages.
When a learner completes the creation of a plan, they can submit it to their advisor for review and approval depending on the planner's configuration. They can view their drafts and approved degree plans in the portal.