
You are here:
Create a List of Current Students
In this common use case doc, we'll show you how to create a list of the students at your college or university who meet certain criteria.
- Introduction
In this article, we walk you through a simple use case that has lots of useful applications for faculty and staff. - Student Enrollment Data: Course Objects and Relationships
In this section we'll review how information about courses and enrollments is structured in . - Create a Courses Custom Report Type
Out of-the-box, Salesforce with gives you a number of standard reports, such as Course Connections with Contact's Academic Program, Course Connections with Course Offering ID, and so on. - Customize Report Fields
Now that we have a custom report type that pulls Course data from multiple related objects, let's create a report based on the report type. - Create Filters for Academic Program, Course, and Grade
Let's apply a few filters to narrow our list to only the students pursuing a B.S. in Business, who earned a B grade or higher in Economics 101.
Introduction
In this article, we walk you through a simple use case that has lots of useful applications for faculty and staff.
We'll identify the students who've performed well in a foundational class for their major, based on their academic program and course enrollment information. Follow along as our recruiter for the School of Business uses Salesforce and the Education Data Architecture (EDA) to identify top candidates to invite to a B school information session.
What you're looking for:
- A list of current students
- Who are pursuing a degree in B.S. Economics
- Who've earned a B grade or better in Economics 101
To arrive at our list, we'll review the handful of data objects—such as Courses, Course Offerings, and Course Connections—that EDA uses to organize data. Then we'll set up a custom report type that links together data from these related objects into a single report. Lastly, we'll use your criteria to filter for the students we're interested in. First, though, let's talk in more detail about these objects and how they relate to each other in the data architecture.
Student Enrollment Data: Course Objects and Relationships
In this section we'll review how information about courses and enrollments is structured in .
Chances are that you're working with students' enrollment data uploaded from your Student Information System. Once the data is in , stored in Salesforce fields and objects, the bulk of the work is done. Those objects are automatically, easily accessible using Salesforce reports. Getting to the specific data set we want is simply a matter of understanding the hierarchical relationships between objects and drilling down into the data.
First, let's review the relevant objects and relationships in the data architecture.
- Course—A class that fulfills a certain number of credit hours, such as Economics 101.
- Course Offering—A unique instance, that is, a running of a course, that is associated with a specific term and faculty member, such as Economics 101 Fall 2017, Section A.
- Term—A school term or academic session that has a start and end date, such as Fall 2017.
- Course Connection—An object representing the relationship between a student and a course offering, capturing credit and grade information. It can also represent a faculty member's relationship to a course offering.
These objects track almost everything we need to know about a student's enrollment information in order to generate our list. This diagram summarizes the object relationships.
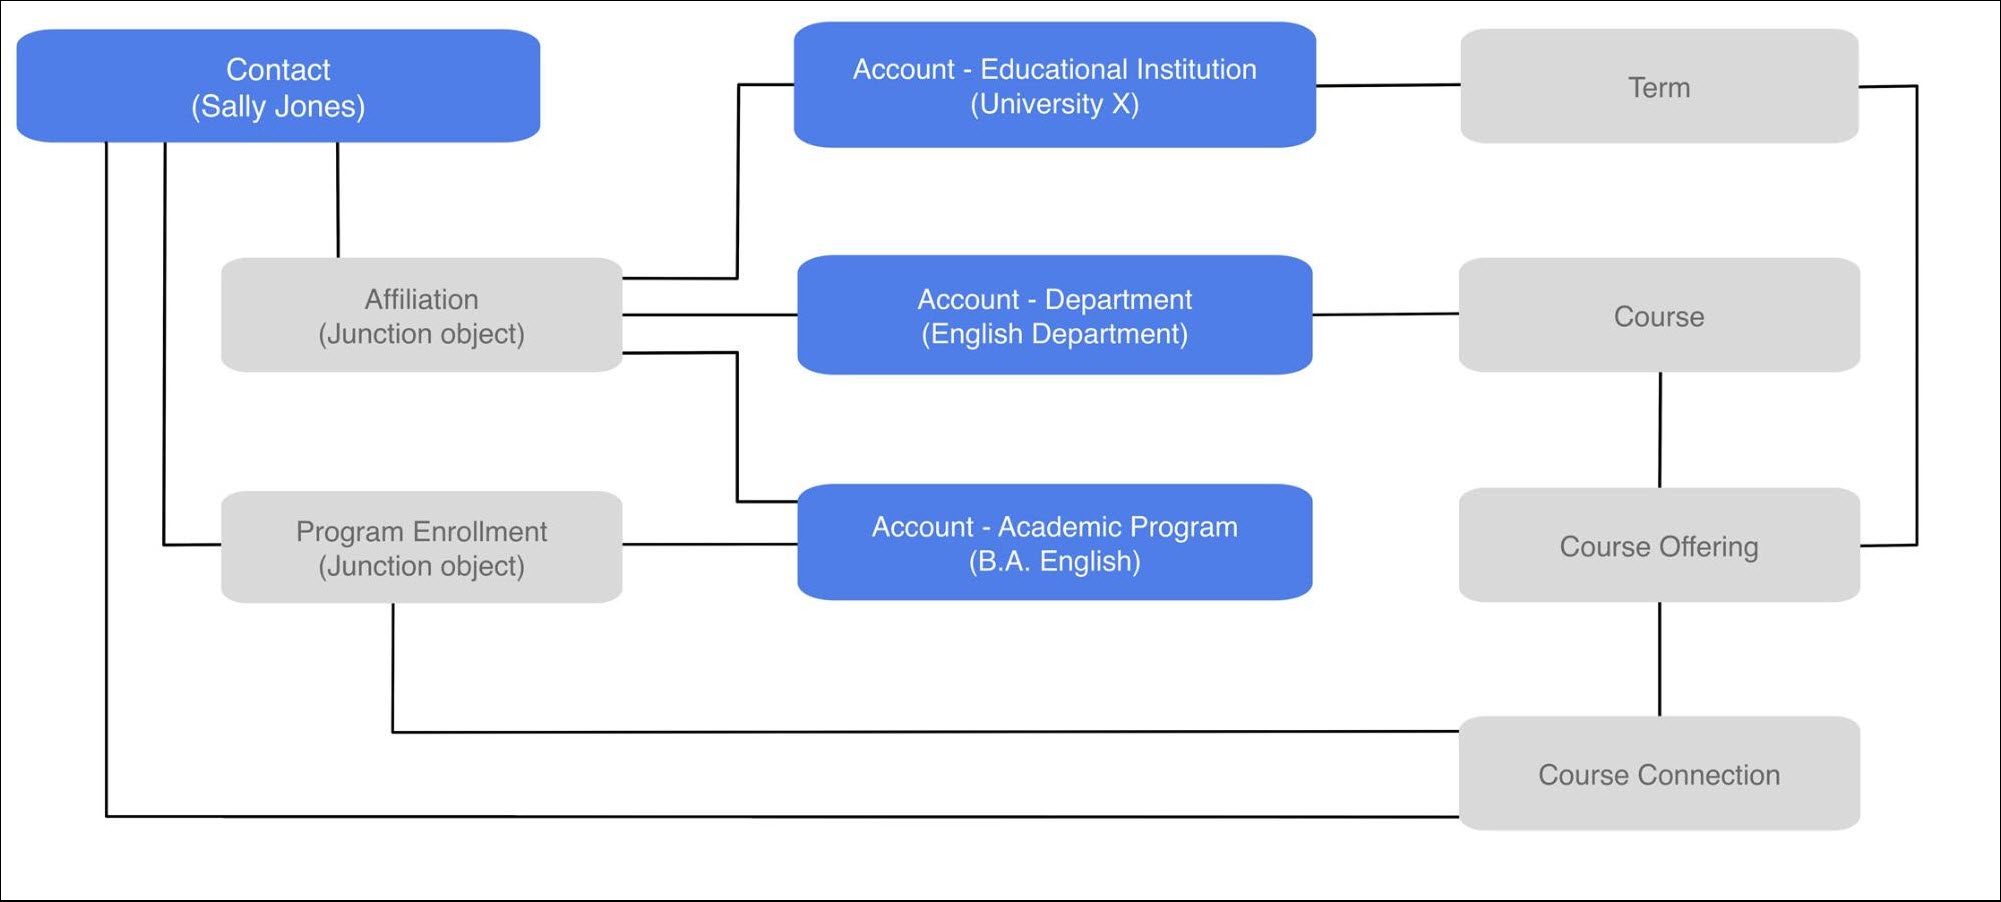
The Program Enrollment object is also relevant. It's a junction object that connects a student with an academic program. For example, it tells us that a student has declared a B.S. in Business as their major. Notice that Program Enrollment is also a lookup field on the Course Connection object.
The hierarchy of relationships is important because it determines how we go about creating a report to tie these related objects together. For now, this quick review is enough to set the stage for diving into reports.
In the next sections, we'll show you how our B school recruiter uses Salesforce reports to create the invitee list for the information session. If you want to follow along, you'll need to first create sample data in your org for about a dozen students, their program enrollments, the ECON 101 course information, and the students' course connections to ECON 101. For maximum efficiency, we recommend creating records in this order.
- Create Contact records for twelve different students.
- Create an Account record to represent your school or university. Choose the Educational Institution record type.
- Create Account records for a few different academic programs, one of which is B.S. Business. Choose the Academic Program record type for these accounts.
- Create Account records for the departments that are associated with the academic programs that you created in the previous step. For example, create the “Economics Department” for B.S. Business. Choose the University Department record type for these accounts.
- From each student's Contact record, on the Related tab, create a Program Enrollment record. Assign about half of your students to B.S. Business, and the rest to the other academic programs that you created in the previous step.
- Create the ECON 101 course information.
- Create a Course record. Give it a name of “Intro to Economics,” a Course ID of “ECON 101,” and associate it with the Economics Department.
- Create a Term record, such as Fall 2016.
- Create a Course Offering record to represent a specific occurrence of the course that's associated with the Fall 2016 term. Give it a Course Offering ID of “ECON 101 Fall 2016.”
- Back on the Related tab of each student's contact record, click the Program Enrollment ID, such as PE-0010, to go to the student's Program Enrollment record. On the Related tab, create a Course Connections record. Associate every student with the Course Offering ID of “ECON 101 Fall 2016” and give every student a grade, but give them a range of grades, including some that are less than 80 (so that you can see filtering by grade later).
While setting up this sample data is a great way to continue getting familiar with EDA, it does involve some work. If these setup tasks are more than you want to do right now, you can skip them and just sit back and watch what our B school recruiter does with the data.
Create a Courses Custom Report Type
Out of-the-box, Salesforce with gives you a number of standard reports, such as Course Connections with Contact's Academic Program, Course Connections with Course Offering ID, and so on.
In our case, we want a more complex report than what's available with the standard reports, so let's create our own by first creating a custom report type.
- From Setup Home, enter "report" in the Quick Find box and click Report Types.
- Review the introductory page about custom report types, and then click Continue.
- Click New Custom Report Type.
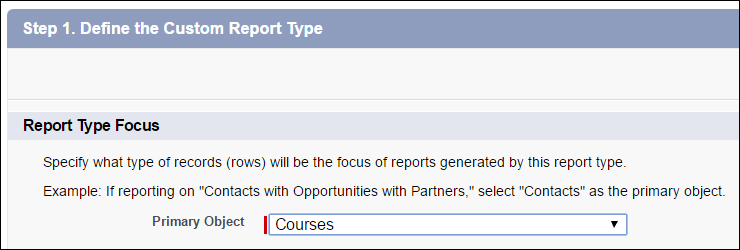
- For the Primary Object, select Courses. By setting Courses as the parent object and focus of the report, we can drill down into its child objects, Course Offerings and Course Connections, and tie everything back to a student.
- Enter a label such as Courses with Offerings with Connections.
- Review the name that's automatically created from the label you entered and adjust it if needed.
- Enter a description such as:
Generate a list of current students
Pursuing a B.S. Economics
Who earned a B grade or better in Econ 101
- For Store in Category select Other Reports.
- Click Next.
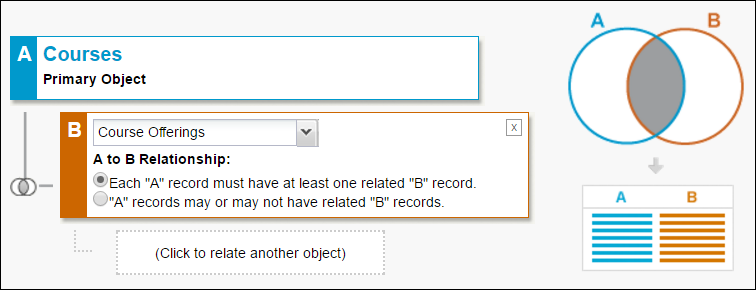
- With Courses already selected as the primary object, define its relationships to child objects in this precise order.
- Click Click to relate another object and select Course Offerings. Leave the A to B relationship requirement that each "A" record must have at least one related "B" record.
- Click Click to relate another object and select Course Connection. Again, leave the B to C relationship requirement that each "B" record must have at least one related "C" record.
- Click Click to relate another object and select Course Offerings. Leave the A to B relationship requirement that each "A" record must have at least one related "B" record.
- Click Save.
Customize Report Fields
Now that we have a custom report type that pulls Course data from multiple related objects, let's create a report based on the report type.
- Click the Reports tab. (If you don't see the Reports tab, from the App Launcher
 , find and select Reports.)
 - Click New Report.
- Expand the Other Reports folder and select the Courses with Offerings with Connections report type. (If you don't see this report type, click Show more … at the bottom of the list.)

- Click Create. The resulting report includes a few columns, for the fields that are included by default.
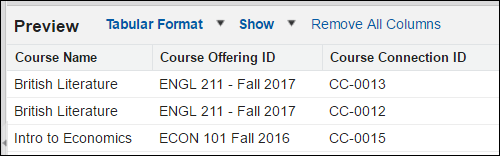
Adding a few more fields would be helpful, making it easier to confirm that we're including the correct students in the report.
- In the report builder, drag these fields from the Fields list into the Preview pane to add them to your report. The object that the field belongs to is shown in parentheses.
-
Course ID (Courses)
-
Contact's Academic Program: Account Name (Course Connection)
-
Grade (Course Connection)
-
Contact: Full Name (Course Connection)

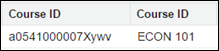
 Tip You might notice that the Courses object has two fields that are identically named Course ID. (If you drag both Course ID fields into the Preview, it's easy to tell which is which.) One is a standard system field in Salesforce that uniquely identifies each course with a 15-character ID. The other is an EDA field that your school uses to uniquely identify each course, such as ECON 101. For ease of use in this report, we recommend selecting the more human-readable, EDA Course ID field.
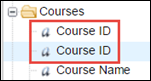
-
Great work so far. By setting up a custom report type, we've gotten Salesforce to determine all current students that could potentially be included in our list. By customizing the report with additional fields, we can easily see that some students are not B.S. Business majors, or are but don't meet our course and grade criteria. Let's narrow our results to exclude them, using report filters.
Create Filters for Academic Program, Course, and Grade
Let's apply a few filters to narrow our list to only the students pursuing a B.S. in Business, who earned a B grade or higher in Economics 101.
- Add a filter for Academic Program.
- Click Add next to the Filters option.
- Set the filter: Contact's Academic Program: Account Name equals
B.S. Business.
- Click OK.
- Add another filter for the course, Economics 101.
- Click Add next to the Filters option.
- Set the filter: Course ID equals
ECON 101. - Click OK.
- Add another filter for Grade.
- Click Add next to the Filters option.
- Set the filter: Grade greater or equal
80.00. - Click OK.
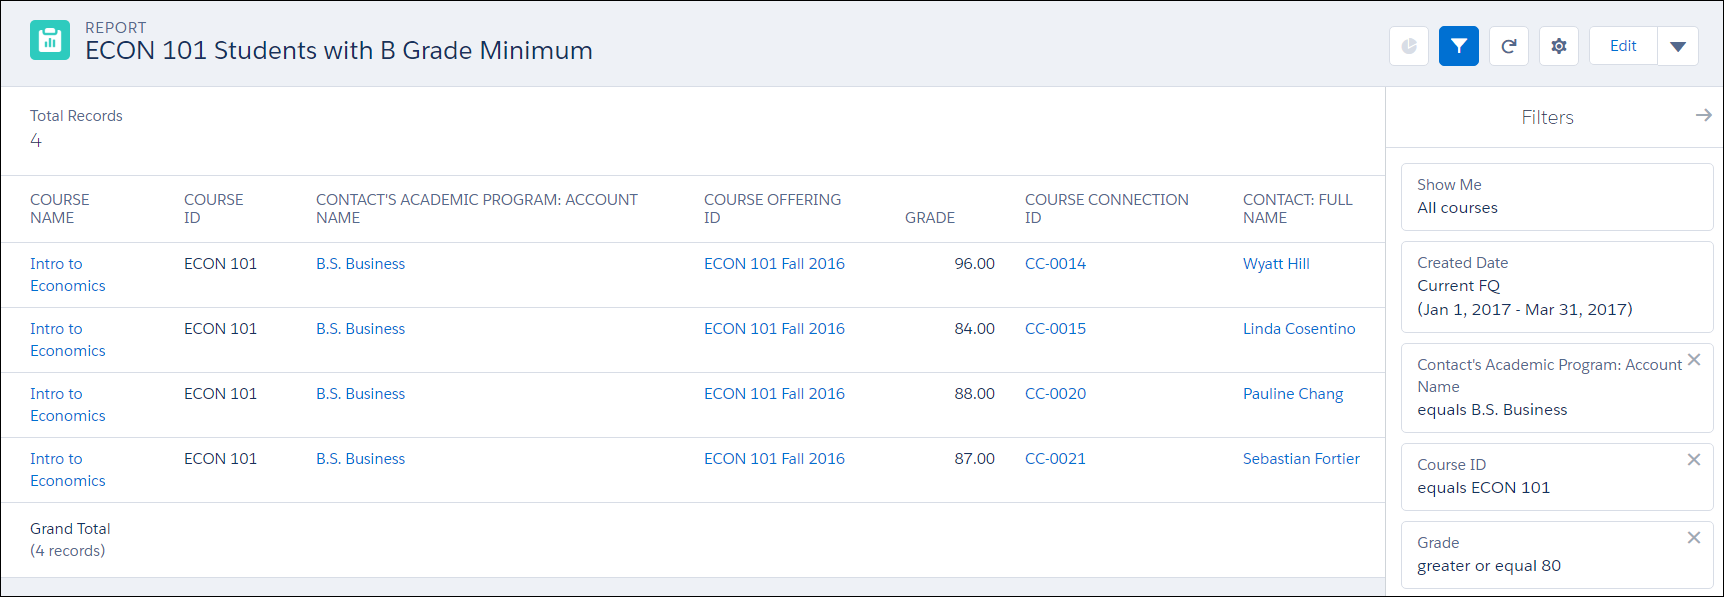
- Check your filtered results in the Preview pane. Only the students who meet your criteria should display.
 Note Make sure that the report options under Filters aren't restricting your data. For example, make sure that the Show menu is set to All Accounts, and the Date Range is set to All Time, so that your report includes all possible results, regardless of who created the records, or when.
 - Click Save to preserve your hard work on this report. Save it with a name like “ECON 101 Students with B Grade Minimum” and a description to make it easy to find in a Reports folder.
- Click Save. You can return to this report over and over again, and it will update automatically with any data you add or edit.
- Click Run Report.
Here you have it. A report of current B.S. Business students who earned a B or better in ECON 101. (In this example, there are four students.)
With all of the filtering options available in Salesforce reports, you can now take what you've learned from this use case and apply it broadly to similar situations to support student (and B school recruiter) success.