
You are here:
Marketing Cloud Engagement for Education
Use Marketing Cloud Engagement for Industries to its fullest potential and synchronize your Education Cloud CRM data with Marketing Cloud.
We recommend that you complete these integration steps with your Marketing Cloud admin.
- Create a Synchronized Data Source for Education Cloud
Create a synchronized data source to automatically add new and updated Education Cloud data to Marketing Cloud on a recurring basis. Synchronizing your data ensures that you always have the most up-to-date information available for your marketing efforts. - Populate Education Cloud Data Extensions With Automation Studio
Create automations to refresh your data extensions when your data source receives new data from Salesforce. - Set Up Emails with Marketing Cloud Engagement for Education
Marketing Cloud Engagement for Education provides email templates to help you efficiently set up your institution's email campaigns.
Create a Synchronized Data Source for Education Cloud
Create a synchronized data source to automatically add new and updated Education Cloud data to Marketing Cloud on a recurring basis. Synchronizing your data ensures that you always have the most up-to-date information available for your marketing efforts.
Create synchronized data sources for these objects: Account, Contact, Individual Application, Lead, Service Appointment, and User. Salesforce uses the fields on these objects in preconfigured email templates.
- Log into Marketing Cloud.
- Under Audience Builder, click Contact Builder.
- Click Data Sources.
- Click Synchronized.
- Click the available data source tile.
- Click Set Up Object.
- Click Synchronize on the Account tile.
- Select these fields:
- FirstName
- PersonEmail
- Phone
- LastName
 Note Required fields such as Id or RecordTypeId are selected by default.
 - Click Next.
- Select how to filter the synchronized data while considering your Marketing Cloud utilization limits. For information about those limits or increasing them, contact your account executive. Alternatively, manage your subscriptions.
- Select how often to synchronize data. We recommend every 15 minutes.
- Save your changes.
- If prompted, click OK to confirm the synchronization process.
- Repeat steps 6–13 for these objects and fields:
- Contact: FirstName, LastName, Phone
- Individual Application: ApplicationCategory, ApplicationType, AppliedDate, Category, Status
- Lead: FirstName, LastName, LeadSource, Name, Phone
- Service Appointment: AppointmentType, ApptBookingInfoUrl, Description, Duration, SchedEndTime, SchedStartTime, Status, StatusCategory, Subject
- User: CompanyName, Department, FirstName, LastName, Phone, SenderEmail, SenderName
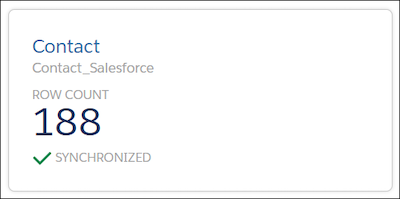
The synchronization sometimes takes several minutes depending on the number of records. After it completes, a tile shows a row count and a Synchronized status for each of the selected objects. Here's an example for the Contact object.
Populate Education Cloud Data Extensions With Automation Studio
Create automations to refresh your data extensions when your data source receives new data from Salesforce.
- Log into Marketing Cloud.
- Under Journey Builder, click Automation Studio, and then select New Automation.
- Drag Schedule to the Start with a Starting Source dotted circle, and then click Configure.
- Enter a start date and time for the automation, and then select your time zone.
- If needed, select a frequency, and then configure the cadence. Schedule this process to run daily or weekly, depending on how often you send emails, so that you have the most recent data.
- Click Done.
- Drag SQL Query onto the canvas, click Choose, and then select EducationCloudAccount.
- Enter this query:
select PersonEmail as PersonEmail, Phone as Phone, FirstName as FirstName, LastName as LastName from Account_Salesforce. - Click Done.
- Repeat steps 7–9 to add these activities:
- EducationCloudContact:
select Email as Email, Phone as Phone, FirstName as FirstName, LastName as LastName from Contact_Salesforce - EducationCloudIndividualApplication:
select Id as Id, AccountId as AccountId, ContactId as ContactId, ApplicationCategory as ApplicationCategory, ApplicationType as ApplicationType, Category as Category, Status as Status, AppliedDate as AppliedDate from IndividualApplication_Salesforce - EducationCloudLead:
select Email as Email, Phone as Phone, FirstName as FirstName, LastName as LastName from Lead_Salesforce - EducationCloudServiceAppointment:
select Id as Id, AccountId as AccountId, ContactId as ContactId, ApptBookingInfoUrl as ApptBookingInfoUrl, AppointmentType as AppointmentType, Subject as Subject, Description as Description, SchedStartTime as SchedStartTime from ServiceAppointment_Salesforce - EducationCloudUser:
select Email as Email, SenderEmail as SenderEmail, Phone as Phone, SenderName as SenderName, FirstName as FirstName, LastName as LastName, Department as Department, CompanyName as CompanyName from User_Salesforce
- EducationCloudContact:
- Save your changes.
- To test the automation, click Run Once.
Set Up Emails with Marketing Cloud Engagement for Education
Marketing Cloud Engagement for Education provides email templates to help you efficiently set up your institution's email campaigns.
Marketing Cloud Engagement for Education provides these email templates.
- Recruitment & Admissions - Application Deadline: Send automated emails to remind learners of upcoming application deadlines.
- Student Success - Appointment Confirmation: Send automated emails to confirm appointment details to learners after they schedule a meeting with your staff.
-
Alumni Engagement - Recent Graduate Portal Invitation: Send an email to invite recent graduates to join the alumni portal and to inform them of available resources, such as career services and groups.
-
Alumni Engagement - Institution Outreach Campaign: Send an email to alumni with information about your institution's mission, goals, and progress updates for capital campaign initiatives.
Create Emails Using Education Cloud Email Templates
Use preconfigured email templates or customize them to fit your needs.
- Log into Marketing Cloud.
- Under Content Builder, click Content Builder.
- Click Create, and then select Email Message.
- Select the Template creation option, and then click Saved.
- Select the template to use, and then click Select.
- Enter the email properties, and then click Next.
- Enter a subject and, if needed, a preheader to display text after the subject line in an email client. A preheader isn’t required, but effective preheader text can increase the number of recipients who open your email.
- If needed, edit the default text and personalize the email, and then click Next.
- If needed, preview the email and perform a test send.
- Save your changes.
Send Education Cloud Emails
After your emails are ready, choose when and who to send them to.
- Log into Marketing Cloud.
- Under Email Studio, click Email.
- Select the email that you created, and then click Send.
- If needed, enter email properties, and then click Next.
- Click Data Extensions, and then drag the object representing your subscribers to the Targeted section.
- In the Select Publication List window, if needed, select specific subscribers instead of all of them, and then click Select.
- Click Next, configure the timing for sending the email, and then click Next.
- Verify all the details of your email delivery. To make changes, click Back. When you’re happy with the setup, select This information is correct and this email is ready to send. and then click Schedule.
SEE ALSO