
You are here:
Configure Levels
Learn about NPSP Levels, how to create new level fields, how to secure and provide access to the Level object and fields, and how to add value to target picklists.
- About Levels
The NPSP Levels feature lets you track your constituents' level of commitment and engagement based on criteria such as total gifts or number of hours volunteered. - Set Object and Field-Level Security
Enable access to the Level object and its fields for each profile that will be using Levels. - Create Level Fields on Contacts, Accounts, or other Objects
To show Level and Previous Level on Contacts, Accounts, or other objects, create custom fields and add them to your page layouts. - Add Value to Target Picklist
When you create a Level structure, you choose the object that the Level structure applies to by making a selection in the Target field. By default, you can select Account or Contact. If you're tracking Level values on an object other than Account or Contact, add that object to the Target field on the Level object. - (Optional) Give Users Access to the npsp.LVL_LevelEdit Page
System Administrators have access to the npsp.LVL_LevelEdit Visualforce page by default, but other profiles don't. If you want users with other profiles to manage Levels, you must give them access to the Visualforce page.
About Levels
The NPSP Levels feature lets you track your constituents' level of commitment and engagement based on criteria such as total gifts or number of hours volunteered.
NPSP Levels uses the following objects:
-
Level (custom object): Each level record you configure indicates a particular level of commitment, for example, Gold, Bronze, or Silver, that you can then assign to your constituents.
Set Object and Field-Level Security
Enable access to the Level object and its fields for each profile that will be using Levels.
To set object and field access:
- Click
 , then click Setup.
 - Enter Profiles in the Quick Find box, then click Profiles.
- Click the name of the Profile you want to set security for.
- Click Edit.
- In the Custom Object Permissions section, select Read, Edit, Create, and Delete for the Level object. This gives all users with this profile full access to use Levels. Depending on the profile, you may want to grant different access.
- In the Custom Tab Settings section, select Default On to include the Level tab in your list of tabs or Default Off to make the tab accessible in App Launcher.
- In the Field-Level Security section, click View next to GAU Allocations.
- Make sure Read Access or Edit Access is checked for all fields. If not, click Edit and select the checkbox.
- Click Save.
Create Level Fields on Contacts, Accounts, or other Objects
To show Level and Previous Level on Contacts, Accounts, or other objects, create custom fields and add them to your page layouts.
These instructions are for the Account object, but they apply to Contact or any other object for which you want to display Levels.
- From Setup, click the Object Manager tab.
- In the list of objects, click Account.
- Click Fields & Relationships.
- Click New to create a new field to display Level.
- Give the field an appropriate name (we suggest Level).
- Select Lookup Relationship as the field type, then click Next.
- Select Level as the related object, then click Next.
- Enter a Description and Help Text, then click Next.
- Select the appropriate Field-Level Security for each profile, then click Next.
- Select Page Layouts to add the new field to, then click Next.
- If you don’t want to include the related list, deselect Add Related List, then click Save.
- Repeat these steps to create a second Lookup Relationship field called Previous Level.

Once you've created Level structures, the values of the Level and Previous Level fields on Account, Contact, or other objects you configured are automatically updated every night by a batch job. Learn more in Create and Manage Levels.
Add Value to Target Picklist
When you create a Level structure, you choose the object that the Level structure applies to by making a selection in the Target field. By default, you can select Account or Contact. If you're tracking Level values on an object other than Account or Contact, add that object to the Target field on the Level object.
First, find the API name of the object you plan to add. In this example, we're using the Affiliation object, but the instructions apply to any object:
-
From Setup, click the Object Manager tab.
-
From the list of objects, click the name of the object you wish to add, for example, Affiliation.
-
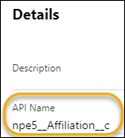
Make a note of the API Name of the object. In this example, it's npe5__Affiliation__c.
Now add that value to the Target picklist on the Level object:
-
From Setup, click the Object Manager tab.
-
From the list of objects, click Level, then click Fields & Relationships.
-
Click Target.
-
In the Values related list, click New, then enter the API name of the object you want to add. In this example, we enter npe5__Affiliation__c.
-
Save your changes.
(Optional) Give Users Access to the npsp.LVL_LevelEdit Page
System Administrators have access to the npsp.LVL_LevelEdit Visualforce page by default, but other profiles don't. If you want users with other profiles to manage Levels, you must give them access to the Visualforce page.
This page is required to use the New and Edit buttons on Levels.
- From Setup, enter Profiles in the Quick Find box, then click Profiles.
- Click the name of the Profile you want to edit.
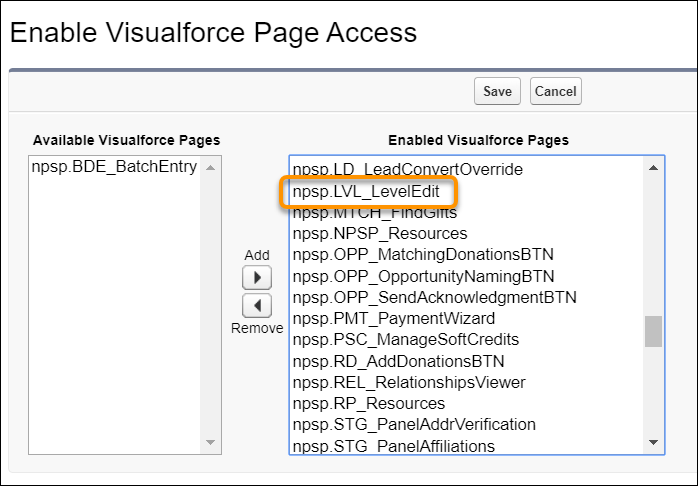
- In the Enabled Visualforce Page Access related list, click Edit.
- Move npsp.LVL_LevelEdit into the Enabled Visualforce Pages list.
- Click Save.
- Repeat for each profile that needs access to Levels.
