You are here:
Configure the Registration and Login Pages
Set up the registration and login pages of your fundseeker portal.
- Update the Logo
The Fundseeker Starter Portal site template comes with a fictitious logo on the Registration and Login pages, which you can update with your own. - Change the Background
The background for the login and registration pages are light gray (RGB 250, 250, 250) by default, but this can be changed. - Configure the Registration Page
The out-of-the-box registration page includes several components, including Rich Content Editors and Self-Registration. - Configure the Login Page
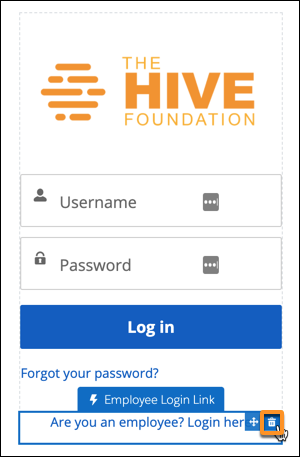
The login page includes two Rich Content Editors, Login Form, and Employee Login Link. Similar to the registration page, this page can be configured to meet your organization’s needs and branding.
Update the Logo
The Fundseeker Starter Portal site template comes with a fictitious logo on the Registration and Login pages, which you can update with your own.
-
Click
 , then click Setup.
 -
Enter Digital Experiences in the Quick Find box, then click All Sites.
-
Click Workspaces for your site.
-
Click Administration.
-
Select Login & Registration.
-
Next to Logo File, click Choose File.
-
Select your organization’s logo then click Open.
Change the Background
The background for the login and registration pages are light gray (RGB 250, 250, 250) by default, but this can be changed.
-
Click
, then click Setup. -
Enter Digital Experiences in the Quick Find box, then click All Sites.
-
Click Builder next to your site.
-
Click
 , then click Images.
 -
Click the Background Image box.
-
Click Upload Image.
-
Select an image file to display in the background of the login and registration page, then click Open.
-
Click Add.
Configure the Registration Page
The out-of-the-box registration page includes several components, including Rich Content Editors and Self-Registration.
-
In Experience Builder, click
 next to Home.
 -
Click Login, then Register.
Let's add a welcome message to new registering users and add the ability for the user to create a password.
-
Click Rich Content Editor.
-
Click Edit Content.
-
 Note The Rich Content Editor also lets you change the size, formatting, and alignment of the text.
 -
Click anywhere to close out of the Rich Content Editor.
Lastly, let's add a password field to the registration page.
-
Click Self Registration.
-
Select Include Password Field?
Configure the Login Page
The login page includes two Rich Content Editors, Login Form, and Employee Login Link. Similar to the registration page, this page can be configured to meet your organization’s needs and branding.
For example, if you doesn't need the Social Login component, you can remove it.
-
Click Login.
-