
You are here:
Build Out Your Student Portal
Add components to new and existing pages in a Student Success Hub portal, and customize the site for overall usability.
Every portal is unique, guided by what your students need to be successful. To help you get started, here are a few examples of basic functions that you'll likely want to include in your site. You'll drag ready-to-use Student Success Hub Lightning components onto new or existing pages—such as support staff User profile pages, the Home page, and your own custom pages. We'll walk through how to add and configure components in the Experience Builder workspace, and recommend customizations for enhancing overall usability.
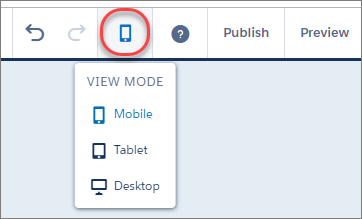
To optimize your student portal for mobile use, remember to confirm that the layout of components and pages works well on both large and small mobile devices. In the Experience Builder header, use the View Mode menu to toggle between device views.
- Add the Support Staff Appointment Settings Component to an Existing Page
Let's add the SSH Support Staff Appointment Settings component to the support staff User Profile page so students can see appointment availability information for support staff users. - Add the Success Team Component to a New Page
Let's create a custom page that displays the SSH Success Team component. - Restrict Users' Access to Admin Tools
We recommend hiding the App Launcher in your student portal to prevent members from accessing administrator tools. - Optimize the Support Staff User Profile Page
When students go to a support staff member's User Profile, they usually want to check on appointment availability or schedule an appointment with that person. The User Profile's default layout is not ideal for these purposes. It shows unnecessary detail and isn't optimized for mobile viewing. Less is more for our purposes, so consider replacing the User Profile component with the simpler User Profile Detail component. - Create Additional Entry Points to the Scheduling Wizard
To allow students to access the Scheduling Wizard from somewhere in the portal besides the Schedule an Appointment button in preconfigured components, add links to the Scheduling Wizard.
Add the Support Staff Appointment Settings Component to an Existing Page
Let's add the SSH Support Staff Appointment Settings component to the support staff User Profile page so students can see appointment availability information for support staff users.
- In the site's Workspaces view, click Builder to open Experience Builder.
- Click the Pages menu and select the User Profile page.
-
Click the Components icon (
 ) in the sidebar, scroll to the SSH Support Staff Appointment Settings
component, and drag it to the editable content region of the page.
) in the sidebar, scroll to the SSH Support Staff Appointment Settings
component, and drag it to the editable content region of the page. -
Confirm that the component looks good by checking the page on both large and small devices.
- Publish your changes.
While you're at it, feel free to add other components, such as the SSH User Profile Schedule Button Component for convenient scheduling from this page, or the SSH Success Plans Component for a quick view of any Success Plans applied to a student.
Add the Success Team Component to a New Page
Let's create a custom page that displays the SSH Success Team component.
- In Experience Builder, click the Pages menu and select New Page at the bottom of the menu.
- Select a page type. In our example, a standard page that's based on a blank layout is appropriate for the Success Team component, so click Standard Page.
- Select a layout. Let's keep things simple and click 1 full-width column.
- Then click Next, give the page a unique name (such as My Team), and specify the static portion of the page's URL.
- Click Create.
-
Click the Components icon (
) in the sidebar, then scroll to the SSH Success Team component and drag
it to the editable content region of the page -
Confirm that the component looks good by checking the page on both large and small devices.
 Tip When the page loads, you might see an error about not being able to show the success team. You can ignore this message throughout most of the setup process; the error is normal and expected. Assuming you're working in Experience Builder as a System Administrator, the error shows because you're previewing the page as a User who doesn't have anyone on their success team. When you've finished configuring your pages and components, preview the site as a student and verify that the error doesn't occur.
 -
If you want the navigation menu to show a link to the new page, add the page to the menu after you've published the site but before you activate it.
-
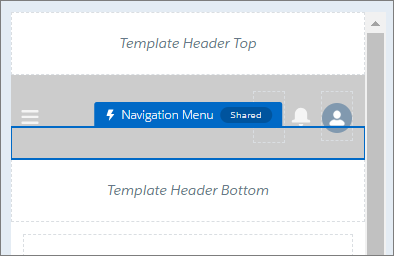
While viewing any page, hover on and click the Navigation Menu header.
- In the Navigation Menu component property editor, click Edit Default Navigation.
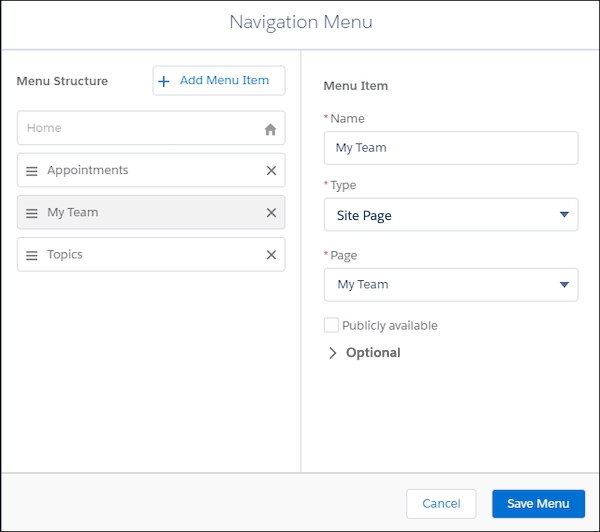
- Click Add Menu Item.
-
Specify the fields required to add My Team as a Site Page, and position the item in the order you want.
 Tip
TipTo nest a menu item under another menu item, create a top-level menu item with the Menu Label type. Then take the menu item you want displayed as a submenu and drag it to the right under the menu label. For example, nest My Team under Resources.
- Click Save Menu.
-
Click the menu icon (
 ) to expand the navigation menu, and verify that My Team
appears.
) to expand the navigation menu, and verify that My Team
appears.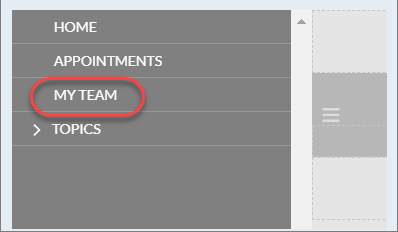
- Publish your menu changes.
-
Now that you have the hang of adding a new page, go ahead and add other custom pages that might be valuable to your students. For example, you might want to add a Scheduling Wizard page where students can schedule an appointment, or a Success Plan page where they can view a list of their assigned Success Plans.
Restrict Users' Access to Admin Tools
We recommend hiding the App Launcher in your student portal to prevent members from accessing administrator tools.
-
In Experience Builder, hover on the Navigation Menu header that contains the App Launcher icon.
 Note If you don't see the App Launcher or the Navigation Menu on the page, you may be working in a template that predates the introduction of the Navigation Menu.
 -
Click the header to display the Navigation Menu component property editor, and then select Hide App Launcher in header.
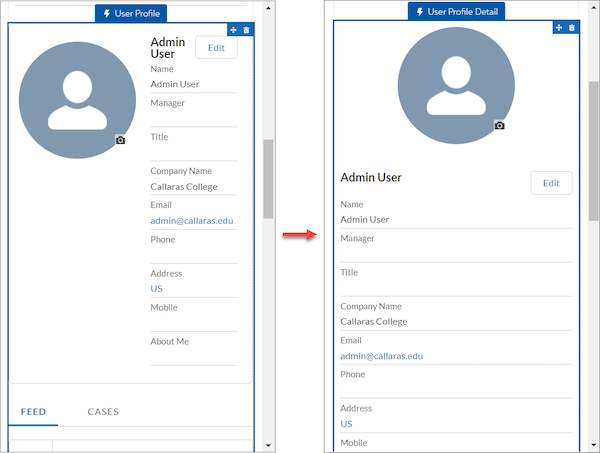
Optimize the Support Staff User Profile Page
When students go to a support staff member's User Profile, they usually want to check on appointment availability or schedule an appointment with that person. The User Profile's default layout is not ideal for these purposes. It shows unnecessary detail and isn't optimized for mobile viewing. Less is more for our purposes, so consider replacing the User Profile component with the simpler User Profile Detail component.
- In Experience Builder, from the Pages menu, go to the User Profile page.
- From the Components menu, drag the User Profile Detail component to the editable content region of the page, above the existing User Profile component.
- Compare the two, and if you share our preference for the more concise Detail version, delete the User Profile component.
- Publish your changes and view the page as a student to verify.
-
To further optimize the layout of the component, such as to remove or reorder fields, edit the page layout.
- From Setup, in Object Manager, click User.
- On the User Profile Page Layouts page, click New. (Make sure that you're not on the User Page Layouts page.)
- Base the layout on any appropriate layout, such as the default User Profile Layout.
- In the page layout editor, remove unnecessary fields and related lists, and rearrange fields as desired. For example, remove Company Name, Manager, and Address, and move up the Phone, Email, and About Me fields.
- Save your changes.
- Assign the page layout to the student profile you're using.
- View the page again as a student to verify your changes.
Create Additional Entry Points to the Scheduling Wizard
To allow students to access the Scheduling Wizard from somewhere in the portal besides the Schedule an Appointment button in preconfigured components, add links to the Scheduling Wizard.
For each page, add the Rich Content Editor component to the desired region on the page, enter a text string (such as Schedule Appointment), format it as a hyperlink, and specify the Scheduling Wizard page URL, such as /scheduling-wizard. Remember to publish the pages that you've updated.