You are here:
Review How Students Experience the Portal (Support Staff)
Understand what students can do in a Student Success Hub portal.
Your school's portal is the online collaboration space where students go to connect with their success teams and get things done. Students can grab their smartphones and schedule appointments, access support resources, and stay current on their assigned Tasks. Here are some highlights of the student's experience in the portal.

- Managing Appointments in the Portal
Students can schedule individual appointments, reserve a spot in a group appointment, and manage their appointments in the portal. Here's an overview of their experience. - How Group Availability and Reservations Work in the Portal
The Scheduling Wizard is smart. It tracks how full group appointments are, and shows or hides group availability accordingly. - Viewing Success Team Membership in the Portal
Students can see who's on their success team so they know who to ask for help. - Managing Success Plans in the Portal
Students can see a list of their assigned and published Success Plans on a page in the portal. The page looks a little different on a mobile device than on the desktop, but it offers similar functionality in both experiences. - Managing Assigned Tasks in the Portal
The ability to access Tasks in the portal helps students discern and act on their most important to-do items. - Viewing and Creating Program Plans in the Portal
If your Student Success Hub administrator has set up Pathways, your students can view Program Plans to make sure they're on the path to graduation. Students see the details of a Program Plan in an easy-to-read summary. They can also create Personal Program Plans to map out how they'll complete a Program Plan. - Collaborating and Communicating in the Portal
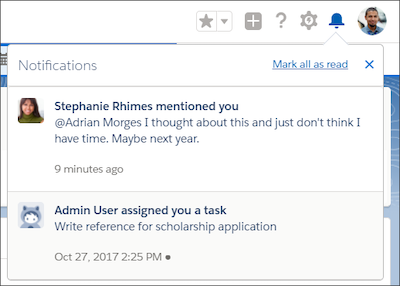
Support conversations don't have to be limited to scheduled appointments. Your student portal offers students an easy way to ask a quick question or follow up on an open issue from a past appointment. In this example, our student, Stephanie, gets back to academic counselor Adrian after thinking about a peer tutoring opportunity.
Managing Appointments in the Portal
Students can schedule individual appointments, reserve a spot in a group appointment, and manage their appointments in the portal. Here's an overview of their experience.
Students can view lists of upcoming, past, and canceled appointments. They can join virtual meetings with the tap or click of a button. They can also add or edit comments about what they want to discuss at upcoming appointments. Students see their comments on Appointment Detail pages if those pages are published. You can see student comments in the Appointment Manager and, if your admin has configured it, on the Appointment Attendee page in the Student Success Hub app.
Depending on how your Student Success Hub administrator has configured the portal, students might be able to click the appointment subject or topic to view the appointment details. They might also be able to see an Agenda tab with a list of their scheduled appointments, calendar events, and courses.
Students can have different scheduling options depending on the type of appointment that they want and what your Student Success Hub admin has configured in the portal. Typically, these are the ways that students can schedule appointments.
- While checking their upcoming and past appointments, students can schedule an appointment with someone on their success team or in a Support Pool, or reserve a spot in a group appointment.
- While looking up information on a staff member's User profile page, students can schedule an individual appointment with that person or reserve a spot in a group appointment.
- While looking up information about a support department that may not be represented on their success team, such as Career Services, students can schedule an appointment with someone in that Support Pool.

Scheduling a one-on-one appointment in the portal is easy. The Scheduling Wizard guides students through the process, including selecting an appointment time that works for everyone. Students can also find and reserve spots in appointments that you've defined in Group availability blocks.
Here are a few things to know about how students schedule and manage appointments.
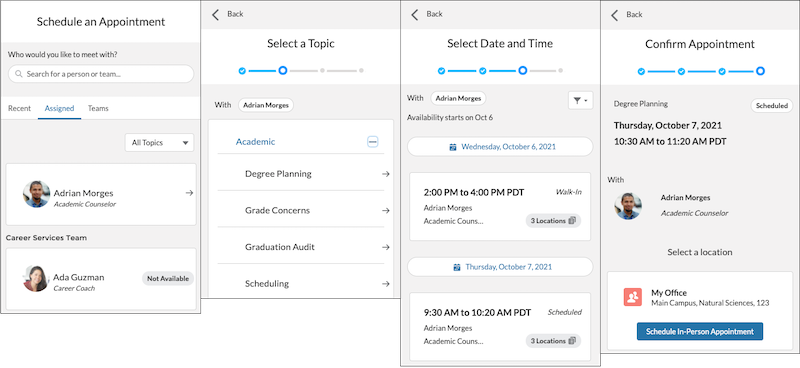
- When scheduling an appointment, students first see a list of Recent or Assigned support staff members. The Recent tab shows up to five people with whom the student has met in the last six months. On the Assigned tab, students can either immediately filter the list by the topic that they want to discuss, or select someone and then select a topic and subtopic. After selecting the person, topic, and subtopic, they select a date and time and, finally, a location.
-
Students can also use the Search field to find any support staff member assigned to them: an individual member of their success team or someone on a case team (in an assigned Support Pool). Autocomplete helps students quickly find the person that they're looking for, even before they finish typing the name. Results show alphabetically by first name.
- Students can schedule appointments only with support staff who have created availability blocks, and they can schedule appointments only on the topics that the staff member has defined in those blocks. They can't schedule appointments for times or topics that someone is unavailable.
Students can reschedule appointments only with staff members who are directly assigned to the relevant case record. To reschedule an appointment with a staff member who is not assigned to their case record, students can cancel the original appointment and schedule a new one instead of using the reschedule function.
- Although students can see a staff member's walk-in availability, they can't actually schedule a walk-in appointment. They can drop by the person's office during walk-in availability hours, and you can log the walk-in appointment from the Appointment Manager.
-
If no one on a student's success team is available to meet about a topic and you're using unassigned Support Pools, then the student can schedule an appointment with individuals in the unassigned Support Pool by selecting the Teams tab on the first page of the wizard.
- Students who are willing to meet with anyone from their predefined teams can select Anyone on this team, then select the topic, date, time, and location for the appointment. They can choose from all scheduled, walk-in, and group appointments for all predefined team members who have availability to meet about that topic.
-
Students can use the Back button to return to earlier steps and change their selections. A progress bar at the top of every page helps them see how many steps are left to schedule the appointment.
-
When selecting the appointment date and time, students see the staff member's availability for 30 days from the current or selected date. Dates and times show in chronological order.
- When there are multiple locations, topics, availability types, and staff members, students can see and choose from all their options, and filter on specific ones.
The Scheduling Wizard provides immediate confirmation of scheduled appointments. On the confirmation page, students can click a button to add comments or to go to a list of their upcoming appointments. Students also receive an email confirmation.
In addition, when an appointment is scheduled, the staff member's calendar is updated and the staff member also receives an email (unless otherwise specified in the staff member's email notification preferences). Student Success Hub doesn't send email confirmations for walk-ins.
How Group Availability and Reservations Work in the Portal
The Scheduling Wizard is smart. It tracks how full group appointments are, and shows or hides group availability accordingly.
If at least one spot is available, the Scheduling Wizard shows group appointment availability to all of your students. If your Attendee Limit is 10, for example, the appointment shows in the wizard until 10 students reserve a spot. When the appointment is full, it no longer appears, and no one else can sign up. When a student reschedules or cancels a reservation, the wizard allows another student to reserve the newly-opened spot.
To ensure that students can't double-book a spot, after they make a reservation, they no longer see that appointment available in the wizard.
Students see the Group Appointment badge, rather than the Scheduled Appointment badge, on all group appointment cards in the portal (including group appointments created by support staff).
If all students reschedule or cancel their reservations, the last attendee to reschedule or cancel cancels the appointment itself. The Scheduling Wizard reflects the updated availability.
Attendees can leave comments for group appointments just as they can for other appointments.
In the Appointment Manager, the status for students who cancel a reservation shows as Declined.
Viewing Success Team Membership in the Portal
Students can see who's on their success team so they know who to ask for help.
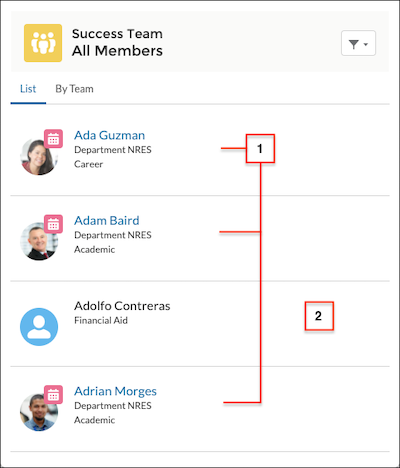
Students can interact directly with any success team member who is a User [1]. They can schedule an appointment with and post questions to success team member Users. Success team members who are Contacts [2] are viewable but only reachable offline, outside of the portal. Students can view their success team members in an alphabetical list or grouped by how they were assigned to the student—as individual members of the success team or as members of a predefined case team. The Success Team list can also be filtered by role to show success team members by type.
Managing Success Plans in the Portal
Students can see a list of their assigned and published Success Plans on a page in the portal. The page looks a little different on a mobile device than on the desktop, but it offers similar functionality in both experiences.
The Success Plans list is organized by type—Academic, Career, Health, and Housing, for example. Active, completed, and canceled Success Plans are all included. A filter button lets students hide or show closed (completed or canceled) Success Plans.
Students can expand any section to see the Success Plans that need the most attention and, most importantly, take action! For any Success Plan, they can:
-
See how many Tasks remain, how many are overdue, and which Task needs to be completed next.
-
Click to view the details of the Success Plan or Task.
-
Mark a Task as complete.
Managing Assigned Tasks in the Portal
The ability to access Tasks in the portal helps students discern and act on their most important to-do items.
When a success team member assigns a Task to a student, the next time the student logs in to the portal, they see a notification in the header that lets them know they have work to do.
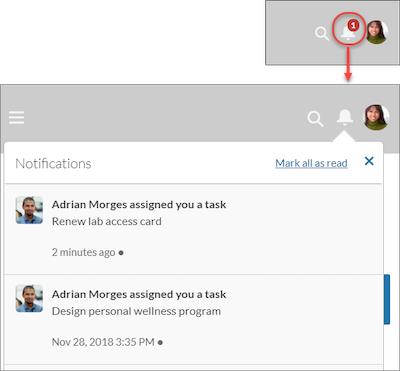
Students simply click a notification to see Task details.
Your Student Success Hub administrator has likely also set up a way for students to see the Tasks that are assigned to them in a Success Plan, organized by priority and due date. Students may also be able to see their Success Plan Tasks interspersed with one-off Tasks.
Viewing and Creating Program Plans in the Portal
If your Student Success Hub administrator has set up Pathways, your students can view Program Plans to make sure they're on the path to graduation. Students see the details of a Program Plan in an easy-to-read summary. They can also create Personal Program Plans to map out how they'll complete a Program Plan.
Students go to the My Programs page to see a list of all their Program Enrollments.
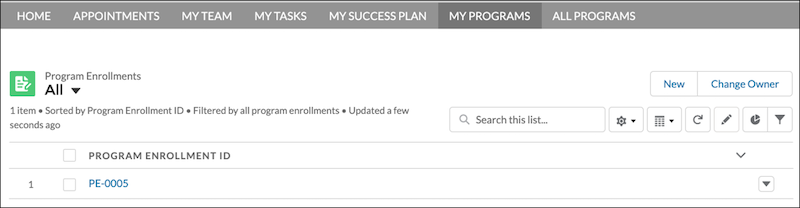
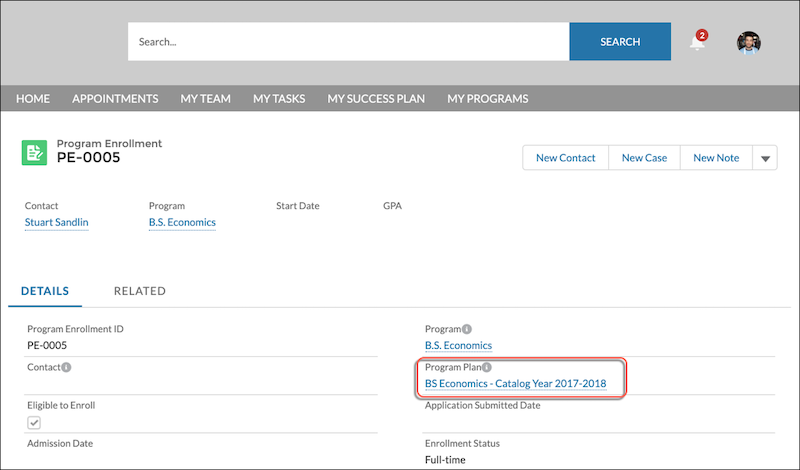
From there, they can click a Program Plan to view its details.
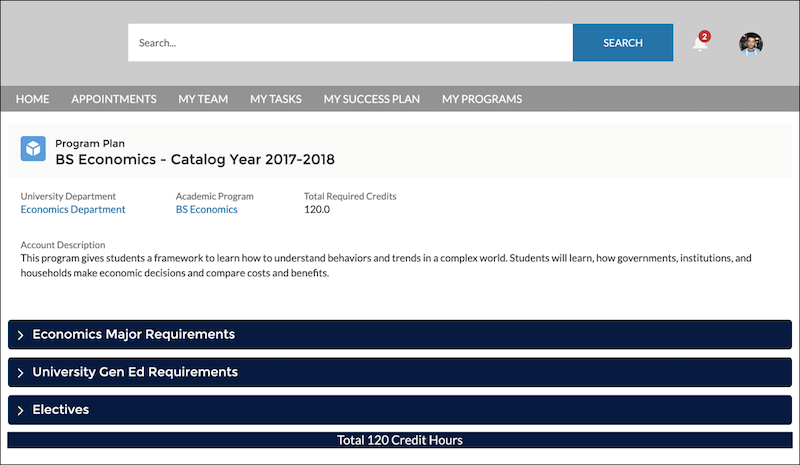
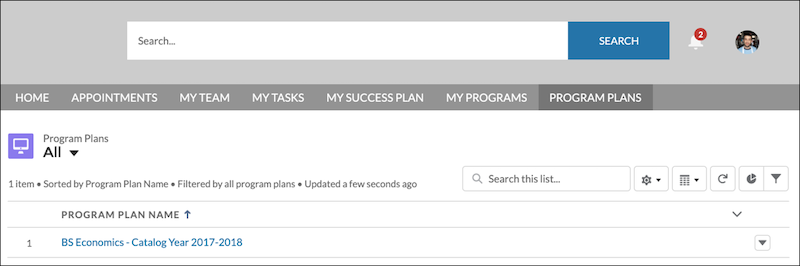
They can also view all Program Plans from the Program Plans page.
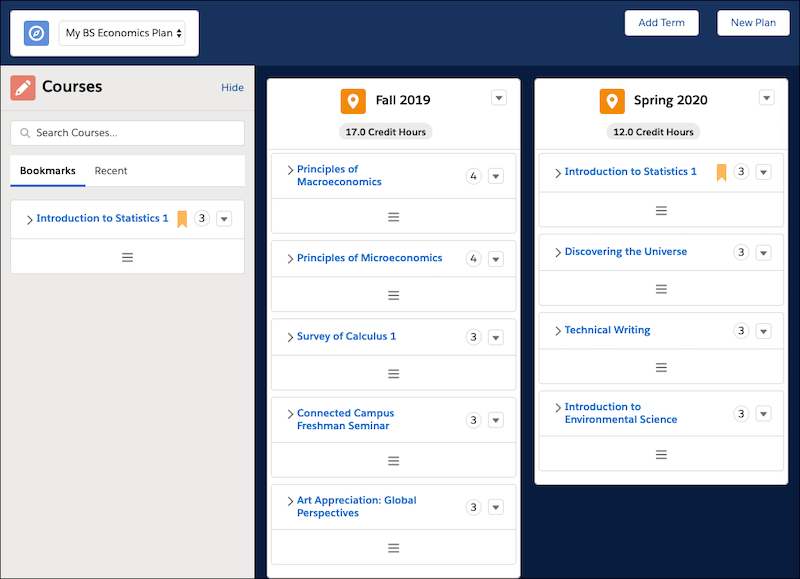
To create their own Personal Program Plan, they can go to the Plan Builder tab. From here they can create plans with terms and courses to plot their path to complete the program. Students can even create multiple plans—like one with a summer term and one without.
Collaborating and Communicating in the Portal
Support conversations don't have to be limited to scheduled appointments. Your student portal offers students an easy way to ask a quick question or follow up on an open issue from a past appointment. In this example, our student, Stephanie, gets back to academic counselor Adrian after thinking about a peer tutoring opportunity.
Stephanie posts on the appointment where she and Adrian discussed the topic. After she shares the post, Adrian gets notified in Student Success Hub and via email. He makes additional notes or schedules follow-ups as needed.