
You are here:
Translate Volunteers for Salesforce into Other Languages or Customize Terminology
To help Volunteers for Salesforce speak the language of your volunteer program, you can replace the existing onscreen text (labels) with alternate text that uses your organization's terminology. Or you can translate all terms in the app into another language.
V4S is available in these languages:
- Dutch (nl_NL)
- English (en)
- French (fr)
- German (de)
- Japanese (ja)
- Spanish (es)
Enable the Translation Workbench
Use the Translation Workbench, a standard Salesforce tool, to manage translations into other languages and custom terms in the same language. Enable it for the languages you support, and then see how it handles common tasks for translation and customizing terminology.
- From Setup, enter Translation Settings in the Quick Find box, then select Translation Language Settings.
-
If this is your first time enabling the Translation Workbench, click
Enable.
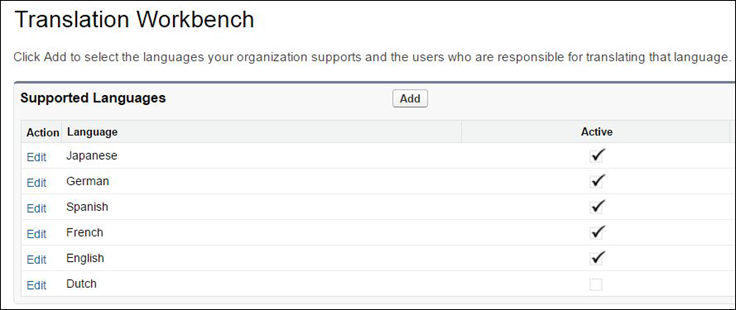
The Translation Workbench displays the supported languages.
-
For each language you support:
- Either Edit an existing supported language or Add a new one.
- If you're adding translations for a language, assign translators by moving users' names to the Selected List.
- While the translation is in progress, leave the Active setting disabled. Remember to come back when the language is ready for use and make it Active, which makes it available to users who choose it as their personal language.
- Save your changes.
Override the Term for a Field or Button
A common terminology task is replacing an out-of-the-box term with your own term. Let's override a term for a button to see how to do overrides in the same language.
- From Setup, enter Override in the Quick Find box, then select Override.
-
Specify the item to override.
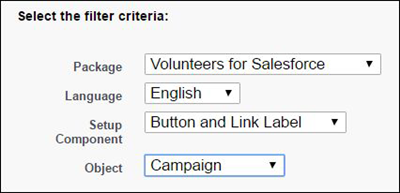
- Select the Volunteers for Salesforce Package.
- Select the Language.
- Select a Setup Component from the list of translatable customizations. Only certain components can be overridden or translated.
-
Select the Object that has the item to override. This final criteria
determines which values can be changed.
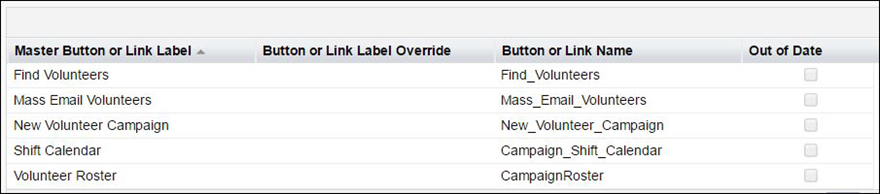
- Double-click in the Label Override column, in the appropriate row, and enter the new label value.
- Repeat the label override as need for other items.
- Save your changes.
Edit Custom Labels
The Volunteers for Salesforce Sites pages use labels whose values can be changed. While you can't directly edit these label values, you can override the default value by "translating" them into English or any of our other supported languages.
For example, you may want to translate some of these labels:
| Label | Description | Site page the label appears on |
|---|---|---|
| labelColorValues | The color scheme for Jobs and Shifts on the JobCalendar. | GW_Volunteers__JobCalendar |
| labelContactInfoLookupTitle | The title for the Contact Info lookup form. | GW_Volunteers__PersonalSiteContactLookup |
| labelContactLookupInstructions | Instruction text for filling out the Contact Info lookup form. | GW_Volunteers__PersonalSiteContactLookup |
| labelEventInThePast | The text that displays for past shifts. | GW_Volunteers__VolunteersJobListingFS |
| labelExternalSignupURL | The link text for an External sign up URL. | GW_Volunteers__VolunteersJobListingFS |
| labelPersonalSiteContactInfoTitle | The link text for viewing your information on the Personal Site page. | GW_Volunteers__PersonalSiteContactInfo |
| labelPersonalSiteJobCalendarTitle | The text for the Job Calendar link at the top of the Personal Site page. | GW_Volunteers__PersonalSiteContactInfo |
| labelPersonalSiteJobListingTitle | The text for the Job Listing link at the top of the Personal Site page. | GW_Volunteers__PersonalSiteContactInfo |
| labelPersonalSiteReportHoursTitle | The text for the Report Hours link at the top of the Personal Site page. | GW_Volunteers__PersonalSiteContactInfo |
| labelPersonalSiteTitle | The title that appears on top of the Personal Site page. | GW_Volunteers__PersonalSiteContactInfo |
- From Setup, enter Custom Labels in the Quick Find box, then click Custom Labels.
- In the list of labels, click the name of the label you want to edit.
- Click New Local Translations/Overrides.
- Select your language.
- In the Translation Text box, enter the label you want to use.
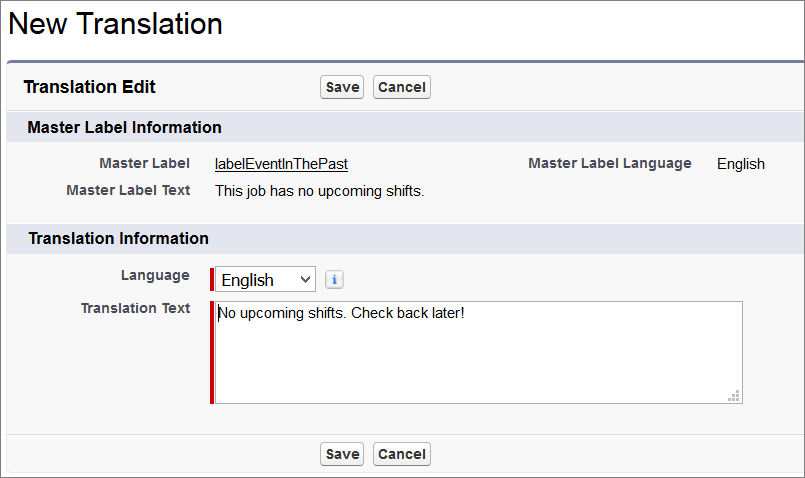
- Click Save.
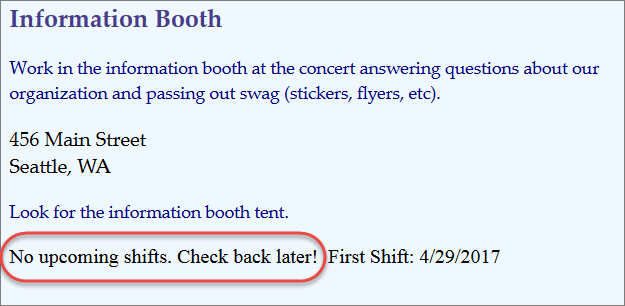
If you go to the Site page where this label is used, you see the new text.
Translate the Contact Volunteer Skills Picklist
Translate the values in a picklist so that you see how to translate terms into another language.
- From Setup, enter Translate in the Quick Find box, then select Translate.
-
Specify the item to translate.
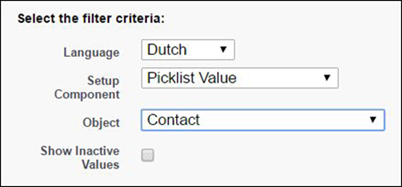
- Select the language you're translating into.
- Select Picklist Value for Setup Component.
- Select the Contact Object.
- Find Volunteer Skills in the menu, then click +.
-
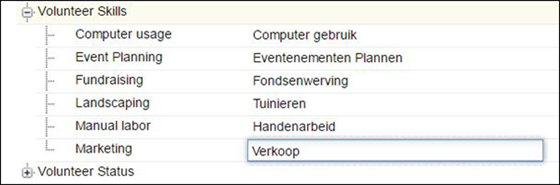
Double-click in the Label Translation column for each term, and enter the
translation for the picklist value.
- Repeat the label translation as needed for other items.
- Save your changes.
Export All Translatable Terms for a Language
Export a translation file for a language to generate a list of all the translatable terms. The exported file can help your first-time translations and also help translators stay on top of label changes that affect their translations.
- From Setup, enter Export in the Quick Find box, then select Export.
- Select Bilingual.
- Click Export.
- Look for the email from Salesforce confirming the export is done.
- If you're working in Lightning Experience, switch to Salesforce Classic so you can access Documents.
- Go to the Documents tab. If you don't see the Documents tab, click the + icon at the end of the tab bar, then click Documents in the list of All Tabs.)
- Go to the My Personal Documents folder. Next to the name of your exported .zip file, click View to save the file to your computer.
- On your computer, extract the .zip file to get a translation file for each language that your Salesforce org has enabled. .stf files are tab-delimited text files in the Salesforce translation format.
- We recommend renaming the file extension from .stf to .txt, so that when you open it in a spreadsheet program like Microsoft Excel, you can specify how the file is structured. If you're warned that renaming file might cause it to become unusable, confirm that you do want to rename it.
-
Open the file in your spreadsheet program.
 Tip If your spreadsheet program can't locate the .txt file, verify that it's looking amongst all file types, not just its own proprietary format.
 - Follow your program's instructions for importing the data. The following steps assume you're using Excel.
- Choose the Delimited file type, with Tab delimiters.
-
Review both sections in the file to plan your edits.
- Translated terms
-
Update a translation by overwriting the current translation, in Column C.
- Untranslated terms
-
Specify a translation by overwriting the values in Column B.
- Save your changes in the spreadsheet. If asked whether to keep it in the current format, choose Yes.
- Close Excel. If asked whether to save again, choose No.
- If you renamed the file extension from .stf to .txt, rename it again to .stf.
-
Clean up a formatting issue that Excel introduces.
- Open the file in a text editor such as Notepad.
- Open the text editor's feature that lets you find and replace text.
- Find all double quotation marks (") and replace them with no value.
- Using the text editor's Save As option, specify that the file uses UTF-8 encoding.
- Save the file.
Import a Translation File
Import an edited translation file back in to Volunteers for Salesforce to add or update your language translations.
- From Setup, enter Import in the Quick Find box, then select Import.
- Click Choose File.
- Select the .stf export file that you created or select a .zip file containing multiple .stf files.
- Click Import.
- Look for the email from Salesforce confirming a successful import or reporting import errors. If there are errors, look in the Documents tab for details.
