
You are here:
Add the Quip Document Component to a Lightning Page
You can use the Lightning App Builder to add the Quip Document component to a Salesforce Lightning page.
Required Editions
| Available in: Lightning Experience |
| User Permissions Needed | |
|---|---|
| To add the Quip Lightning component: | Administrator Permissions |
Before you add a document:
- To configure different documents for a Salesforce record, create a custom field. To configure different templates, you can create a second custom field to store the template URL.
- Connect your Quip and Salesforce accounts.
Important Quip is retiring slides on
January 31, 2021. After this date, existing slides are view-only and new ones can’t be
created. Tell Me More
- Navigate to the Salesforce page where you want to add a Quip Document component, such as a customer’s Account page.
- Click the gear icon, and select Edit Page to go to the Lightning App Builder.
-
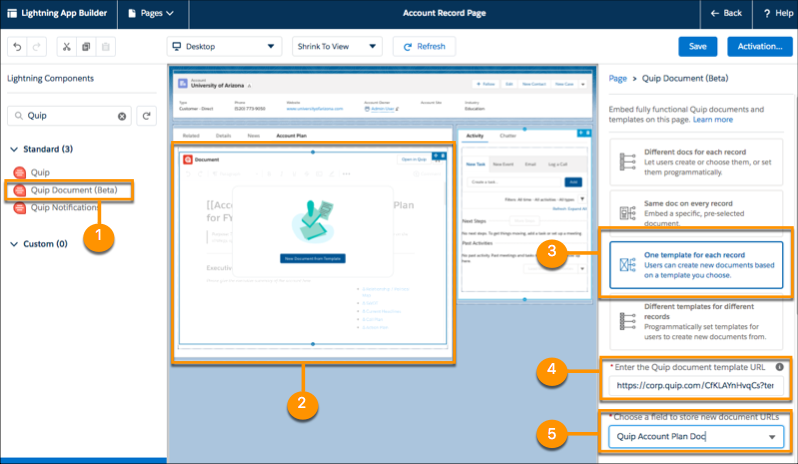
In the left pane, select Quip Document (1) and drag it to your
canvas (2). The right pane shows the four Quip Document component configuration options with
the "One template for each record" option (3) selected.
-
In the right pane, select a configuration option that describes how you want the document to behave, and
enter values into the required fields. The required fields depend on the option you
chose.
Different docs for each record Enter the name of the custom field that stores the document URL. Users can either embed existing documents or create and embed new documents from scratch or from templates. Administrators can optionally pre-populate a field with a specific document if they create an Apex trigger on the field or use Flow Builder or Process Builder. Same doc on every record Enter the URL of the document. For users, the document is embedded on the page and every record associated with it. One template for each record Select a template from the Template Library or enter the template URL(4). Select or create the custom field that stores the document URL (5). Users create documents on each record based on the template. Different templates for different records Enter the name of the custom field that stores the document URL and the name of the field that stores the URL of the Quip template. Administrators are required to prepopulate the template field. They can create an Apex trigger on the field or use Flow Builder or Process Builder. Users choose which template to create a document from. -
If you selected One template for each record, click
 .
.
-
To choose a template in the Template Library, use the Template Library section. Select a
gallery name, then the template name, and click Next.
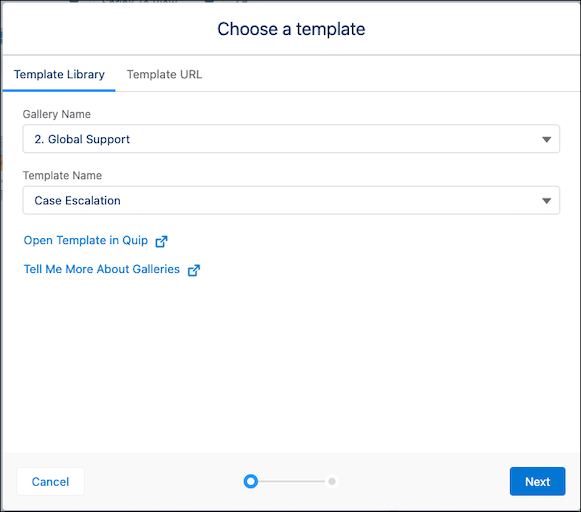
- To enter a template URL, select Template URL. Enter the URL and click Next.
-
To make sure that your template is ready to add to the component, validate the template.
The validation checks that you have access to the document, that link sharing is turned on,
that the document is marked as a template, and that it isn’t a slide.
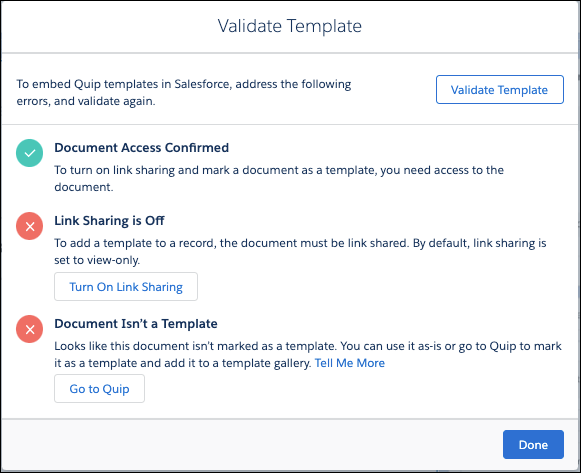
- To create a document from a template, users need view access to the source template. To turn on view-only link sharing for your document from the Lightning App Building, click Turn On Link Sharing,
- To differentiate regular documents from templates and keep your templates organized, click Go to Quip, and mark your document as a template.
- After you address the errors, click Validate Template, and click Done.
-
To choose a template in the Template Library, use the Template Library section. Select a
gallery name, then the template name, and click Next.
-
Specify whether other users can view, edit, or request access to documents created from the
template.
 Tip Turn on Synced Sharing to manage user access to documents created from a template or linked to a Salesforce record. Tell Me More
 - (Optional) Enter a custom label for the embedded document in the Custom Component Label field.
- Enter the component’s pixel height. See Component Size Recommendations
- Click Save, and click Activation.
- On the Activation: Account Record Page, click Assign as Org Default and close the page.
-
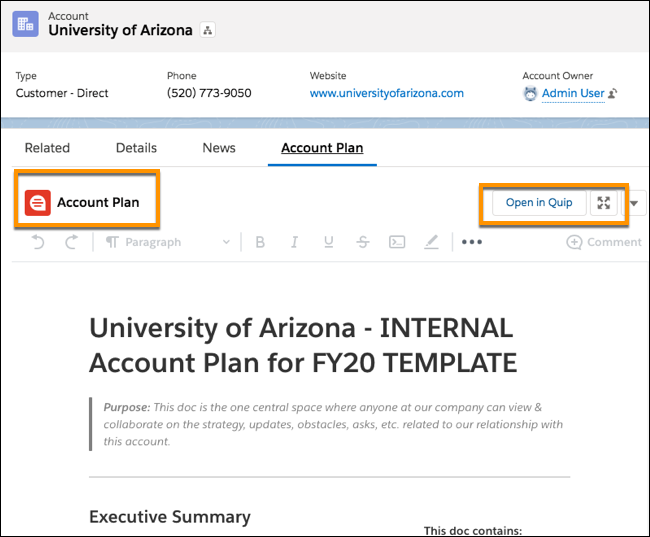
To exit Lightning App Builder, click Back. The Quip Document
component appears where you dragged it.
If you select Different templates for different records, create an Apex trigger on the template field to prepopulate it with the template URL. You can also use Flow Builder or Process Builder. This step is optional if you select Different docs for each record.
Did this article solve your issue?
Let us know so we can improve!