In your branded Experience Cloud mobile app, the navigation tab bar is fixed at the
bottom of the screen, with two pre-configured tabs: Home and User Settings. Customize the
navigation tab bar by adding more tabs, and adjust the look and feel of the tabs to match your
branding. And if you don't want the navigation tab bar, you can disable it.
Required Editions
Setup for Mobile Publisher available in: Lightning Experience
Setup for Mobile Publisher available in: production only (not sandbox)
Available in Lightning Experience in: Enterprise, Performance,
and Unlimited Editions
User Permissions
Needed
To create and modify a Mobile Publisher project:
Manage mySalesforce Apps
To create and modify a site:
Create and Set Up Experiences
A few things to note before you get started:
In addition to the navigation tab bar, you can configure other navigation methods.
The first tab must always point to the Home page of the base Experience Cloud site of the
app.
A maximum of 7 tabs are available.
A tab that points to the user’s My Settings page shows the login page for
unauthenticated users.
Tab labels can’t be localized.
Audiences can’t be applied to a navigation tab bar.
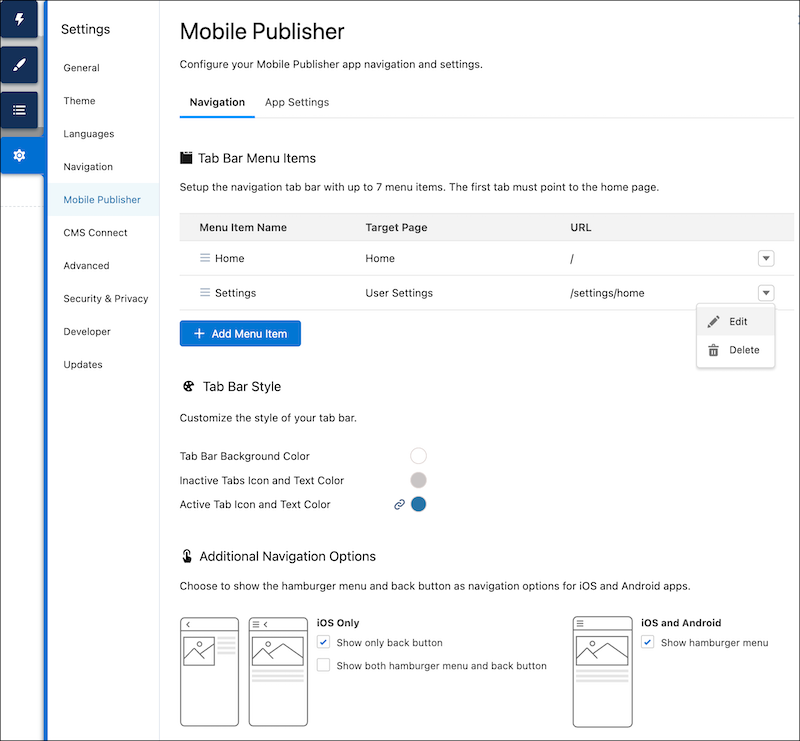
In Experience Builder, go to Settings | Mobile Publisher | Navigation.
Add more menu items to your navigation tab bar, by clicking Add Menu
Item.
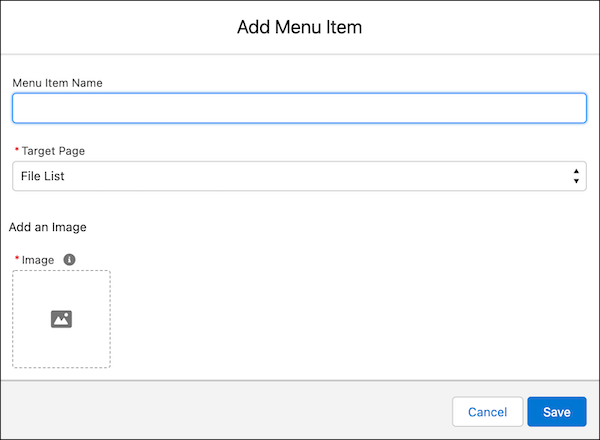
Use the Add Menu Item dialog to select the target page and image that you want to associate
with the new menu item. Optionally add a label to the menu item in the Menu Item Name field.
Then save your changes.
Note For menu items with the Target Page as an object, such as Case, links to record pages aren't
supported in the URL field. For example, /case/:recordId(/:recordName) isn't a
supported URL format.
To change the look and feel of the navigation tabs, use the options in the Tab Bar Style
section to make your selections.
To disable the bottom tab bar, use the dropdown menu associated with each menu item to
delete all menu items.
We use three kinds of cookies on our websites: required, functional, and advertising. You can choose whether functional and advertising cookies apply. Click on the different cookie categories to find out more about each category and to change the default settings.
Privacy Statement
Required Cookies
Always Active
Required cookies are necessary for basic website functionality. Some examples include: session cookies needed to transmit the website, authentication cookies, and security cookies.
Functional Cookies
Functional cookies enhance functions, performance, and services on the website. Some examples include: cookies used to analyze site traffic, cookies used for market research, and cookies used to display advertising that is not directed to a particular individual.
Advertising Cookies
Advertising cookies track activity across websites in order to understand a viewer’s interests, and direct them specific marketing. Some examples include: cookies used for remarketing, or interest-based advertising.