
You are here:
Bind a Flexcard Input Value to a Data Field (Managed Package)
For the managed package runtime, bind the value of an Input element to a new or existing data field in your Flexcard's data source. When a user updates the input value, the data JSON updates. You can use the new data like any other piece of data from a data source. For example, update the value of an attribute sent from a parent to a child Flexcard based on user input.
 This information is for Omnistudio for Managed Packages. For Omnistudio on standard runtime, see Omnistudio Help.
Required Versions |
|---|
Available beginning Winter '22. |
- From the Flexcard Designer, drag an Input element from the Inputs section of the Build panel.
-
To bind your input value to a data source field in one of two ways, in the
Properties panel, click into Field Binding and perform one of
the following tasks:
-
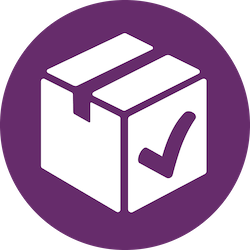
Bind to an existing data source field: To enable a user to update a data field in the data source, click into Field Binding to select a data field that exists, such as {AccountRevenue}. When your user updates the value of the input element, the value of AcccountRevenue in the data JSON updates.
-
Bind to a new data source field: To add new data to the data source, enter a unique name to create a data field in the data JSON. Enter as a merge field with alphanumeric characters and no spaces. For example, {SecondaryContactEmail} or {2ndryContactEmail}.
 Important
The Field Binding value takes priority over the Default Value. When creating a data field, the default value is null. When binding to an existing data field, the default value is the value in the data source.
-
-
To confirm the data JSON updates when the input value changes an existing data
field, perform the following tasks:
-
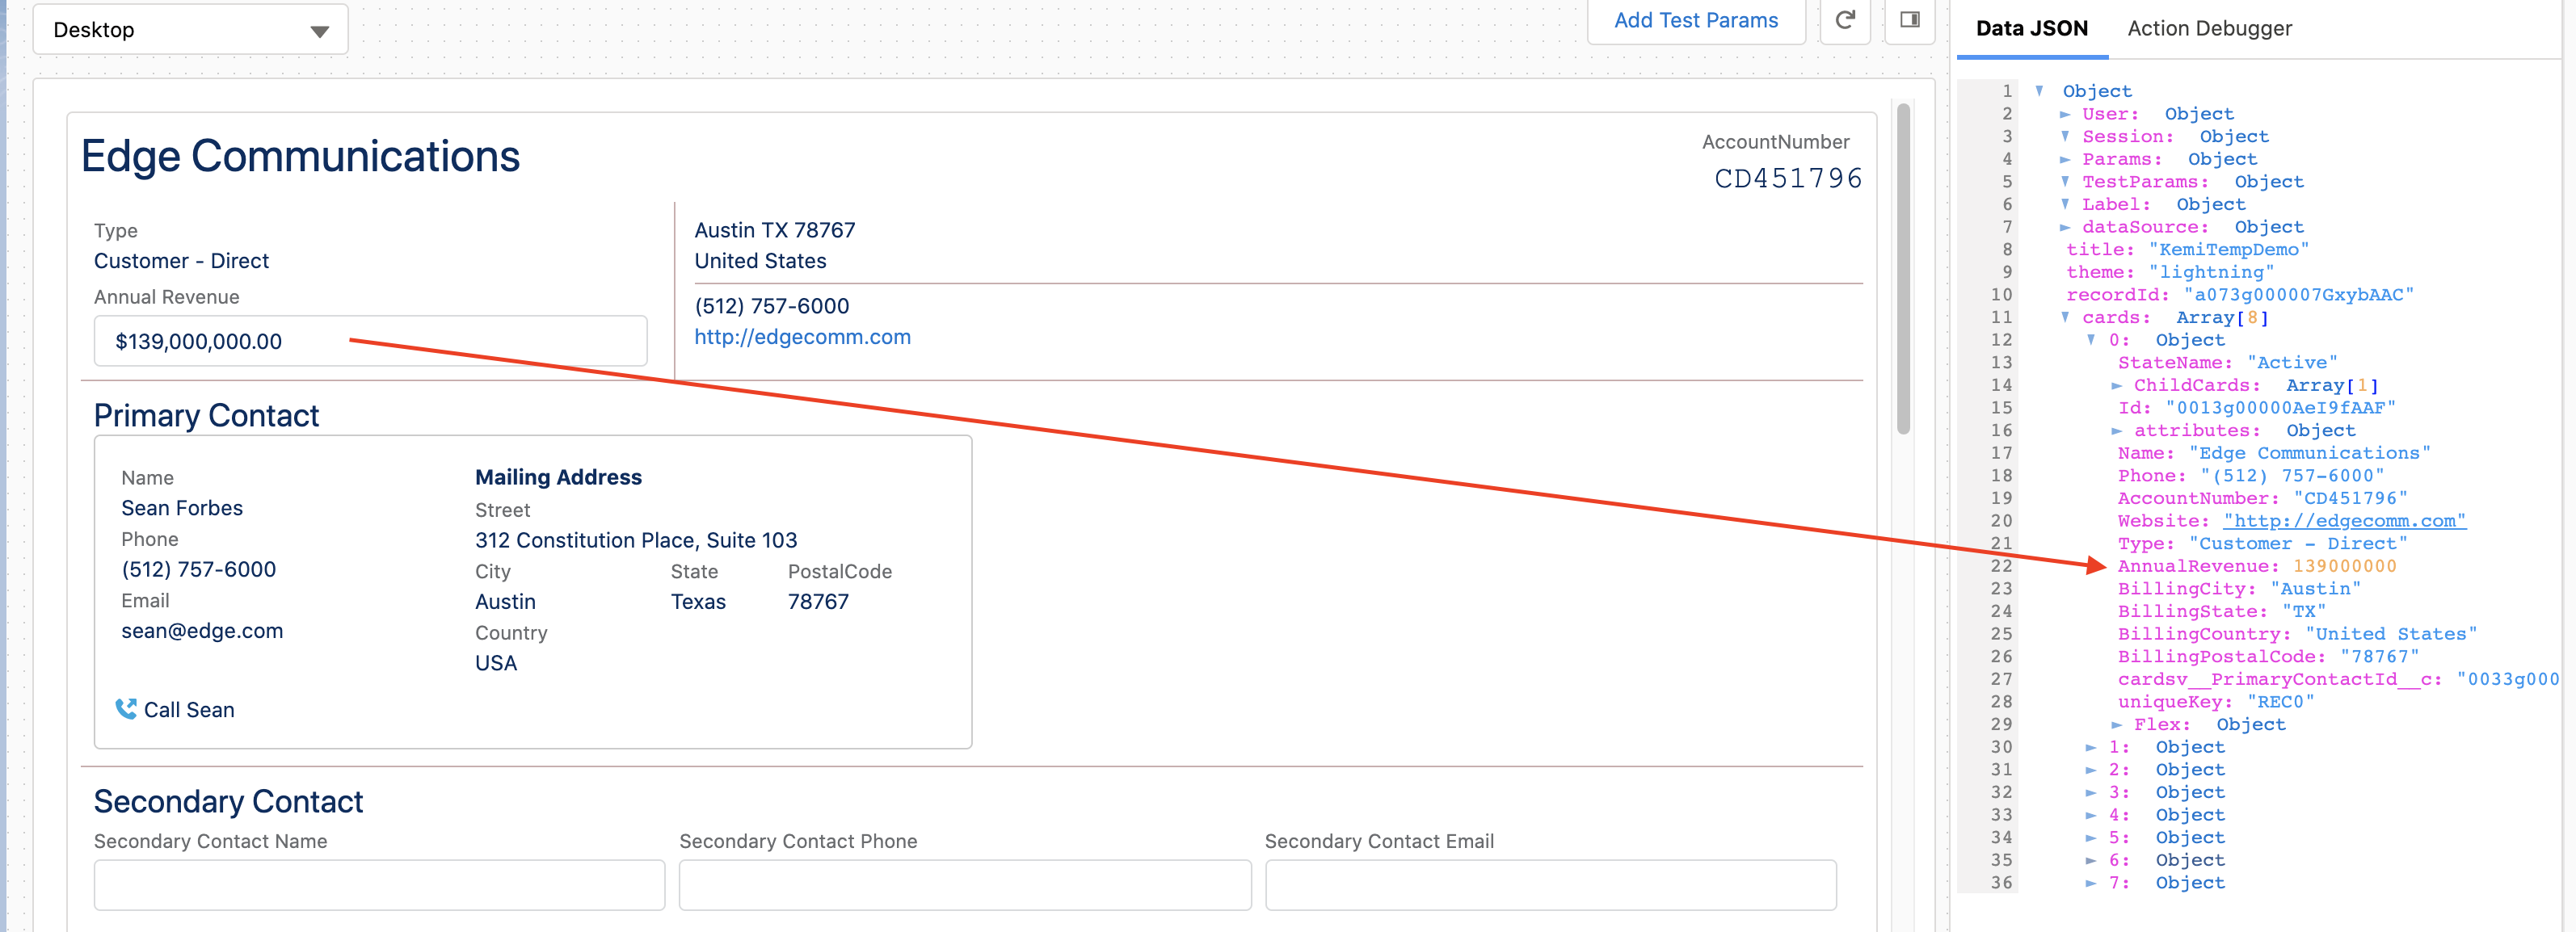
Click the Preview tab, and enter or select a value from an input element on the canvas. For example, in a Currency Input element that binds the element to the
AccountRevenuedata field, enter a new amount, such as 5000000. -
In a card object in the
cardssection of the Data JSON panel, find the updated data field, such asAccountRevenue: "5000000".
-
-
To confirm a new data field is created in the data JSON when a user enters or
selects an input value, perform the following tasks:
-
Click the Preview tab.
-
In a card object in the
cardssection of the Data JSON panel, notice there’s no data field for the one you created in the Field Binding property. -
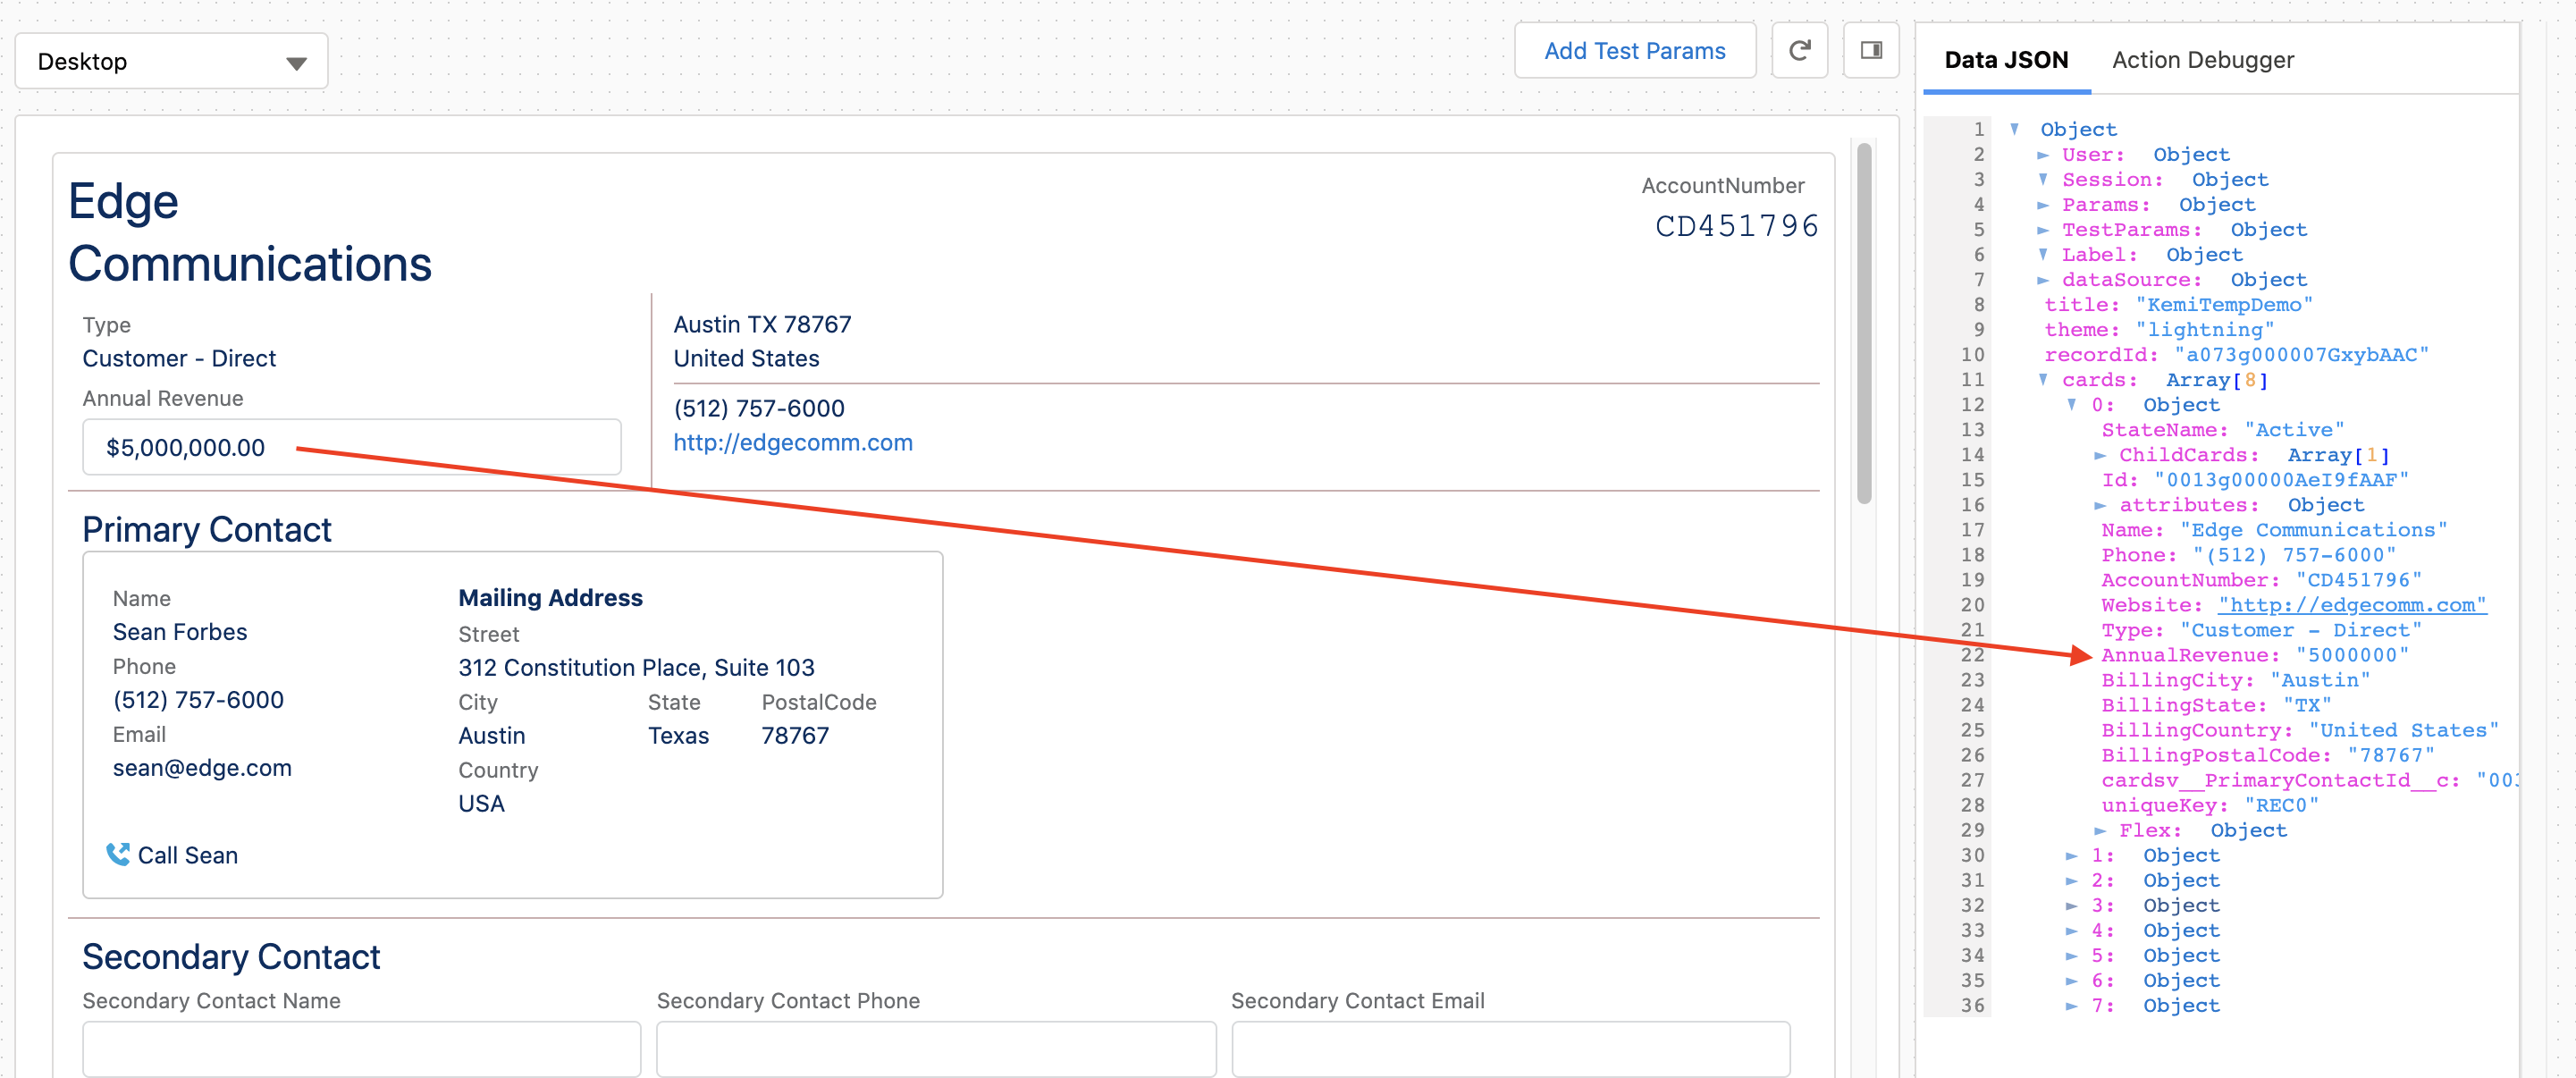
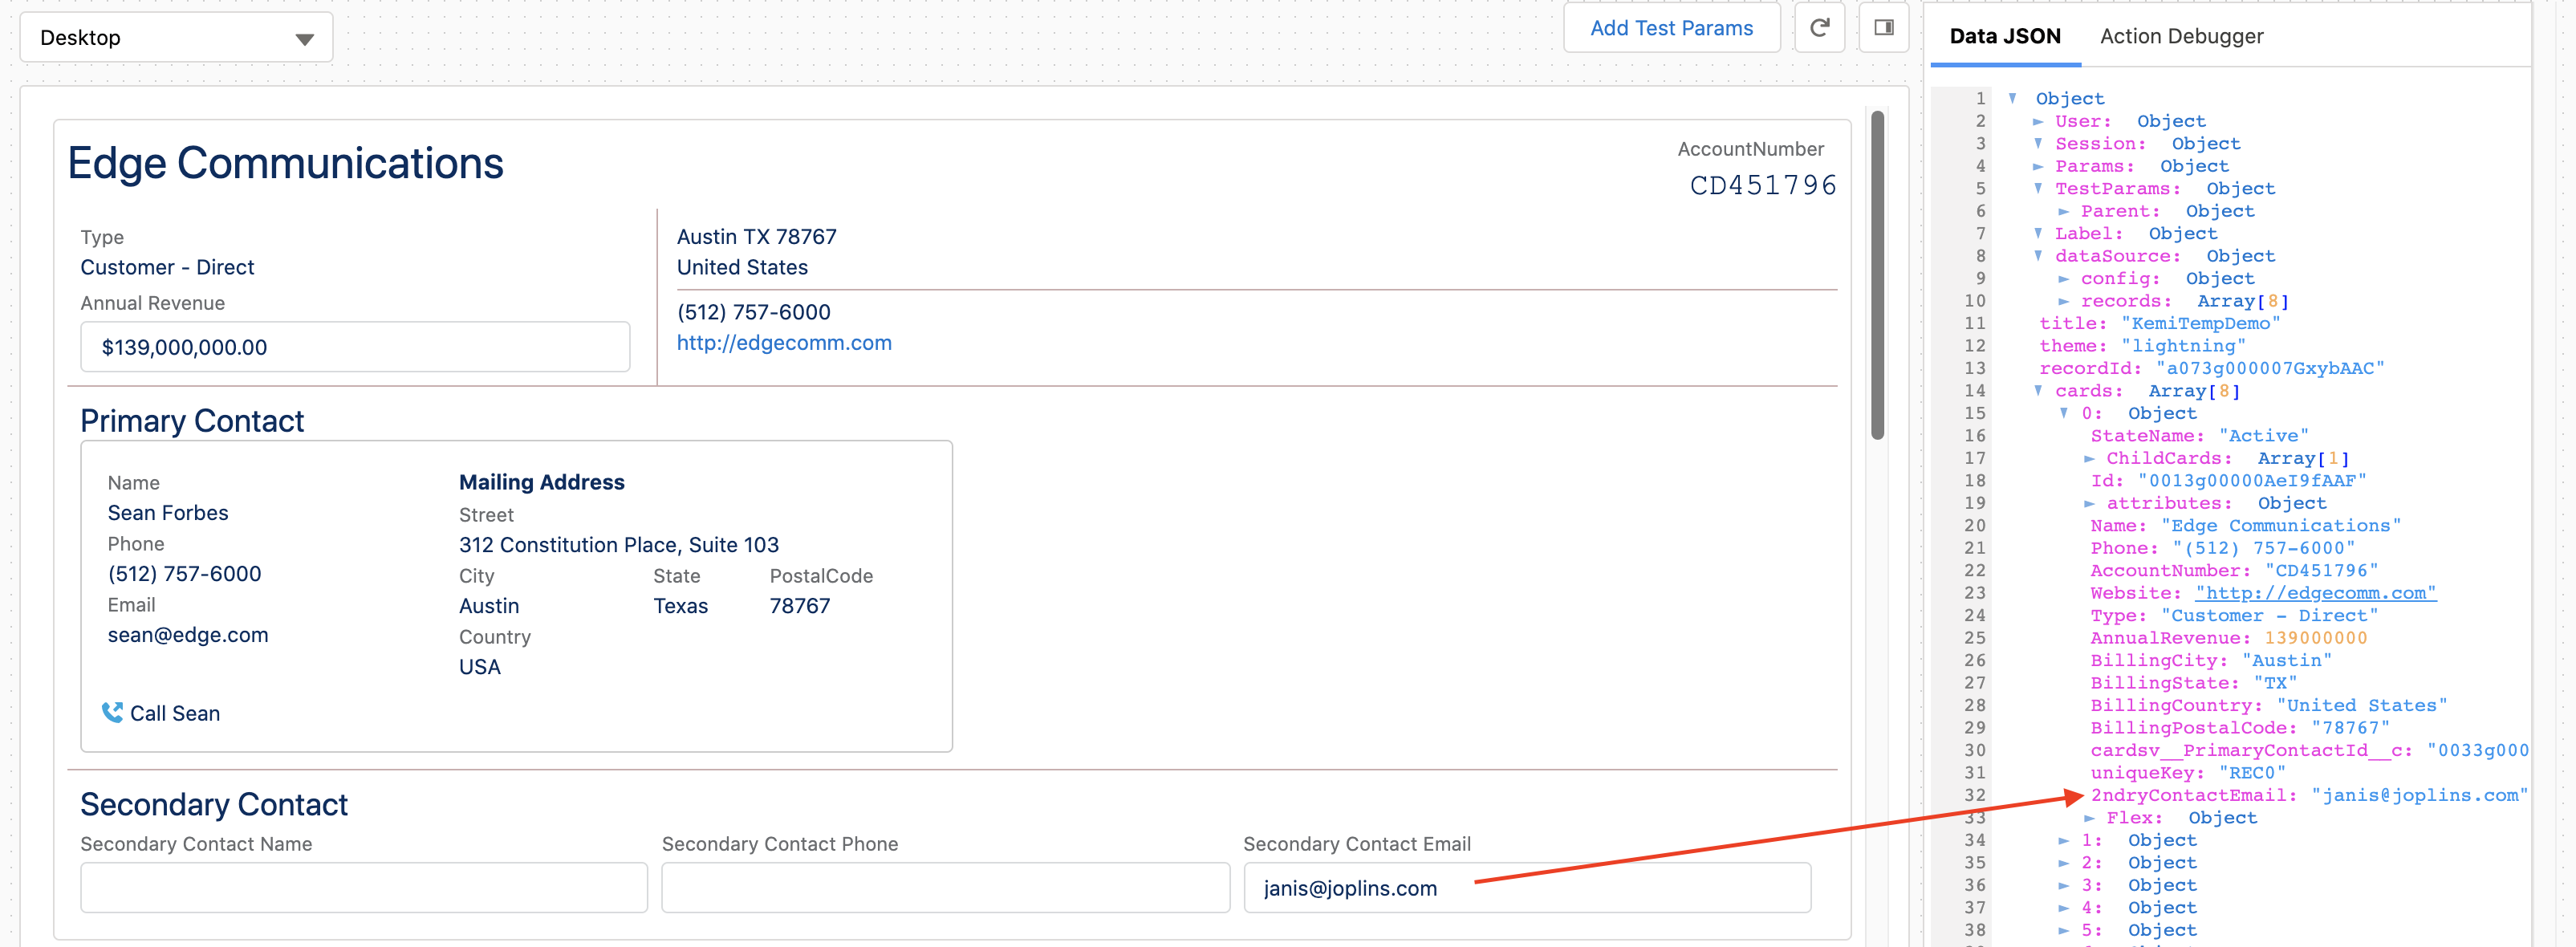
On the canvas, enter or select a value from an input element on the canvas. For example, in an Email Input element that binds to a new
2ndryContactEmaildata field, enter an email address, such as janis@joplins.com. -
In the associated card object in the
cardssection of the Data JSON panel, find the new data field, such as2ndryContactEmail: "janis@joplins.com".
-