
You are here:
Call a Data Source from an Action on a Flexcard (Managed Package)
For the managed package runtime, trigger a data source from an action to get data from a server or post data to a server. When data is fetched from the server, the incoming data is appended to the data JSON in the card's record object or to a data node you name. If you choose to send the request without getting a response from the server, the data JSON does not update. To confirm your request is sent successfully, in Preview, view the requested data in the Action Debugger's response.
 This information is for Omnistudio for Managed Packages. For Omnistudio on standard runtime, see Omnistudio Help.
Required Versions |
|---|
Available beginning Winter '22. |
Possible Use Cases:
-
Use a Data action that populates a child Flexcard with the returned data. For example, create a Data action that gets a list of Account Cases and whose response data node is caseList. Populate a child Flexcard with the response data by entering {record.caseList} in its Data Node property field. See Embed Flexcard Inside Another Flexcard (Managed Package).
-
Use a Data action to conditionally display messages from an API response. For example, display the error message returned from a response in a Text element, such as {caseList.error}. Then add a condition on the element so that the element displays only when an error message exists. See Add Conditions to a Flexcard Element (Managed Package).
- In the Flexcard Designer, drag an Action element from the Build panel to a state on the canvas.
- Select Data as the Action Type.
-
From the Data Source Type dropdown, select a data source
and configure its properties. See Flexcards Data Source Reference (Managed Package).
 Note For a Data action, the datasource's Input Map values can't be objects or arrays.Note Beginning Winter ‘23, SOSL Search and SOQL Query data sources are supported.Note
For Omnistudio Data Mapper, select an Interface Type to filter the list of Data Mappers available in the Interface Name list. For a description of each Interface Type, see Omnistudio Data Mappers.
- If you don't need a response from the server, such as in a simple notification, enable Ignore Response. When enabled, data is not appended to the data JSON, but you can view the response in Preview from the Acton Debugger's response section.
-
In Response Node, to specify where in the data JSON you
want to save the returned data, enter one of the following:
-
If the request returns one object, enter record. The data is put into the root of the card object.
//One record returned
{
    "Type": "Mechanical",
    "Subject": "The watchamacallit is too high",
    "Status": "Escalated",
    "Priority": "High",
    "CaseId": "5003g000007WQHRAA4",
}
//One array object returned
{
    "contacts": [
     {
        "AccountId": "0013g00000AeI9fAAF",
        "Name": "Rose Gonzalez",
        "Birthdate": "1968-09-26",
        "CreatedDate": "2020-10-15T21:28:48.000+0000",
        "Phone": "(512) 757-6000",
        "Id": "0033g00000EXVKbAAP"
      },
      {
        "AccountId": "0013g00000AeI9fAAF",
        "Name": "Sean Forbes",
        "Birthdate": "1947-06-25",
        "CreatedDate": "2020-10-15T21:28:48.000+0000",
        "Phone": "(512) 757-6000",
        "Id": "0033g00000EXVKcAAP",
      }
    ]
}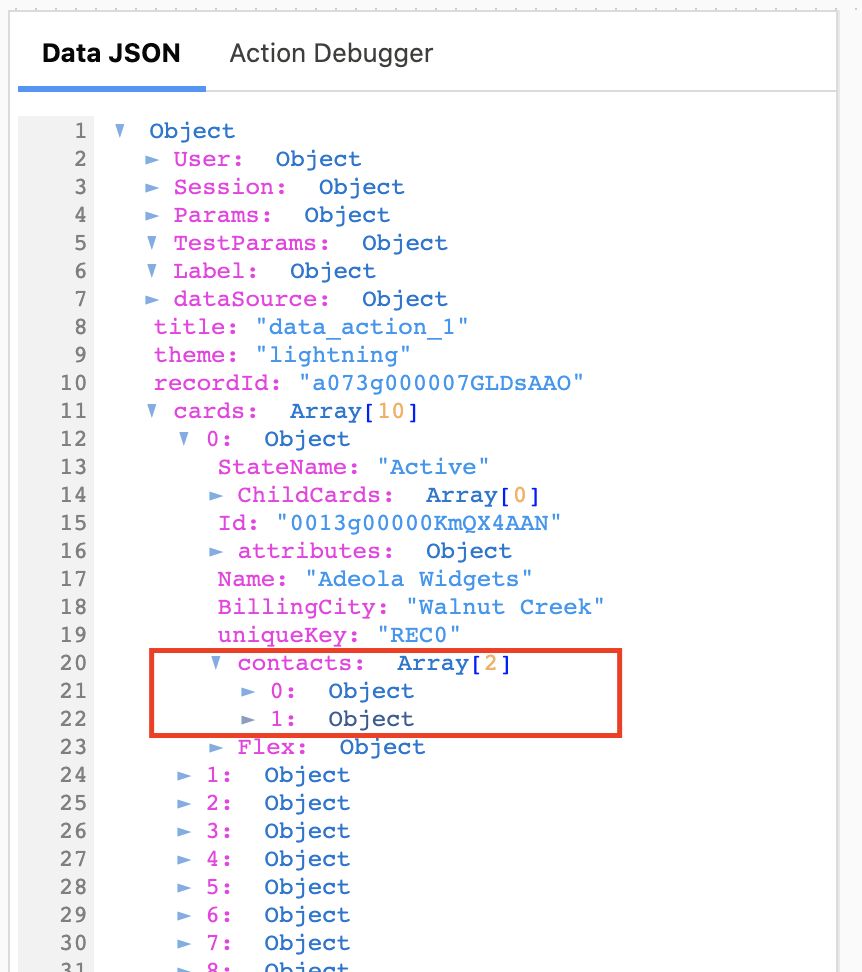
-
If the returned data is more than one record or you want to add the data to a new data node, enter an alphanumeric name with no spaces or special characters, such as caseList or caseList1.
//multiple records returned
[
    {
	"Type": "Mechanical",
	"Subject": "The watchamacallit is too high",
	"Status": "Escalated",
	"Priority": "High",
	"CaseId": "5003g000007WQHRAA4"
    },
    {
	"Type": "Structural",
	"Subject": "The doodat wasn't properly set up",
	"Status": "New",
	"Priority": "Medium",
	"CaseId": "5003g000007WQHQAA4"
    }
]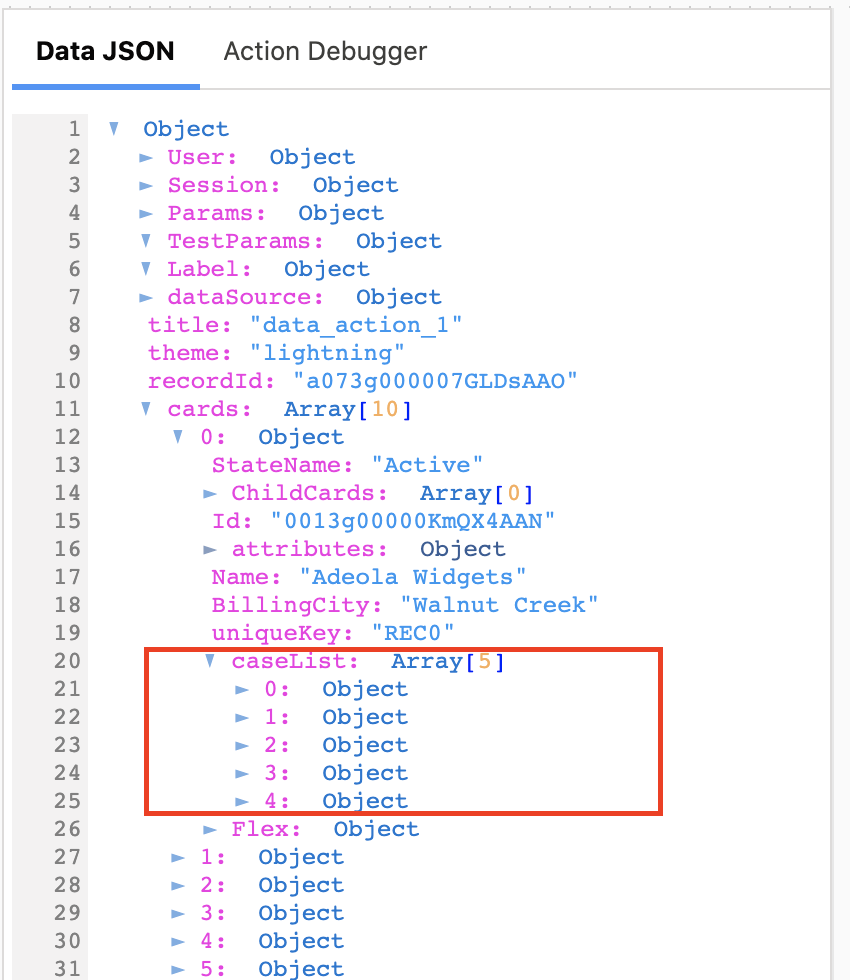
NoteBeginning Spring '22, to use the returned response in a sequential action, you must first save it in Response Node. See Flexcards Sequential Actions (Managed Package).
-
-
To access the data, use the following syntax:
{dataResponseNodeName.dataNode}. For example, if the Response Node name is contactList, and you want to return an error message from an error data node, use {contactList.error}. -
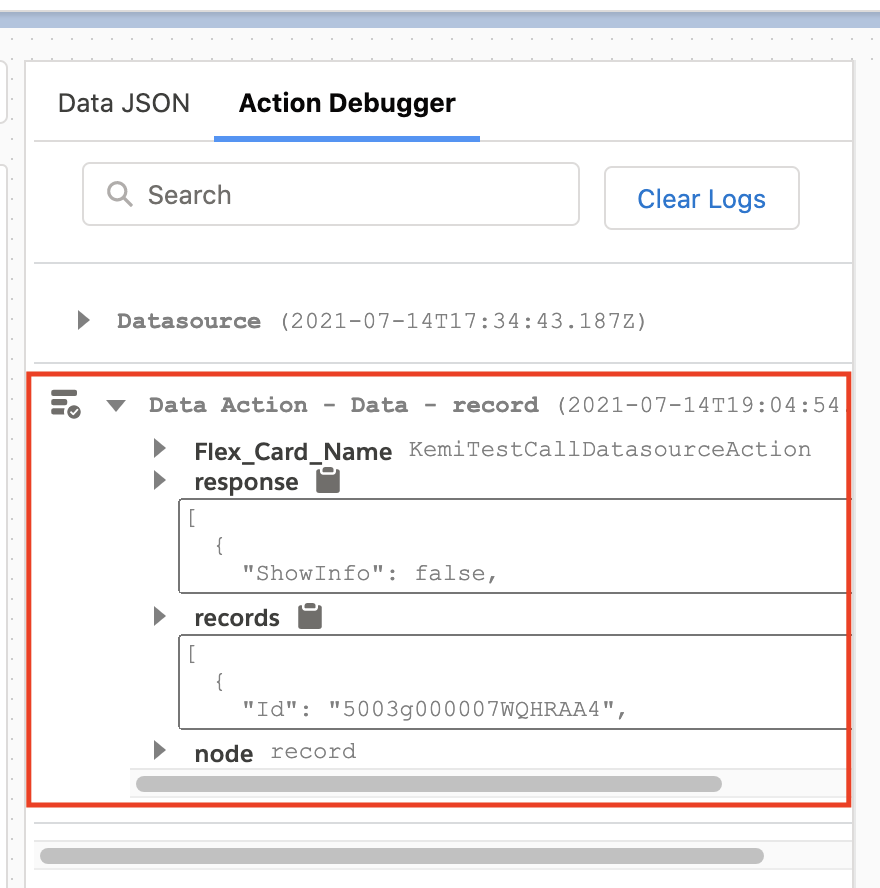
To confirm your request response, click the Preview tab, click the Action Debugger
tab, and perform the following tasks:
-
Click a Data action on the canvas.
-
Click the name of the action in the Action Debugger to reveal the following sections:
-
response: Displays the requested data from the Data action.
-
records: Displays records fetched from the Flexcard's data source and all executed data actions that append records to the data JSON.
NoteIf you enable Ignore Response, records is not visible.
-
node: Displays the name of the node that holds the Data action records and defined in Response Node.
-
ignoreResponse: Visible and set to true when you enable Ignore Response.
-
-
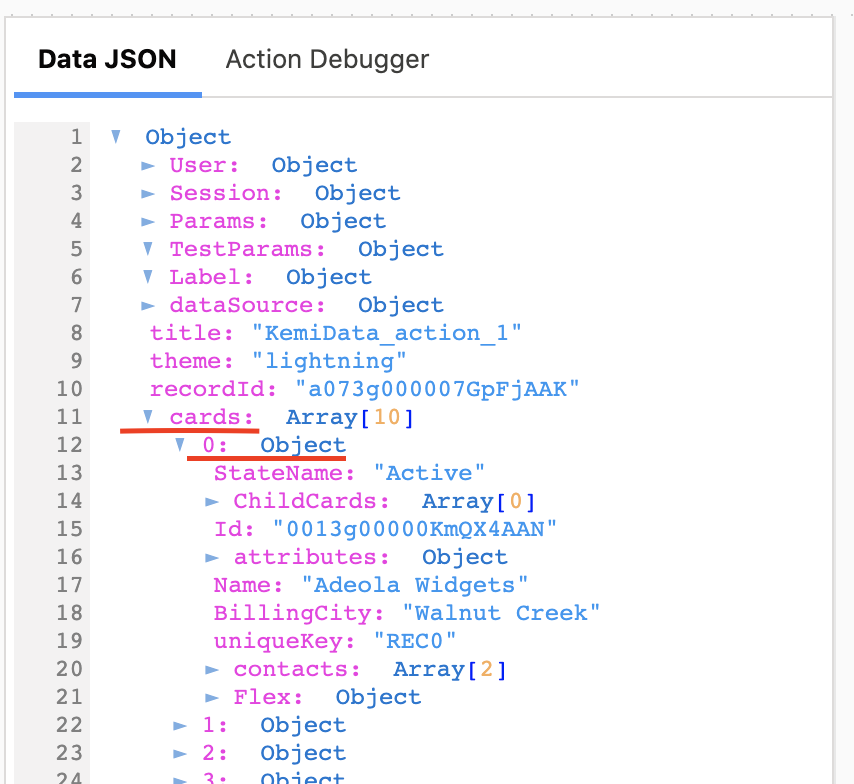
To confirm that your data JSON updates, click Preview and perform the following
tasks:
-
Select a Data action on the canvas.
-
In the Data JSON panel, click the cards node to reveal record data and select an Object.
-
Look for the name of the node you entered in the Response Node field in Design view.
 Important
If you don't see the response node, go back to Design view to confirm that Ignore Response is not checked.
-