
You are here:
Define Custom Label Translations in Multi-Language Omniscripts (Managed Package)
For the managed package runtime, define translations for custom labels in multi-language Omniscripts using the Omniscript's Edit Translations window. Build a simple example Omniscript with translated Text and Text Block elements.
 This information is for Omnistudio for Managed Packages. For Omnistudio on standard runtime, see Omnistudio Help.
Before you begin:
- Enable multi-language Omniscripts. See Enable Multi-Language Omniscript Support (Managed Package).
- Learn about custom labels in Salesforce. See Create and Edit Custom Labels.
Omnistudio provides default custom labels that allow translations in addition to Salesforce custom labels. Omnistudio doesn't support Salesforce standard labels.
The Set Values and Set Errors actions don’t support custom labels.
How you translate Text and Text Block elements using custom labels in the following example illustrates how you can translate almost any Omniscript element.
-
Create a multi-language Omniscript.
- On the Omniscripts tab, click New.
- 2. Specify a Name, Type, and SubType.
-
Remove the
Englishvalue from the Language field and select Multi-Language from the dropdown. - 4. Click Save. The new Omniscript opens in the designer and contains one step.
-
Create the example Omniscript's basic structure.
- From the Build panel, expand GROUPS and drag a second Step into the Omniscript.
-
6. In the Step Properties for the second Step, remove the
Step2value from the Field Label field. - Expand both Steps.
- 8. From the Build panel, expand INPUTS and drag a Text element into the first Step.
- 8. From the Build panel, expand DISPLAY and drag a Text Block element into the second Step.
- Click Edit Translations. The Edit Your Omniscript Translations window opens.
-
Click the Settings gear icon in the window header and select English
(US) from the dropdown.
 Note Always create the English translation first so the custom label is created properly.
 - In the Text1 element's Field Label row, enter a Custom Label Name value of Name and a Custom Label Value in English (US) value of Name.
-
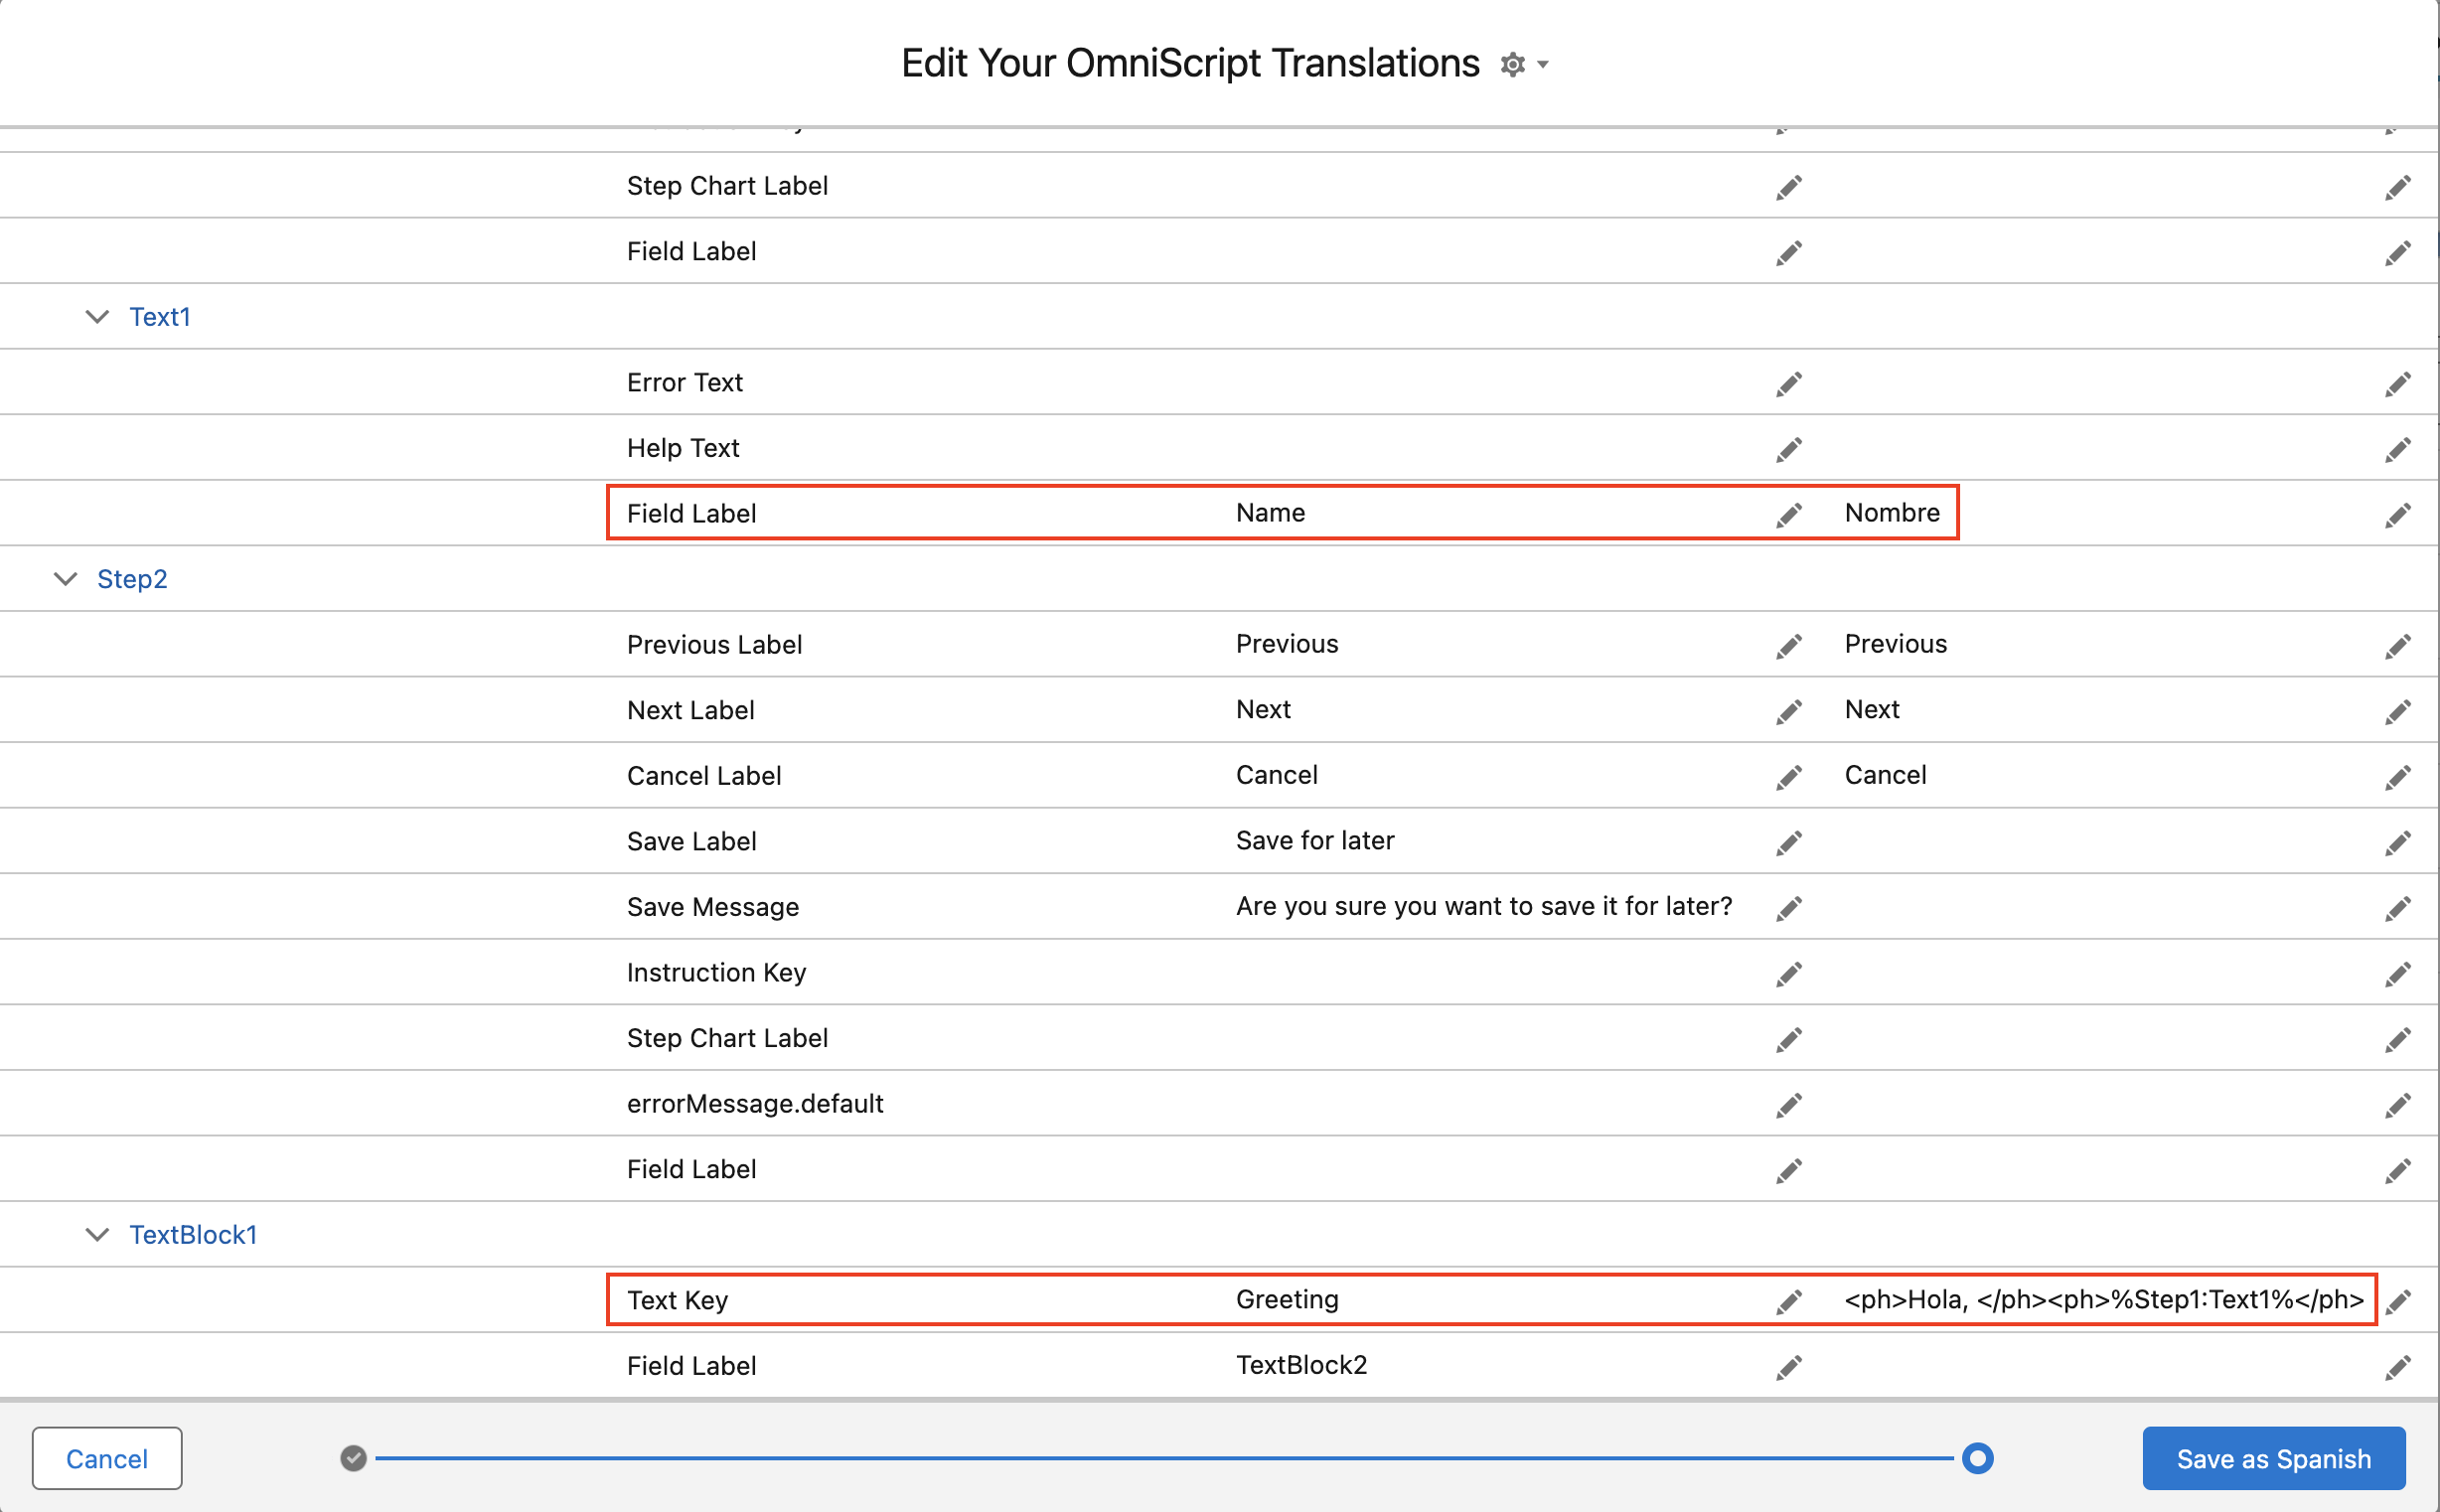
In the TextBlock1 element's Text Key row, enter a Custom Label
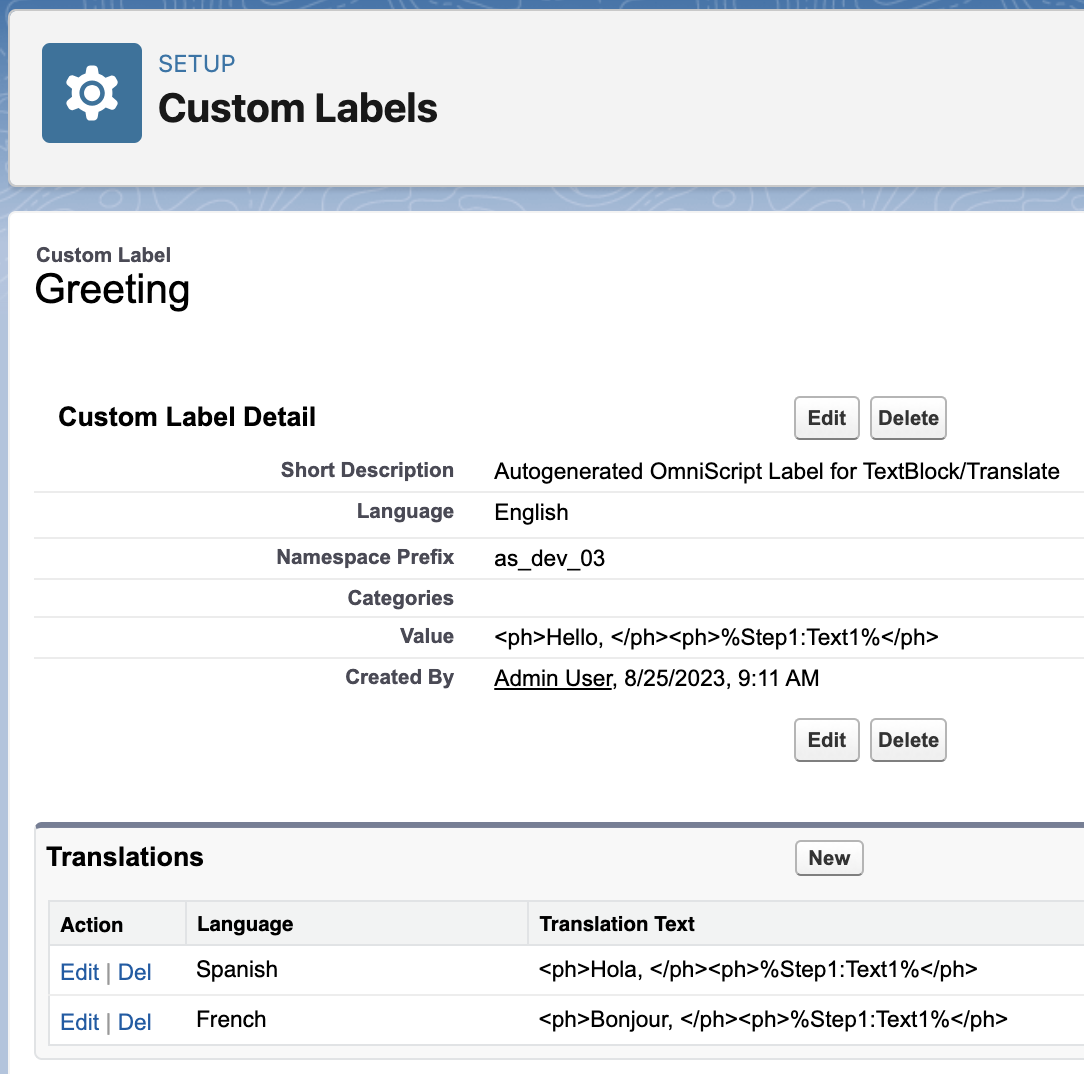
Name value of Greeting and a Custom
Label Value in English (US) value of <ph>Hello,
</ph><ph>%Step1:Text1%</ph>.
A custom label value for a Text Block can contain HTML markup. To ensure that a merge field value displays, put the merge field between
<ph>HTML tags as in this example. To begin on a new line, use<br/>. - Click Save as English (US). Two custom labels are created: Name and Greeting.
-
Create another translation. Repeat the previous five steps, except:
-
Select Spanish from the Settings gear dropdown.
- In the Text1 element's Field Label row, enter Nombre for the Custom Label Value in Spanish.
-
In the TextBlock1 element's Text Key row, enter <ph>Hola,
</ph><ph>%Step1:Text1%</ph> for the Custom
Label Value in Spanish.
- Click Save as Spanish. Spanish translations are added to the Name and Greeting custom labels.
-
Select Spanish from the Settings gear dropdown.
- Add other languages as desired. For example, if you add French, enter Nom for the Text1 element's Field Label and <ph>Bonjour, </ph><ph>%Step1:Text1%</ph> for the Text Block element's Text Key.
-
Click Preview and test each language.
Sometimes it takes a few minutes for the custom labels to be created. If the labels don't appear in Preview at first, try again in a few minutes.
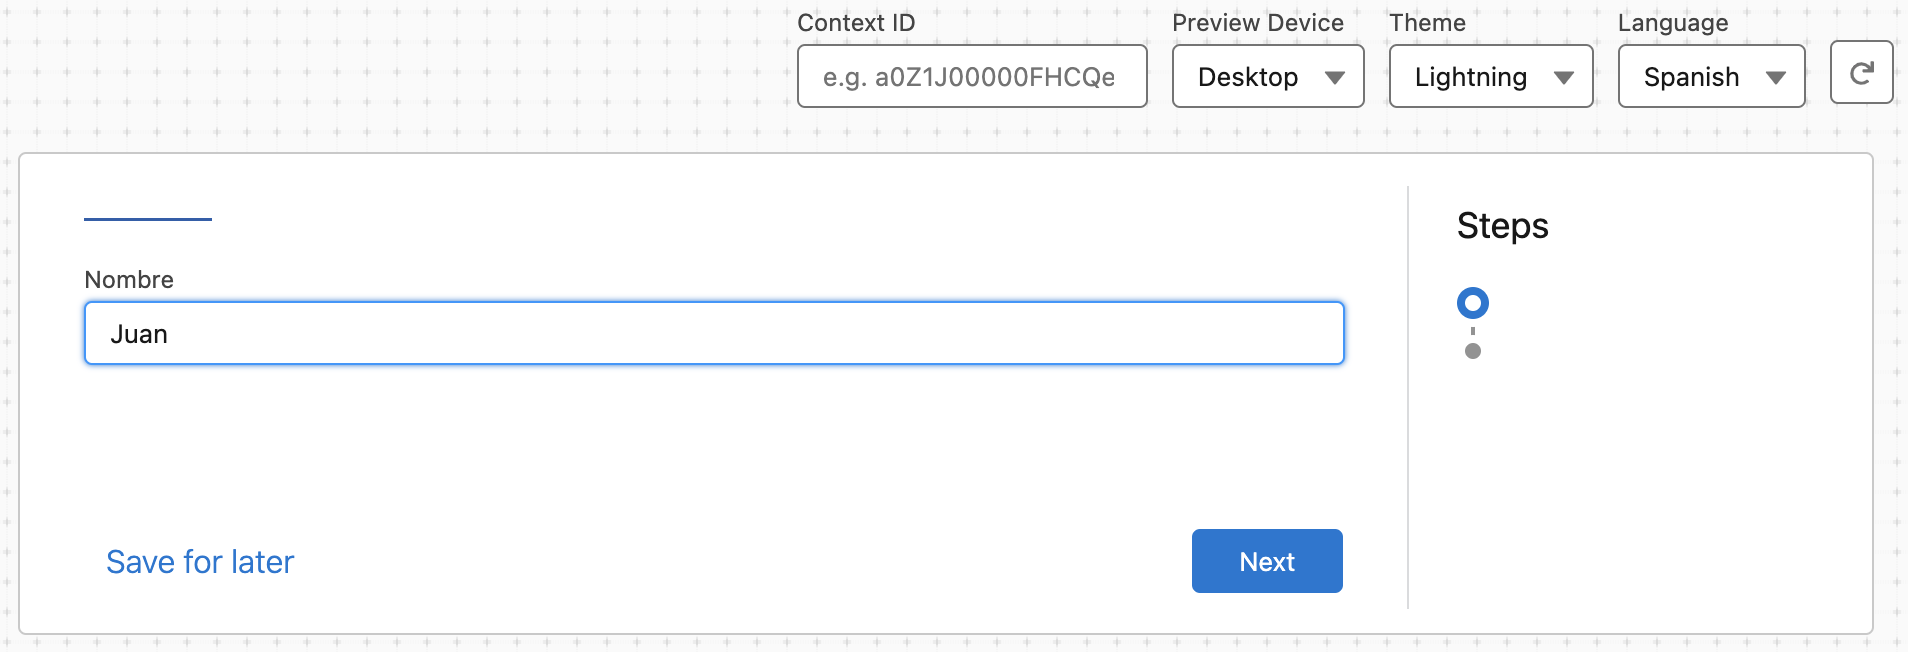
The first page looks like this:
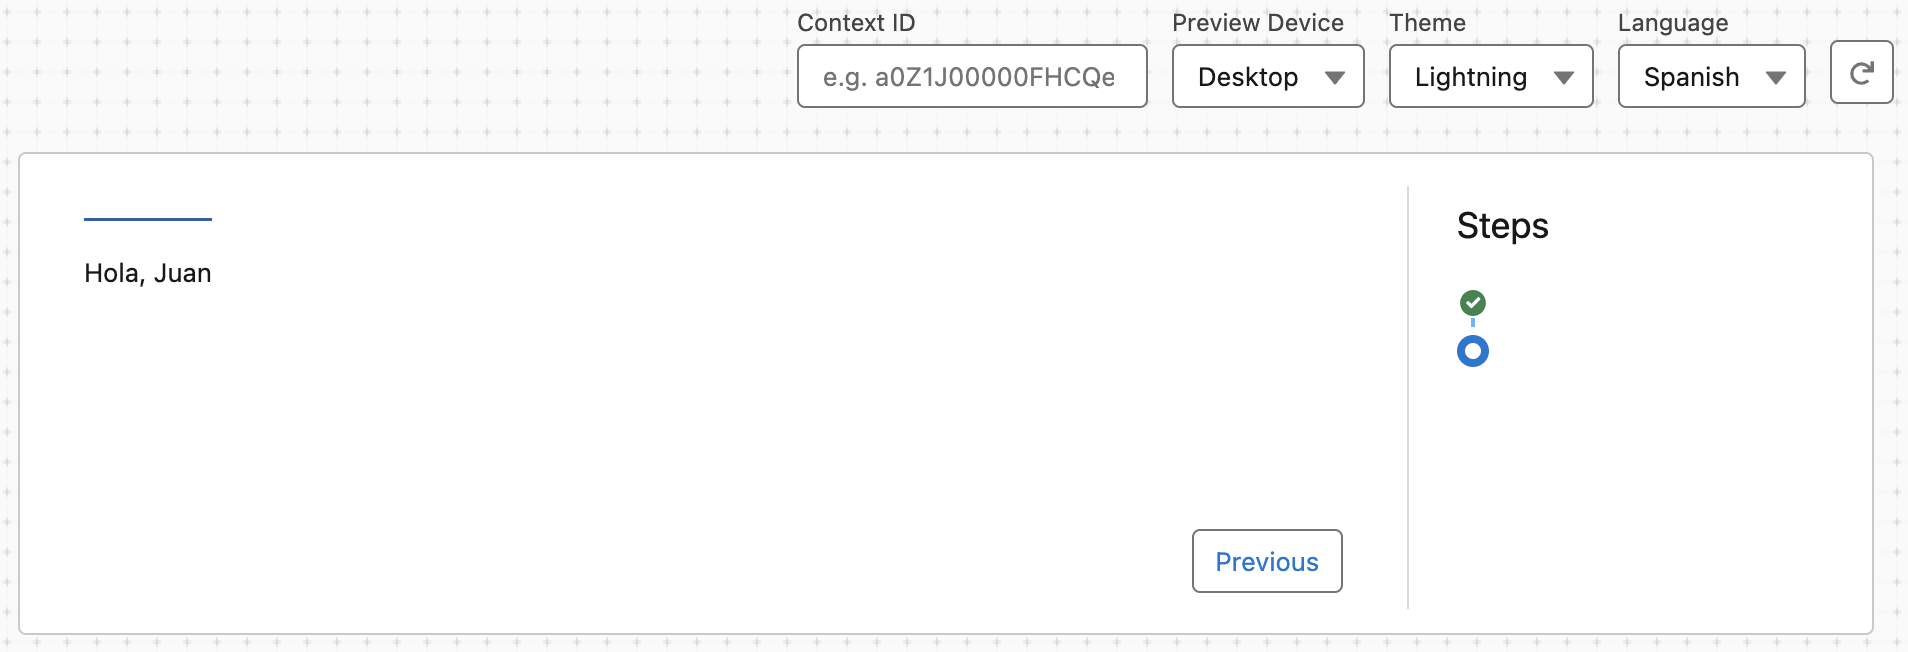
The second page looks like this:
 Note
NoteCustom labels must have values. If a custom label value doesn't exist, the following error message displays when you preview the Omniscript:
Error: Field $Label.<stepName> does not exist. Check spelling
If the Save operation is not completed error appears, or if labels don't appear in Preview after a few minutes, go to Custom Labels in Setup. Add Spanish and other translations to the Name and Greeting labels there. See Create and Edit Custom Labels.
For example, here's what the Greeting label looks like with Spanish and French translations:
Use naming conventions when creating custom labels in an org with multiple developers to avoid duplications and improve querying. Example syntax: jSmithCustomTextLabel.
What’s next: View required Omniscript custom label translations and apply translations for each label. See Omniscript Custom Label Reference (Managed Package).