You are here:
Automate Close Plans and Account Folder Creation with Flow Builder
Save time manually creating and filling out Close Plans with templates in Flow Builder. Use Flow Builder to automatically create Account folders in Quip and add your Close Plans to them.
Required Editions
| Available in: Lightning Experience |
Use a flow to automatically populate a Close Plan attached to an Opportunity when an Opportunity is created. After you create a document from the template, the flow moves the document to an existing folder named for the Opportunity’s parent Account or creates a one.
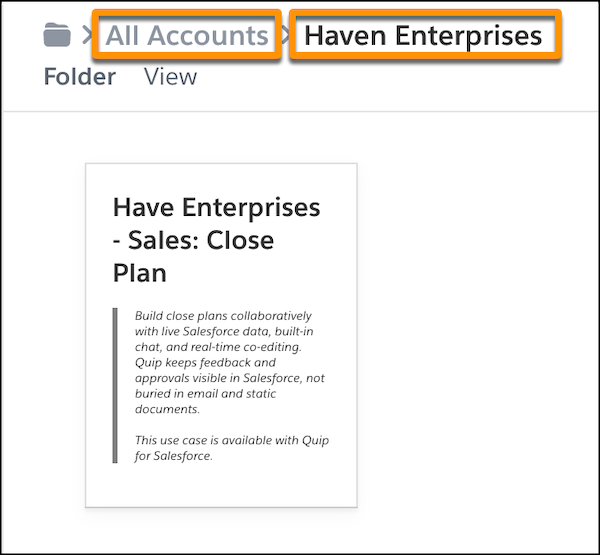
Create an All Accounts Folder in Quip
To keep all of your Account folders in one organized place, create an All Accounts parent folder in Quip. Flow later adds Account folders to this parent folder.
Required Editions
| Available in: Lightning Experience |
- In Quip, click Compose, and then New Folder.
- Name the folder All Accounts and click Create.
- Click Share and turn on link sharing.
Create a Custom Folder URL Field
To store the folder URL of documents created from a template, create a custom Folder URL field. Flow later uses this field to check whether a folder exists for an Account.
Required Editions
| Available in: Lightning Experience |
- From Salesforce Setup, go to the Object Manager, and select Account.
- Select Fields & Relationships, and then New.
- Select URL, and then Next.
- Enter Quip Folder as the field label and click Next.
- Select the profiles that can edit the field, and click Next.
- Save the action.
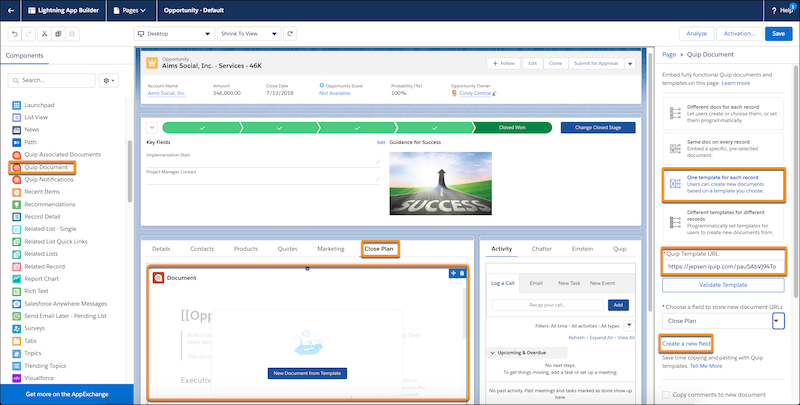
Set Up the Quip Document Component
Set up the Quip Document component on the Opportunity page layout. Create a Close Plan custom URL field to store Close Plans created from your template.
Required Editions
| Available in: Lightning Experience |
- Navigate to an Opportunity record in Lightning Experience.
- Click the gear icon, and select Edit Page to go to the Lightning App Builder.
- Create a new tab called Close Plan.
-
In the left pane, select Quip Document and drag it to your new
tab.
-
Select One template for each record.
 Note One template for each record lets you add a template via Flow Builder or lets your users manually add a template. To use Flow Builder only, select Different Docs for each record.
 -
Click
 . You can either paste your Close Plan template URL or select a template from
the Template Library.
. You can either paste your Close Plan template URL or select a template from
the Template Library.
- Click Next and validate the template. The validation checks that you have access to the document, that link sharing is turned on, that the document is marked as a template, and that it isn’t a slide.
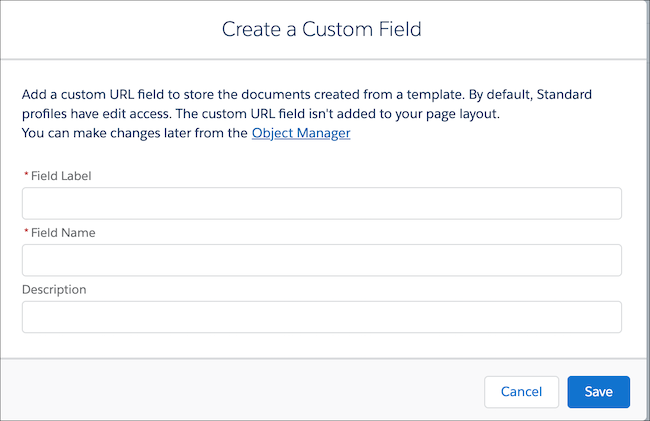
- To create a custom URL field to store the new document URLs, select Create a new field.
-
Enter Close Plan as the field label and
Close_Plan as the field name. You can make changes later from the
Object Manager.
- Save and activate the action.
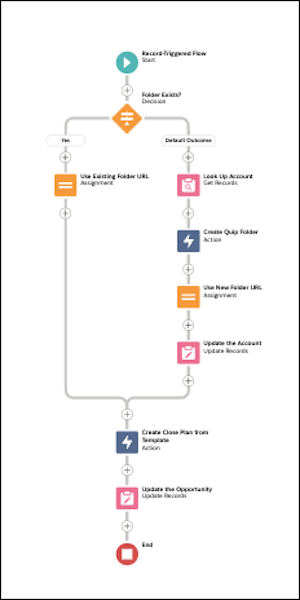
Build a Flow to Add Opportunity Close Plans to New or Existing Account Folders
Use Flow Builder to create Close Plans from a template when an Opportunity is created and move them to the parent Account folder. If the folder doesn’t exist, use Flow Builder to create one.
Required Editions
| Available in: Lightning Experience |
- From the Quick Find box in Setup, enter Flows.
- Click New Flow.
-
Select Record-Triggered Flow and click Next.
Flow Builder displays the flow in the Auto-Layout flow layout. You can access Interactions, Logic, and Data via the plus icon.
- Under Trigger, click Edit. Set the flow to trigger when a record is created, and run the flow after the record is saved. Click Done.
- Click Choose Object.
- Select Opportunity as the object and set the conditions to None.
-
Check to see if a folder exists.
-
From the Elements tab, drag Decision onto your flow’s
canvas.
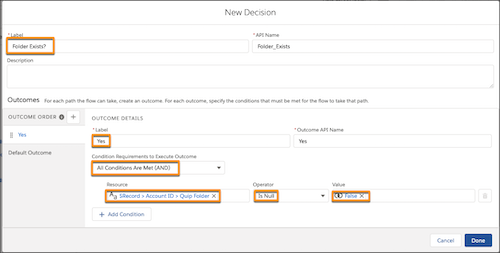
- Name the decision Folder Exists?.
-
Create outcomes for when the folder is already created and for when it’s not.
Label Condition Requirements to Execute Outcome Resource Operator Value Yes All Conditions Are Met (AND {!$Record.Account.Quip_Folder__c} Is Null False - For the document exists outcome, set the Account Plan URL field reference to Is Null, and the Value to False. For the document doesn’t yet exist outcome, set the Account Plan URL field reference to Is Null, and the Value to True.
-
From the Elements tab, drag Decision onto your flow’s
canvas.
-
If a folder exists, add Close Plans created from a template to it.
- From the Elements tab, drag Assignment onto your flow’s canvas.
- Name the assignment Use Existing Folder URL.
-
For the Variable, click New Resource.
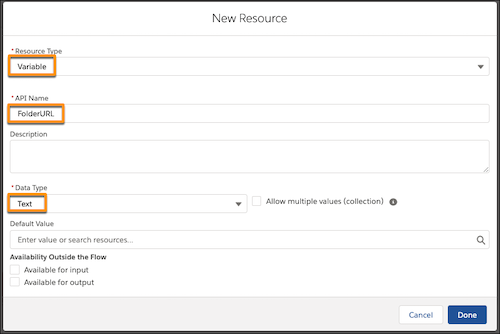
- Set the Resource Type to Variable and enter FolderURL as the API Name. Set the Data Type to Text and click Done.
-
Set the variable values.
Variable Operator Value FolderURL Equals {!$Record.Account.Quip_Folder__c} - Click Done.
- Connect the Decision and Assignment elements and set the Outcome to Yes.
-
If a folder doesn’t exist, check to see the Opportunity’s parent Account.
-
From the Elements tab, drag Get Records onto your flow’s
canvas.
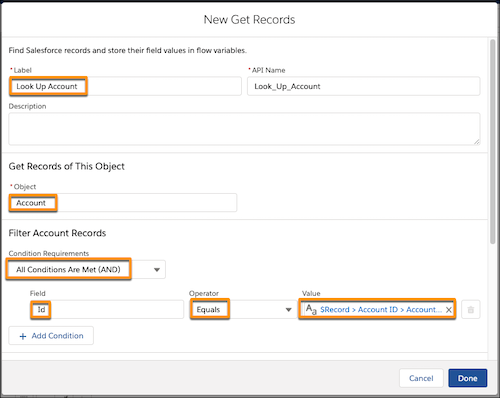
- Enter a name for the action. Here, we use Look Up Account. Select Account as the Object, and set conditions. Here, we set All Conditions to be met, and Id to equal {!$Record.Account.Name}.{!$Record.Account.Id}.
- Click Done.
-
From the Elements tab, drag Get Records onto your flow’s
canvas.
-
If a folder doesn’t exist, create one.
- From the Elements tab, drag a new action onto the canvas.
-
Select Quip and enter Create Quip
Folder.
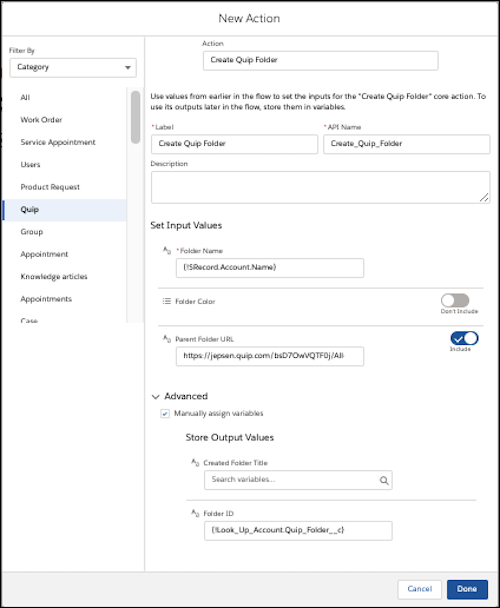
- Enter a name for the action. Here, we use Create Quip Folder.
- Enter {!$Record.Account.Name} as the Folder Name.
- Include the Parent Folder URL and enter the All Accounts folder URL.
- Under Advanced, click Manually assign variables.
- Enter {!Look_Up_Account.Quip_Folder__c} as the Folder ID.
- Click Done.
- Connect the Lock Up Account and Create Quip Folder actions on the canvas.
-
If a folder doesn’t exist, add Close Plans created from a template to it.
-
From the Elements tab, drag Assignment onto your flow’s canvas.
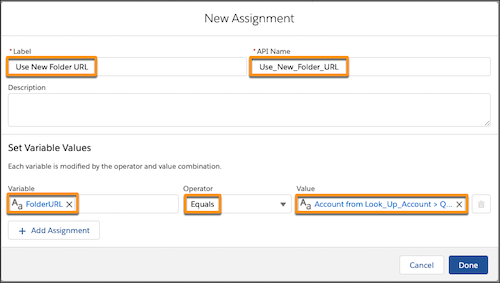
- Name the assignment Use New Folder URL.
-
Set the variable values.
Variable Operator Value FolderURL Equals {!Look_Up_Account.Quip_Folder__c} - Click Done.
- Connect the Create Quip Folder and Use New Folder URL elements on the canvas.
-
From the Elements tab, drag Assignment onto your flow’s canvas.
-
If a folder doesn’t exist, update the Account with the new folder information.
-
From the Elements tab, drag Update Records onto your flow’s
canvas.
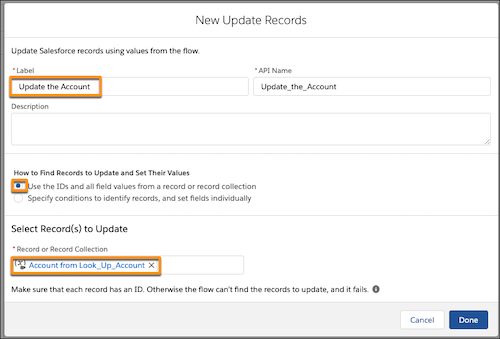
- Name the action Update the Account.
- Select Use the IDs and all field values from a record or record collection.
- Under Select Record(s) to Update, enter {!Look_Up_Account}.
- Click Done.
- Connect the Use New Folder URL and Update the Account elements on the canvas.
-
From the Elements tab, drag Update Records onto your flow’s
canvas.
-
Create Close Plans from a template.
- From the Elements tab, drag a new action onto the canvas.
-
Select Quip and enter Copy Quip Document as
the Quip action.
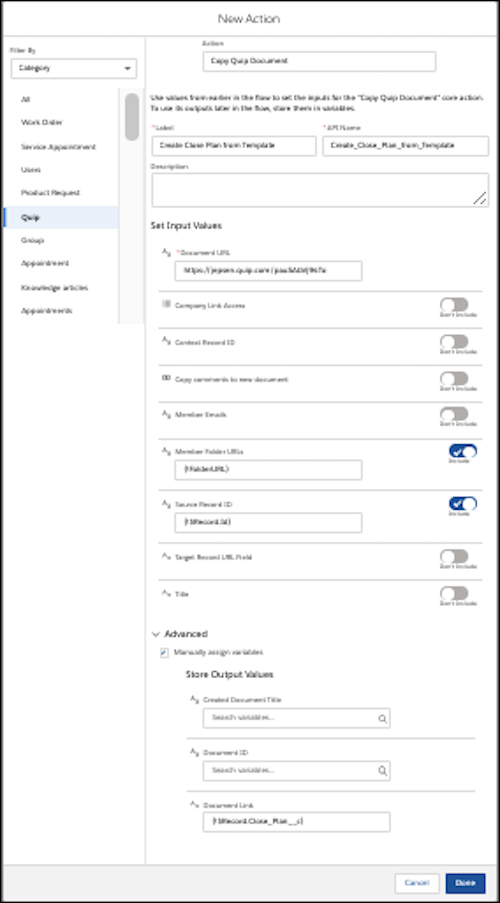
- Name the action Create Close Plan from Template.
- Enter the Document URL for the Close Plan.
- Include the Member Folder URLs and enter {!FolderURL}.
- Include the Source Record ID and enter {!$Record.Id}.
- Under Advanced, click Manually assign variables.
- For the Document Link, enter {!$Record.Close_Plan__c}.
- Connect the Use Existing Folder URL and Update the Account elements to the Create Close Plan from Template action.
-
Update the Opportunity record with the new document URL.
-
From the Elements tab, drag Update Records onto your flow’s
canvas.
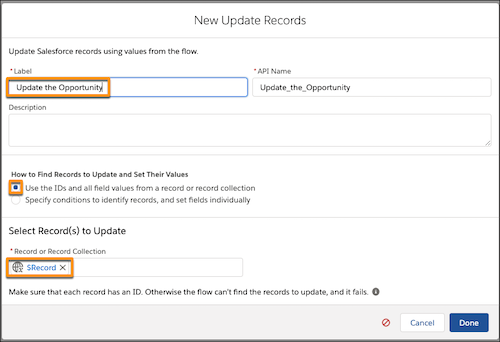
- Name the action Update the Opportunity.
- Select Use the IDs and all field values from a record or record collection.
- Under Select Record(s) to Update, enter {!$Record.}.
- Click Done.
- Connect the Create Close Plan from Template action and Update the Opportunity element on the canvas.
-
From the Elements tab, drag Update Records onto your flow’s
canvas.
- Click Save. Name the flow. For this example, we use the name Automate Account Folders. To auto-create the API name, press Tab. Click Save.
- Click Activate.
Create an Opportunity
To see your flow in action and automatically create a Close Plan and add it to an Account folder, create an Opportunity in Lightning Experience.
Required Editions
| Available in: Lightning Experience |
- In Salesforce, click New Opportunity.
- Select Simple Opportunity, and then Next.
-
Enter your opportunity information and save the action.
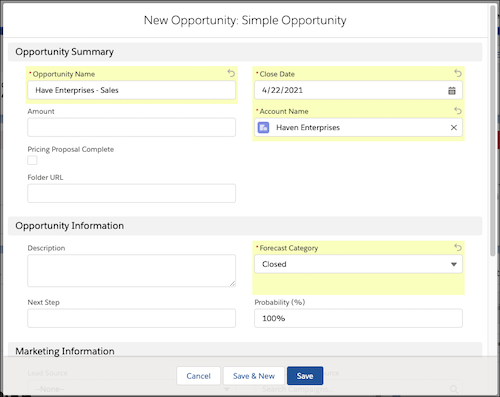
A Close Plan is automatically created and added to the Close Plan tab on the record. A new Account folder is created with the Account name to the All Accounts folder in Quip and the Close Plan is added to it.