Bulk update your Salesforce list views, add next steps, and keep your team in the know.
The Salesforce List live app uses live Salesforce data so that your list views are always
current.
Required Editions
Available in: Lightning Experience
When you import a list view into Quip, you see only the data that you have access to. You can
see records that you own, have read or write access to, or are shared with you. List views
also include records owned by or shared with users in roles below you in the hierarchy. The
fields you see depend on your page layout and field-level security settings.
In a document, enter @Salesforce List.
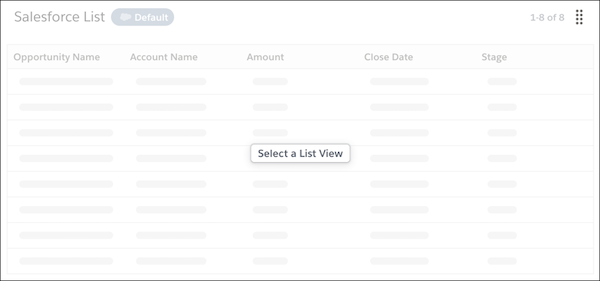
Click Select a List View.
To import a Salesforce record list view, select Record List, and
click Next.
Search for the list you want to import by object type, and click
OK.
Tip You can add list views from different Salesforce orgs to the same
document. To import a list view from a different org, click the org name in the
left-hand corner, and select the org you want to pull data from.
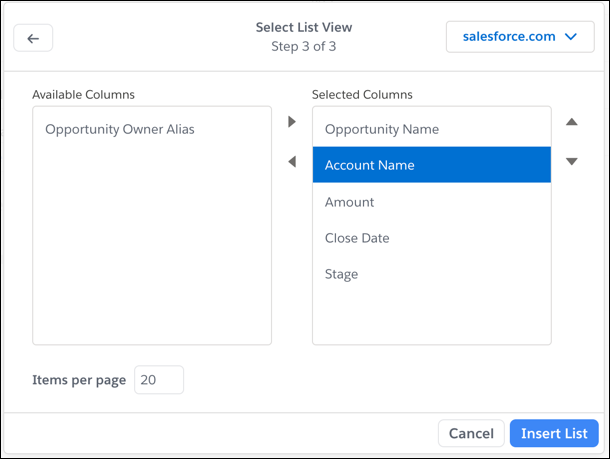
Select the columns that you want to appear in your list view by using the arrows to move
them from Available Columns to Selected
Columns.
Tip For easier viewing of longer list views, limit the number of rows per page. In
Rows per page, enter the number of rows you want to show per
list view page. You can change the configuration later by selecting Configure
List View from the Salesforce List dropdown.
Click OK.
To update a list view field, click , and enter your new text. Edited fields appear in yellow.
To save your changes to Salesforce, click Save to Salesforce. To
revert your list view to its original state, click Discard All
Changes.
To add comments and next steps, click the comment bubble, and
place the yellow dot where you want to leave your comments.
We use three kinds of cookies on our websites: required, functional, and advertising. You can choose whether functional and advertising cookies apply. Click on the different cookie categories to find out more about each category and to change the default settings.
Privacy Statement
Required Cookies
Always Active
Required cookies are necessary for basic website functionality. Some examples include: session cookies needed to transmit the website, authentication cookies, and security cookies.
Functional Cookies
Functional cookies enhance functions, performance, and services on the website. Some examples include: cookies used to analyze site traffic, cookies used for market research, and cookies used to display advertising that is not directed to a particular individual.
Advertising Cookies
Advertising cookies track activity across websites in order to understand a viewer’s interests, and direct them specific marketing. Some examples include: cookies used for remarketing, or interest-based advertising.