
You are here:
Mark a Document as a Template
To differentiate documents that your team uses as templates, mark your documents as templates in Quip. See what documents are embedded in Salesforce based on the object, convert your embedded documents to templates, and access them from the Template Library in Quip.
Required Editions
| Available in: Lightning Experience |
Templates have all the same great functionality of a document, but can be locked and unlocked to protect against accidental edits. Indicate that the template is ready to use with template locking. To make edits to it later, unlock it. After you mark a document as a template, share it with others and find it in your Created by Me private gallery. Users and admins with full access to a document can mark it as a template.
Mark a New Document as a Template
To create a template, create a document and mark it as a template.

You can mark only documents as templates. Spreadsheets and slides aren’t supported.
-
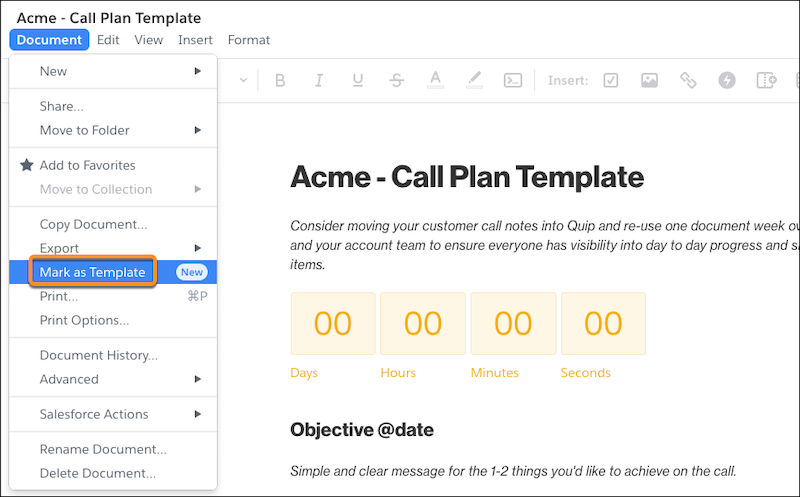
From your document, click the Document dropdown, and select
Mark as Template. Only users with full access to the document can
mark it as a template.
-
To confirm you want to irreversibly mark the document as a template, click
Mark as Template.
New templates are unlocked by default.
-
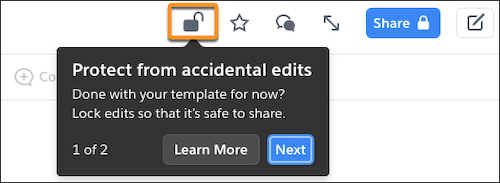
If your document is ready to share and to protect it from accidental edits, click the
lock icon, and lock template edits. To edit your template later, you can unlock and relock
it at any time. Only users with full access to a template can change the lock
status.
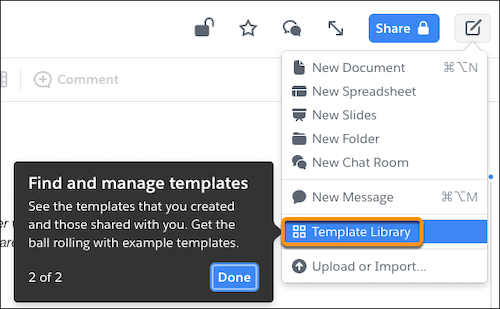
- Your new template is added to your private Created by Me gallery in the Template Library. To share it and collaborate with others, click Share, and grant Quip users access to the template.
To access your new template, click the Compose button, and select Template Library.
Convert an Existing Document to a Template
To convert an existing document to a template, mark it as a template.
-
Identify which documents are used as templates.
You can mark only documents as templates. Spreadsheets and slides aren’t supported.
- To surface documents embedded in Salesforce via the Quip Document component, use the Template Manager in Salesforce.
- Find documents used as templates in Quip.
- Choose a template creator. The person who converts the document to a template is considered the template creator—the template is added to their Created by Me gallery in the Template Library. Users shared on the document can see it only in their Shared with Me gallery.
-
Mark your documents as templates. From your document, click the
Document dropdown, and select Mark as
Template. Only users with full access to the document can mark it as a
template.Marking an existing document as a template doesn’t change the document’s sharing settings. Users previously added to the document retain document access, and Synced Sharing and link sharing settings aren’t affected. Documents embedded in Salesforce that are converted to templates aren’t affected.
-
To confirm you want to irreversibly mark the document as a template, click Mark
as Template.
Important After you mark a document as a template, you can’t reset it. If you’re not sure you want to irreversibly mark your document as a template, make a copy of the document, and mark the copy as the template.
-
If your document is ready to share and to protect it from accidental edits, click the lock
icon, and lock template edits. To edit your template later, you can unlock and relock it
at any time. Only users with full access to a template can change the lock status.
- Your template is added to your private Created by Me gallery in the Template Library. To share it and collaborate with others, click Share, and grant Quip users access to the template.
- If you converted a copy of a document embedded in the Quip Document component, update the Quip Template URL, and validate the template to make sure it’s ready to use.
To access your new template, click the Compose button, and select Template Library.
