
You are here:
Create a Custom Relationship Map in Quip
Build a lightweight relationship map with custom data in your documents.
Required Editions
| Available in: Lightning Experience |
-
In a document, enter @Relationship Map.
A placeholder relationship map is added to your document.
-
To build a new map or edit the current one, click Build Custom
Map.
 Tip Use Quick Update to edit a map’s field values but not the fields themselves. From the Tree Map, click the edit pencil on the card that you want to edit.
 -
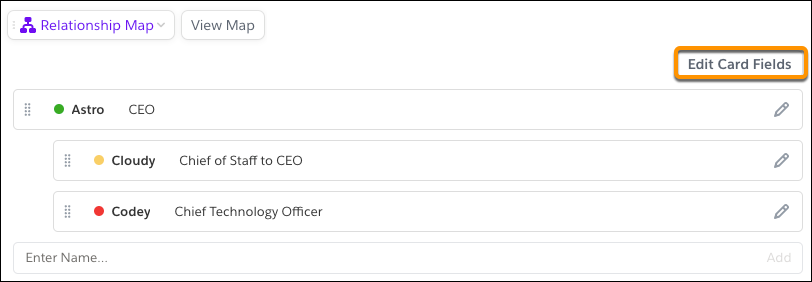
Choose which fields appear on the relationship map cards from the Map Builder. To edit or
add fields, click Edit Card Fields.
-
To customize the fields that show on a card, edit the fields in the Compact View section.
You can add more fields in the Detail View section—these fields show when you click
More... on the card.
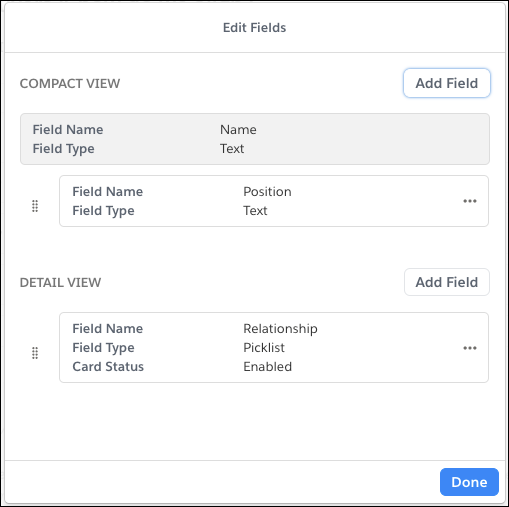
- To add a field, click Add Field. Enter a field name, and select a field type.
-
To reorder fields or move a field to a different view, use
 to drag the
field.
to drag the
field.
-
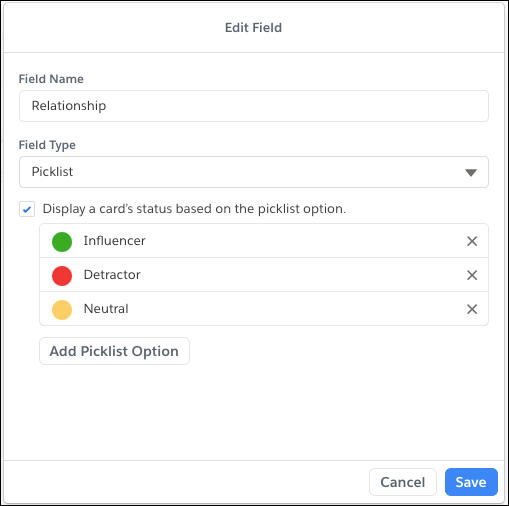
To add a colored dot on a card that indicates its status, add a picklist field, and
select Display a card’s status based on the picklist option. Add
picklist options and choose a status color for each.
 Important Only one field per map can determine the card status.
-
After you set up your fields, add new cards to your map in the Map Builder. To create a
card, enter a name, and click Add.
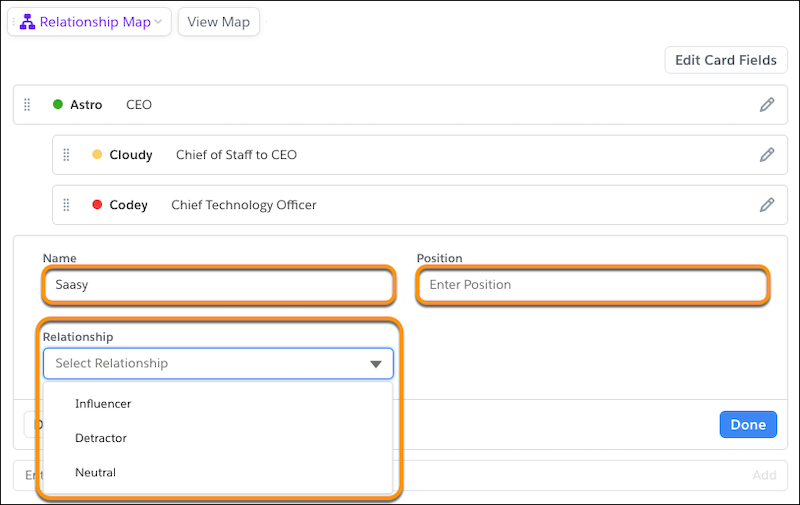
- Fill in the fields you created and click Done.
-
From the Map Builder, drag cards to create a hierarchy. To see what it looks like in the
Tree Map, click View Map.
Tip To keep your relationship map lightweight and to avoid document scrolling, we recommend adding up to 10 columns.
Your relationship map is ready to go! To stay on top of an account’s health and keep in touch with stakeholders, add it to your Account Plans.
Did this article solve your issue?
Let us know so we can improve!