
You are here:
Create a Salesforce Relationship Map
Use Salesforce data to build a lightweight relationship map in your documents. Create a map with Salesforce record data or add custom cards to build a hybrid map.
Required Editions
| Available in: Lightning Experience |
- Create relationship map cards from Salesforce records.
- Add records from different object types to the same relationship map.
- Customize which record fields appear on your relationship map cards.
-
In a document, enter @Relationship Map.
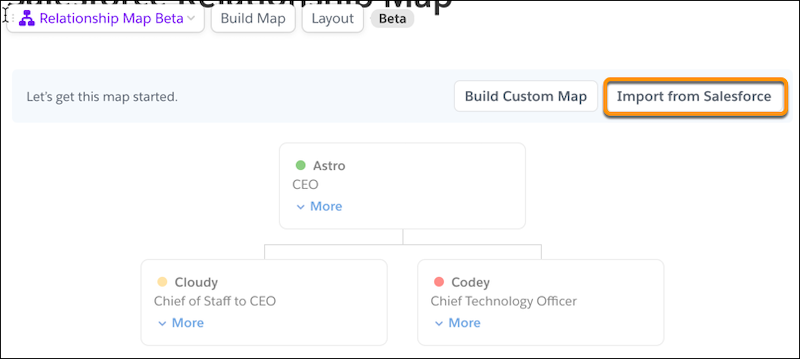 A placeholder relationship map is added to your document.
 - To build a map with Salesforce data, click Import from Salesforce.
-
To create cards based on Salesforce records, select a Salesforce object and enter the
record name.
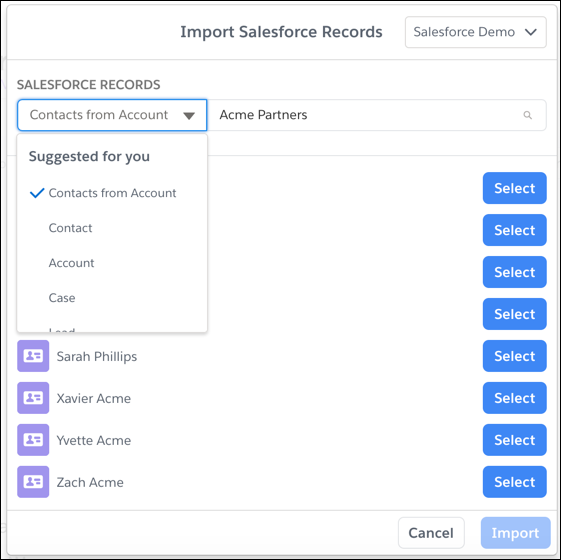
 Tip You can select multiple records at once from multiple objects. For example, to import multiple contacts from the Acme Partners account, select Contacts from Account, enter Acme Partners, and select the contacts you want to add. To also add a card for the Acme Partners account, change the object to Account, enter Acme Partners, and select Acme Partners.
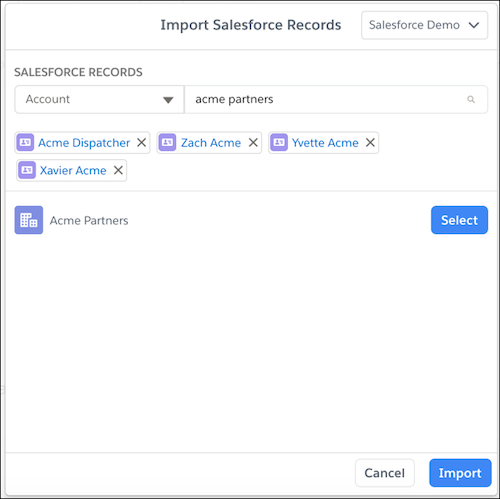
- Click Import.
-
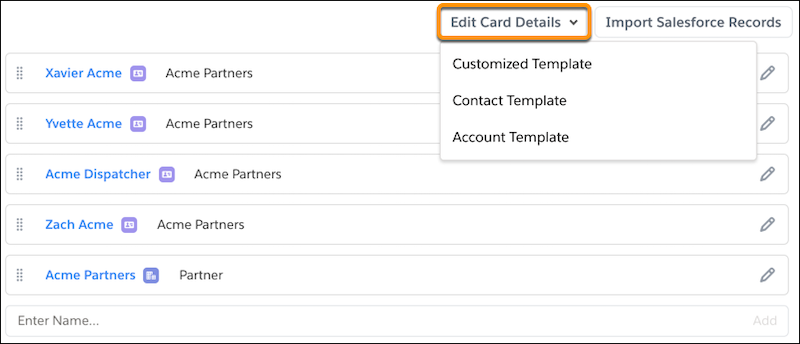
Choose which fields appear on your relationship map cards from the Map Builder. To edit or
add fields, click Edit Card Details, and select the object template you
want to customize.
-
To customize the fields that show on a card, edit the fields in the Compact View section.
You can add more fields in the Detail View section—these fields show when you click
More on the card.
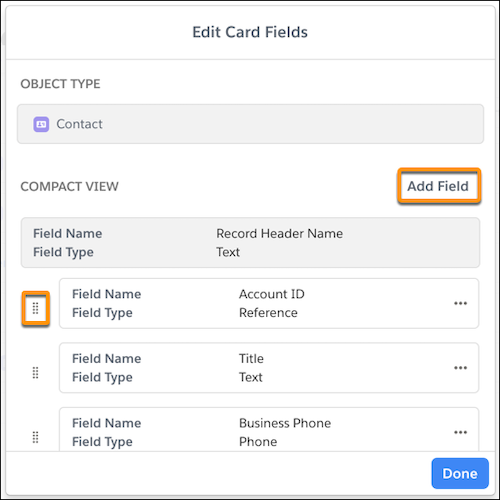
- To add a field from the record, click Add Field. Select a field and save the action.
- To change the fields in the compact and detail views, delete and readd the fields.
-
To add a colored dot on a card that indicates its status, add or edit a picklist field, and
select Display a card’s status based on the picklist option. Choose a
status color for each picklist option and save.
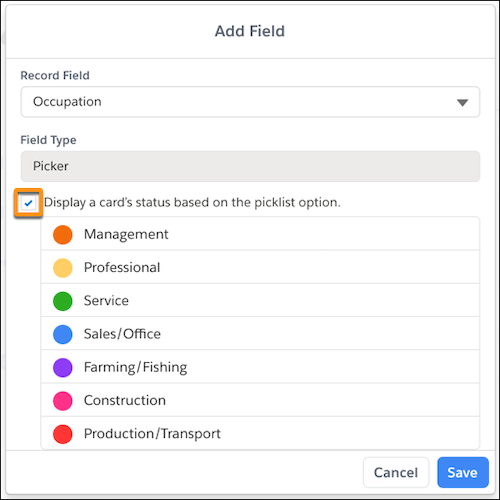
 Important Only one field per map can determine the card status.
 - After you set up your fields, add new cards to your map in the Map Builder. To import more Salesforce records, click Import Salesforce Records. To create a custom card, enter a name, and click Add.
- To edit your Salesforce cards in the Tree Map or Map Builder, click the card’s edit pencil, and update the fields. Save the changes to Salesforce.
- To edit your custom card fields, click Edit Card Details, and select Customized Template.
-
From the Map Builder, drag cards to create a hierarchy. To see it in the Tree Map, click
View Map. To resize the card layout, click
Layout, and select a layout.
Tip To keep your relationship map lightweight and to avoid document scrolling, we recommend adding up to 10 columns to the map or dividing it into several smaller maps.
- To make sure that your map is up to date with the latest Salesforce data, from the Tree Map, click Refresh Records.
Your relationship map is ready to go! To stay on top of an account’s health and keep in touch with stakeholders, add it to your Account Plans.
Did this article solve your issue?
Let us know so we can improve!