
Create a Custom Report Type in the Legacy Custom Report Type Builder
Build a custom report type on any object, even objects that you don’t have permission to view. A custom report type provides more flexibility with object relationships and can include fields from objects with lookup relationships to expand the data available for report users.
Required Editions
| Available in: Salesforce Classic and Lightning Experience |
| Available in: Essentials, Professional, Enterprise, Performance, Unlimited, and Developer Editions |
| User Permissions Needed | |
|---|---|
| To create and update custom report types: | Manage Custom Report Types |
These steps apply to the legacy custom report type experience. If the Report Types page in Setup resembles the one shown here and the Enhanced Custom Report Type Setup Page preference in Reports and Dashboards Settings isn’t selected, continue with these steps. Otherwise, use Create a Custom Report Type in the Enhanced Custom Report Type Builder
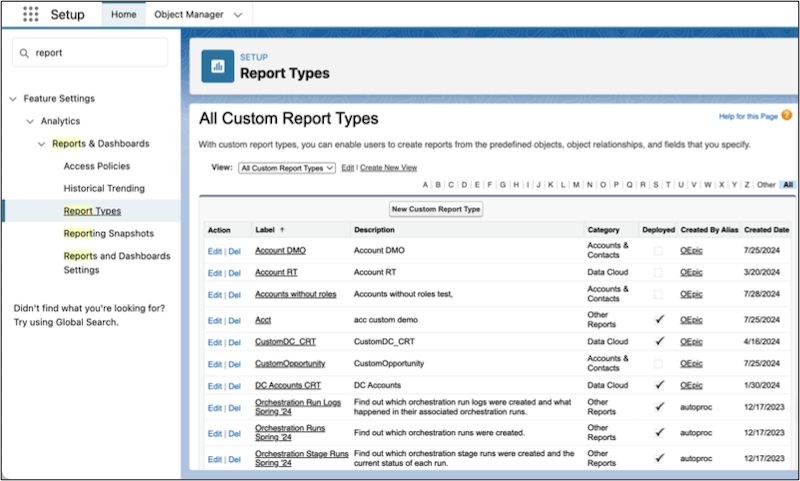
- In Setup, in the Quick Find box, enter Report Types, and select Report Types.
- On the Custom Report Types welcome page, click Continue.
- Click New Custom Report Type.
-
Enter the report type details.
-
Select the primary object for your custom report type.
After you save the report type, you can’t change the primary object.
- Enter a unique report type label, a report type name, and a description to inform users which data is available in the report.
- Select the category for the custom report type to help users find it.
- Select an availability status.
- During design and testing, select In Development. The report type and its reports are hidden from all users except those with the Manage Custom Report Types permission. Only users with that permission can create and run reports when a report type is in development.
- If you’re ready to let all users access the report type, select Deployed.
-
Select the primary object for your custom report type.
- Click Next.
-
(Optional) If you want to include fields from more than just the primary
object, add related objects. You can also specify which records from the child
objects are included in the report results.
- Click Click to relate another object.
-
Select the criteria for the relationship.
- If you select Each "A" record must have at least one related "B" record, only parent records with child records are included in the report. If you’re using Essentials Edition, you can only choose this option.
- If you select "A" records may or may not have related "B" records, parent records are shown whether or not they have child records. All subsequent relationships use the may-or-may-not association.
- Add more objects as needed, and then click Save.
-
(Optional) Control which fields are available in a report.
All custom reports based on that object include the fields that you specify.
- Click Edit Layout.
- From the View dropdown, select an object.
- To add fields from the selected object, drag the available fields to the required section.
- To add fields from objects that aren’t included in the report type’s structure, click Add fields related via lookup.
After creating the custom report type, deploy it to make it available to other users.
Did this article solve your issue?
Let us know so we can improve!