
You are here:
Categorize Dimension Column Values into Buckets
In Salesforce Data Pipelines, use a bucket column in a Data Prep recipe to categorize and organize text values. For example, you can create buckets West, Central, and East to group regions.
Required Editions
Categorize Text Column Values into Buckets
In Salesforce Data Pipelines, use a bucket column in a Data Prep recipe to categorize and organize text (dimension) values. For example, you can create buckets West, Central, and East to group regions.
| User Permissions Needed | |
|---|---|
| To manage and create a recipe: | Edit CRM Analytics Dataflows OR Edit Dataset Recipes |
- In the Transform node of a Data Prep recipe, select the text (dimension) column in the Preview tab.
- In the Transform toolbar, click the Bucket button (
 ) to define the buckets.
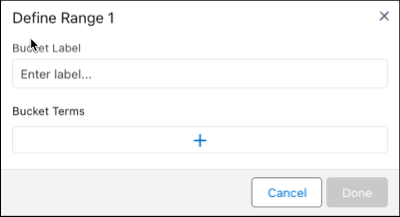
- Click
 .
. - Enter a label for the bucket. Click to add bucket terms.
- Select an operator and a value. In the Value box, search for and select the values to be assigned to this bucket. For direct datasets and datasets, you can search for all values. Otherwise, you are limited to preview data. If a value doesn’t appear in the list, adjust your sample size or refine your search. You can select from the list of available values or click Add new value and enter a custom value.
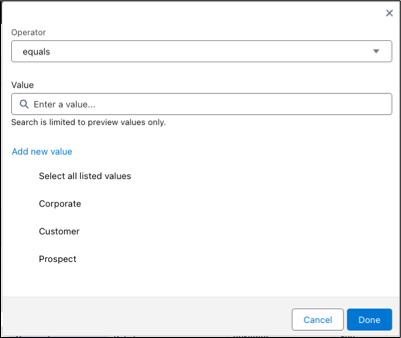
- Click Done.
- To add more terms, click again.
- Click Done when you have entered all of the terms for your bucket.
- To create more buckets, click and select another label and the values to assign to the bucket.
- To place null values into their own bucket, select Bucket null values.
- To place values not otherwise bucketed together in a bucket, select Bucket remaining values then specify the name for this group.
- To bucket similarly spelled values together, select Apply smart bucketing. To change the edit distance, use the Distance Threshold slider. Einstein uses the Levenshtein distance for fuzzy matching. The default edit distance is set to 1, which means that a single-character edit is allowed for text matching. For example, with an edit distance of 2, variations such as flavor, Flavor, flavour, and flavors can all belong in the same bucket. By default, differences in uppercase and lowercase characters are ignored.
- Under Show Results In, select whether the buckets appear in a new column and what happens to the original column.
- If you elect to create a column, set the label under Column Label.
- Click Apply to add the transformation to the Transform node. The Preview tab shows the new bucket column.
- To view the Graph area, click the Collapse button (
 ).
). - Save the recipe.
After you run the recipe, you can view the bucket assigned to each row in the bucket column.
Did this article solve your issue?
Let us know so we can improve!