
You are here:
Categorize Measure Column Values into Buckets
In Salesforce Data Pipelines, use a bucket column in a Data Prep recipe to categorize and organize numeric values. For example, you can create buckets High, Middle, Low to group numbers of cases per account.
| User Permissions Needed | |
|---|---|
| To manage and create a recipe: | Edit CRM Analytics Dataflows OR Edit Dataset Recipes |
- In the Transform node of a Data Prep recipe, select the number (measure) column in the Preview tab.
- In the Transform toolbar, click the Bucket button (
 ) to define the buckets.
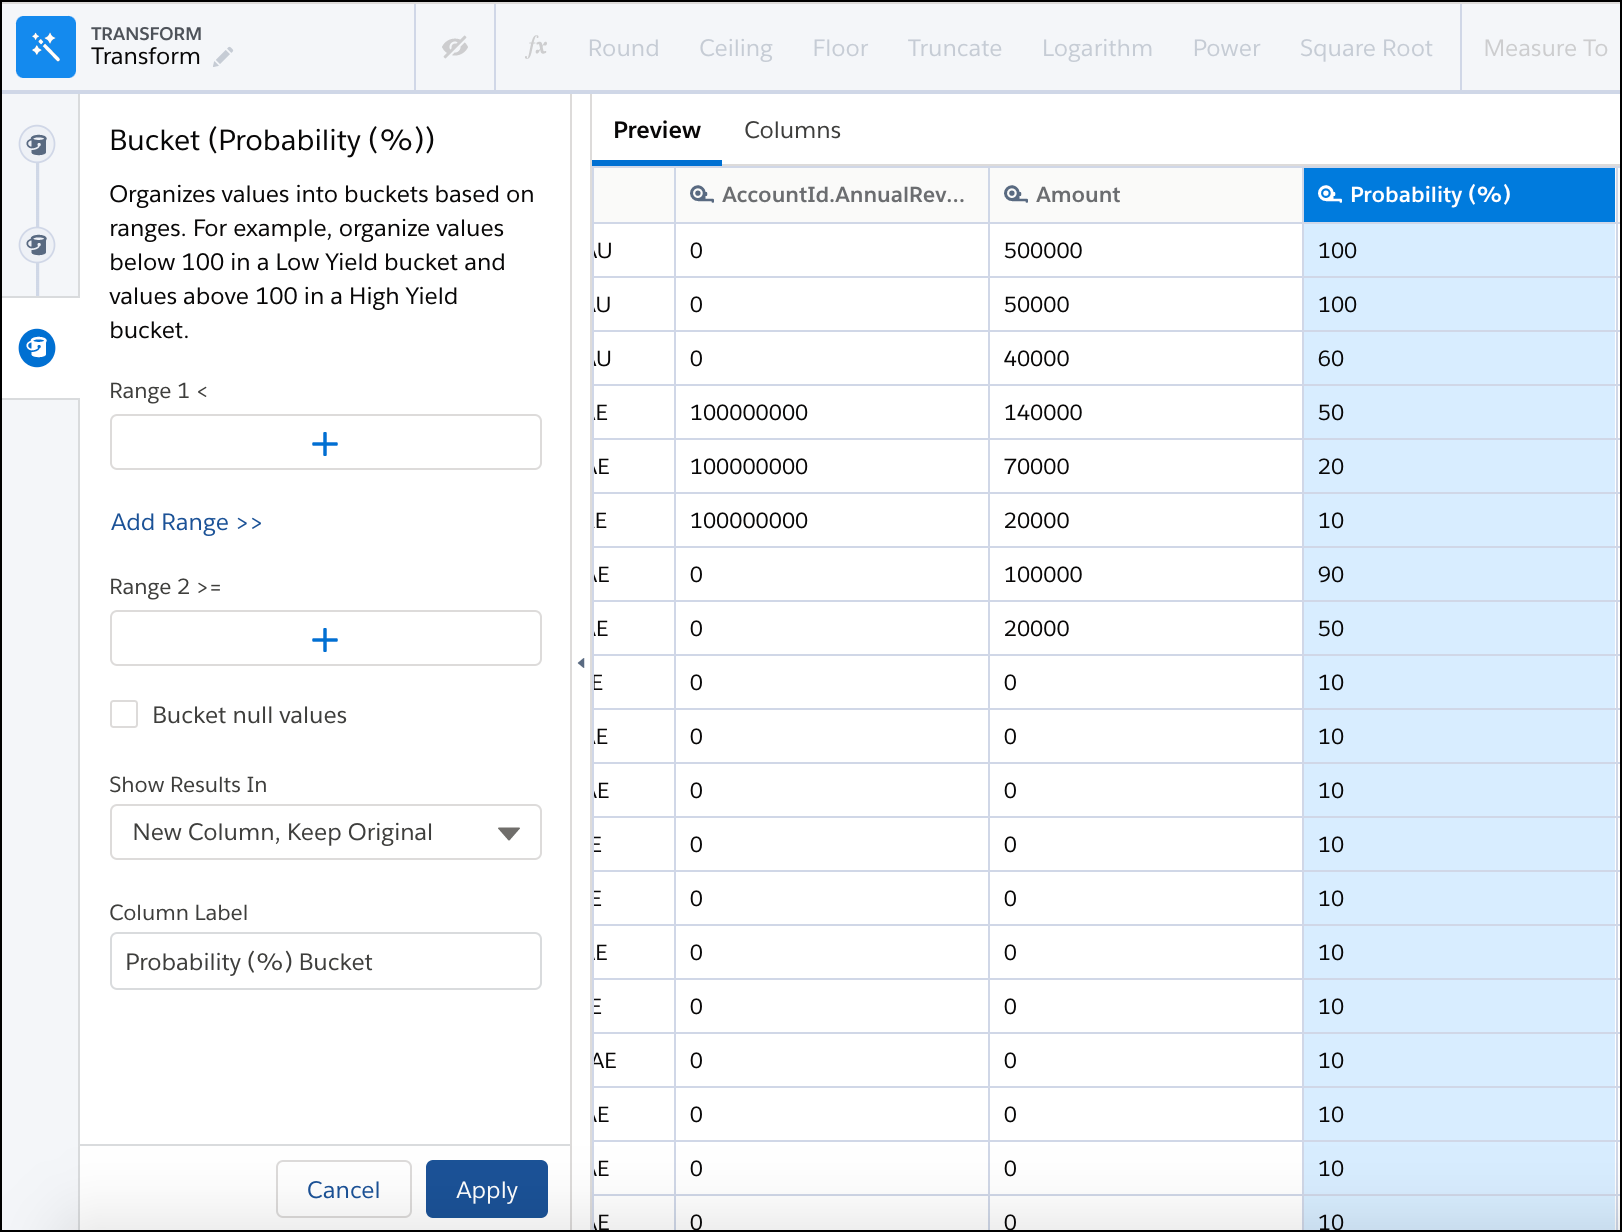
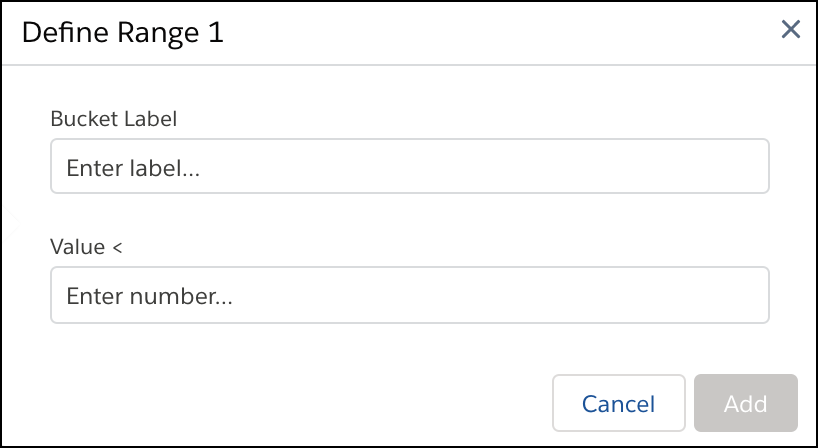
- For Range 1, enter a value and label for the first bucket. Rows with values below the
Range 1 value are assigned to this bucket.
- If your bucket column has more than two buckets, click Add Range>> to add a middle range.
- For each additional middle range you add, enter the range of values and the bucket
label.
Rows with values greater than or equal to the first value and less than the second value are assigned this bucket.
- For the final range, enter a value and bucket label. Rows with values greater than or
equal to this value are assigned to this bucket.
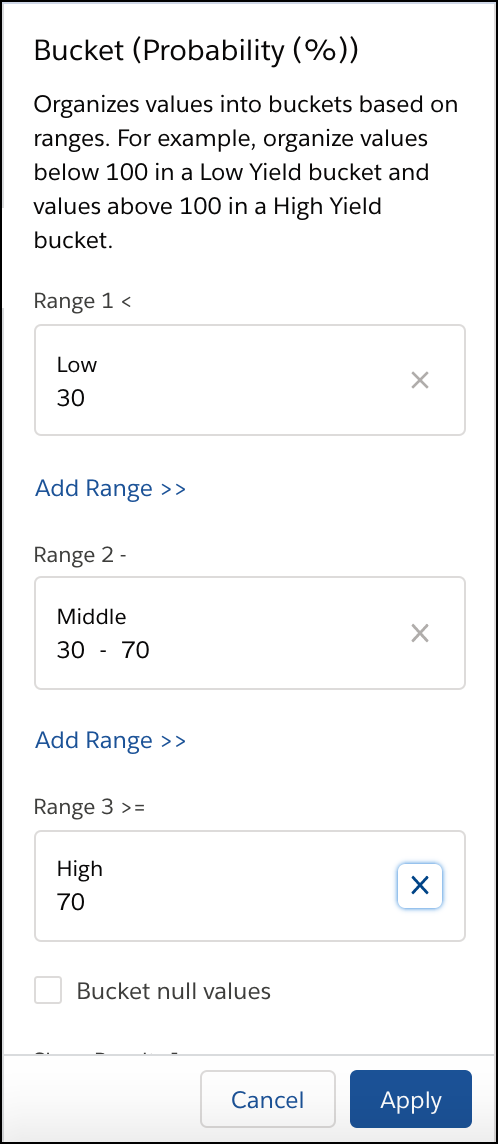
- To place null values into their own bucket, select Bucket null values.
- Under Show Results In, select whether the buckets appear in a new column and what happens to the original column.
- If you elect to create a column, set the label under Column Label.
- Click Apply to add the transformation to the Transform node. The Preview tab shows the new bucket column.
- To view the Graph area, click the Collapse button (
 ).
). - Save the recipe.
After you run the recipe, you can view the bucket assigned to each row in the bucket column.
Did this article solve your issue?
Let us know so we can improve!