
You are here:
Change a Consumption Threshold for a Specific Card
Learn how to configure the Digital Wallet Consumption Threshold Alerts flow to only send notifications when a specific card reach a certain usage threshold.
Required Editions
| User Permissions Needed | |
|---|---|
| To activate or modify the Consumption Threshold Alerts flow: | Manage Flow user permission |
Find the Card Definition Developer Name
- Click View Consumption Details for the desired card.
- In the page URL, look for c__card=YourCardDefinitionDeveloperName. See an example below.
- Now follow the instructions in Assign a New Decision Outcome and Conditions.
Example
In the URL below, the card definition developer name is PlatformServicesCard:
https://myorg.lightning.force-com/standard-ConsumptionCards?c__view=cardDetail&c__card=PlatformServicesCard&c__env=Production&c__model=PrePurchased
Assign a New Decision Outcome and Conditions
- Ensure that you complete the steps above in Find the Card Definition Developer Name.
- Create a new flow with the Consumption Threshold Alerts template or open an existing Consumption Threshold Alerts flow to edit it.
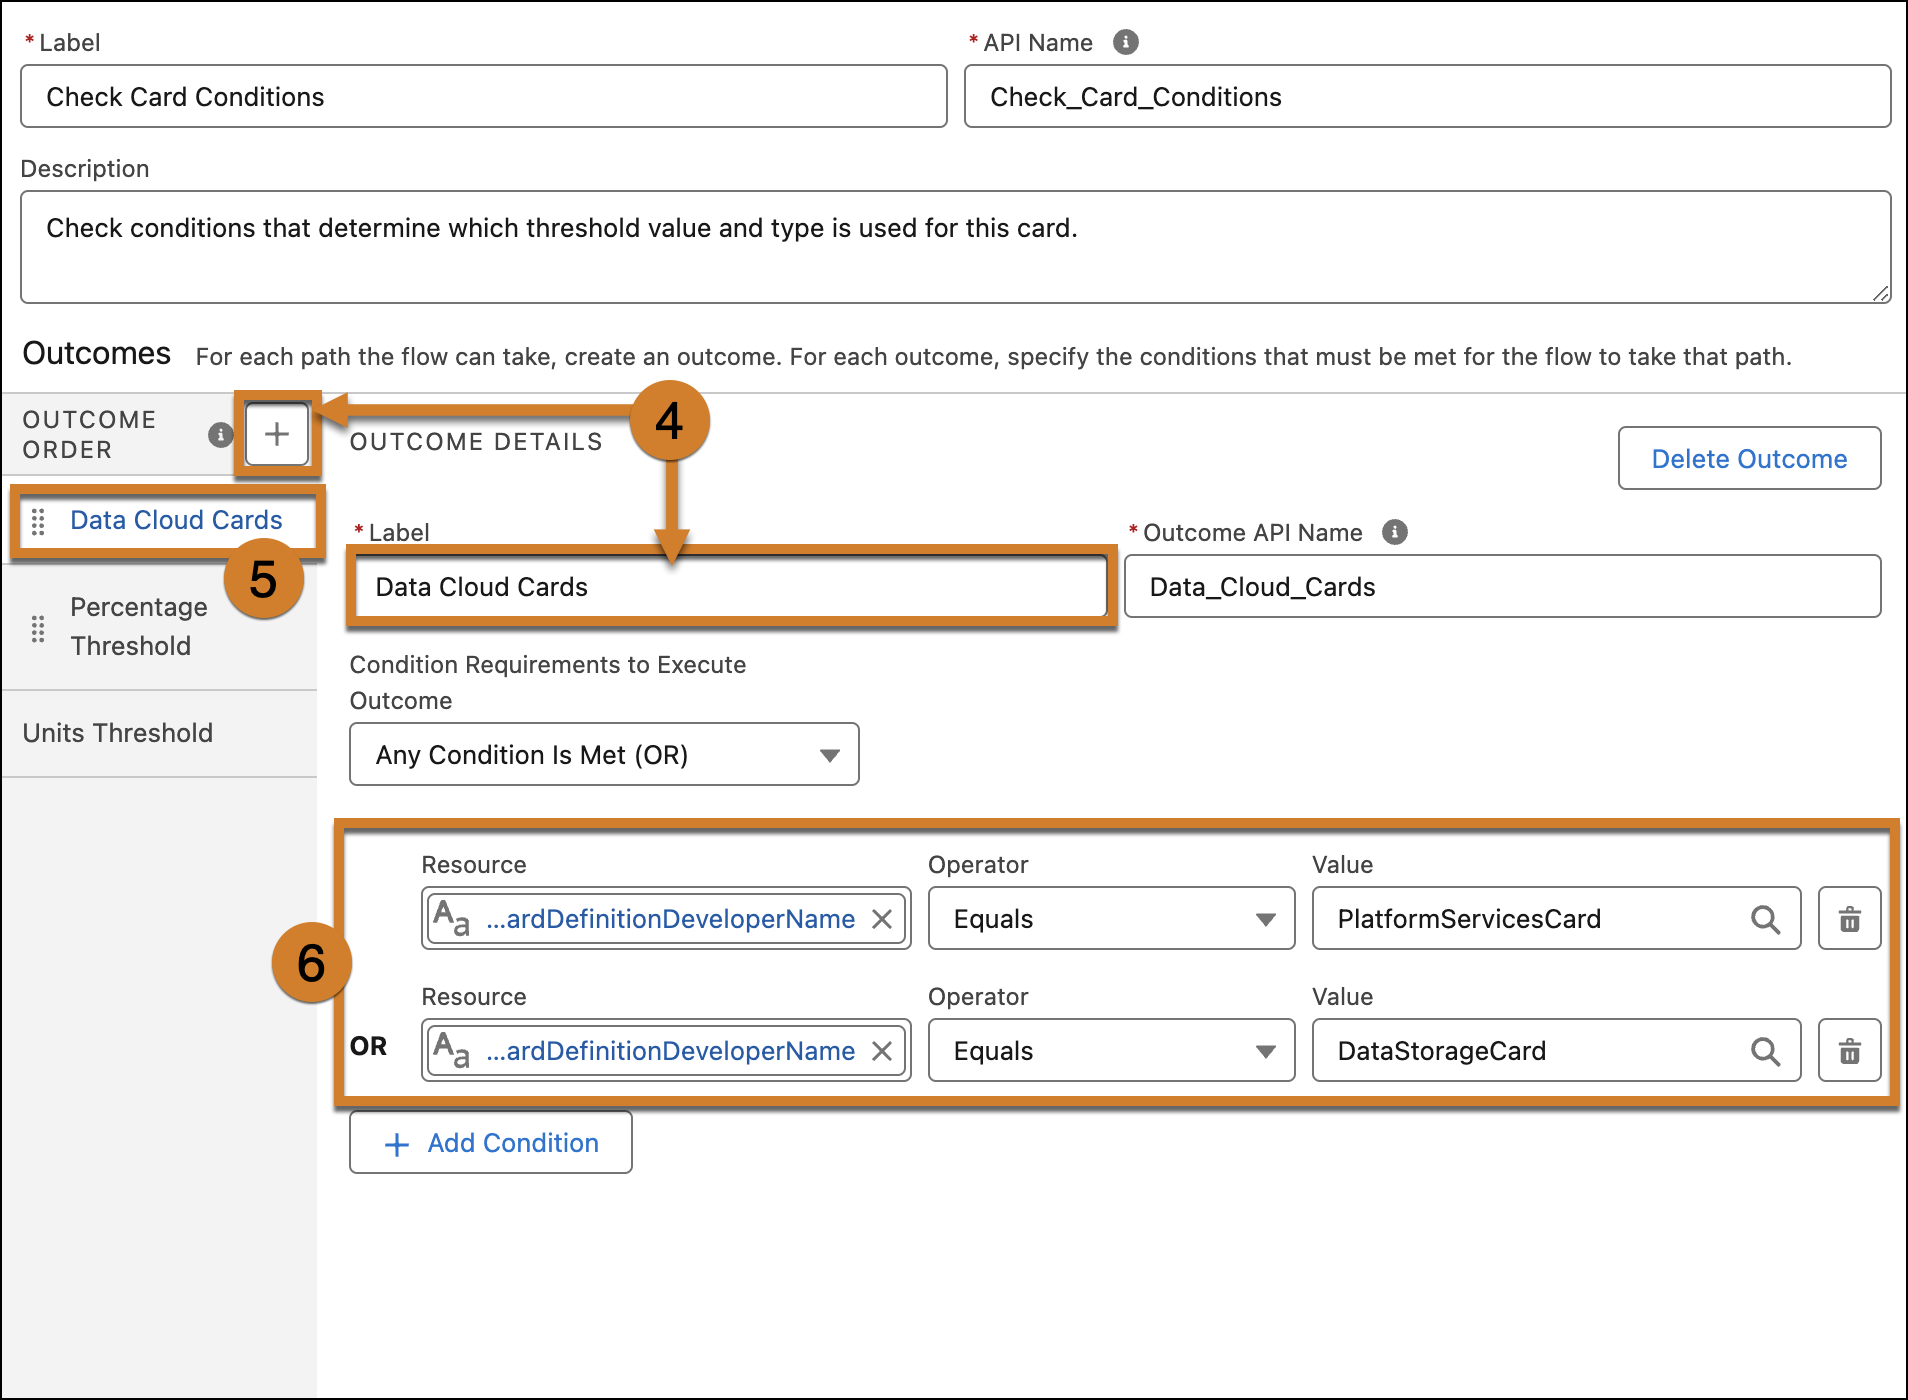
- With the flow open, click the Check Card Conditions element in the flow itself or click the element in the toolbox in the side panel to edit it.
- Create a new decision outcome. Give it a name based on the type of card you’re targeting, such as "Data Cloud Card." Salesforce recommends that you don't remove the existing decision paths.
- In the Order Outcome sidebar, move the new decision outcome above the existing ones. This gives it the highest priority.
-
In the Outcome Details pane, add conditions to check for the desired card definition
developer name.
- Set Resource to Current Item from Loop Cards > cardDefinitionDeveloperName.
- Set Operator to Equals.
- Set Value to the single card definition developer name.
- Repeat for each card you wish to target. If you’re adding more than one condition, you’ll need to change Condition Requirements to Execute Outcome to Any Condition is Met (OR).
- Return to the main Flow Builder pane.
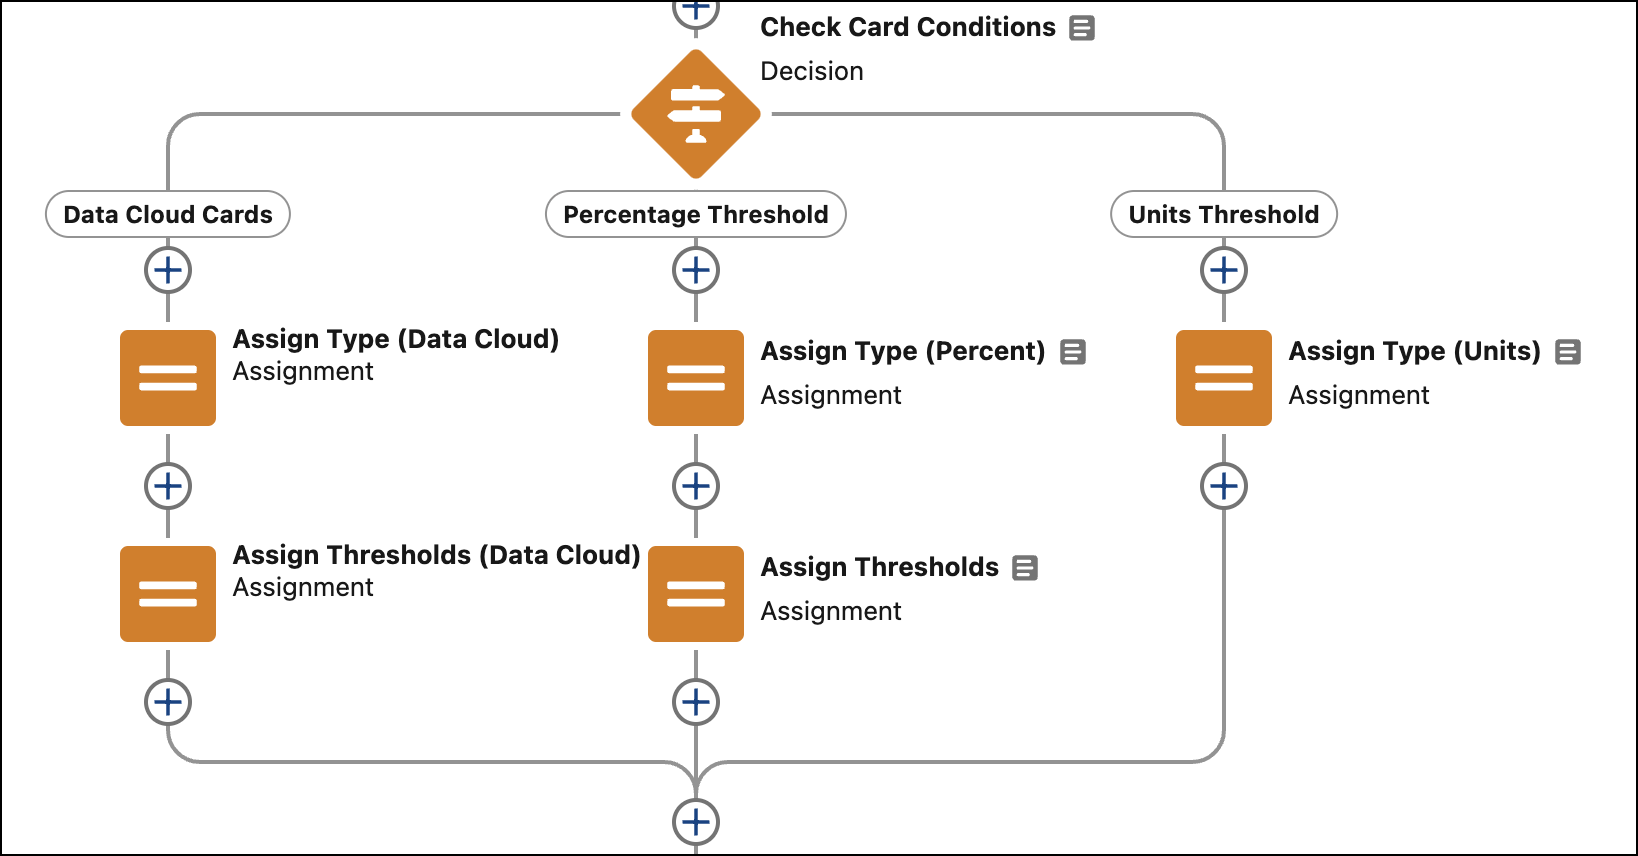
-
Add an assignment element to your new decision branch. This will be used to set the
AlertTriggerType variable.
- Click the + under your new decision branch. Select the Assignment element type.
- In the edit pane, go to Set Variable Values.
- Set Resource to AlertTriggerType.
- Set Operator to Equals.
-
Set Value to the desired AlertTriggerType.
If you want to send an alert when a percentage of the consumption card has been consumed, such as 60%, use the AlertTriggerType_ThresholdPercent constant.
If you want to send an alert when a raw consumption value has been reached, such as 100,000 credits, use the AlertTriggerType_ThresholdUnits constant.
- Name the element appropriately.
-
Add another assignment element immediately following the one you just created.
- Click the + under your previous assignment element.
- Select the Assignment element type.
- In the edit pane, go to Set Variable Values.
- Set Resource to ThresholdValues.
- Set Operator to Add.
- For Value, enter the desired threshold value to alert on, as an integer.
- Repeat for as many thresholds as you wish to add.
- Name the element appropriately. See an example below of a flow with a new decision branch added.
-
To keep your changes, click Save.
The original flow template stays the same.
- To start notifications, click Activate.
Did this article solve your issue?
Let us know so we can improve!