You are here:
Map Hyperlink Tokens in Omnistudio Data Mapper for Omnistudio Document Generation
Use hyperlink tokens in Microsoft Word or Microsoft PowerPoint document templates to insert dynamic URLs in the generated DOCX and PDF files. The hyperlink token must start with HYP_. The token format is {{HYP_<hyperlinktokenname>}}, for example, {{HYP_Salesforce Website}}.
You can define a text for the URL in the Data Mapper, for example, Salesforce. If you don't provide a text for the hyperlink, the URL appears in blue and is underlined in the generated document, for example, https://www.salesforce.com. The font and the style of the hyperlink token in the document override the default hyperlink font and style in the generated document. Hyperlink tokens support URL formats such as https and http.
-
Create a Microsoft Word document with hyperlink tokens.
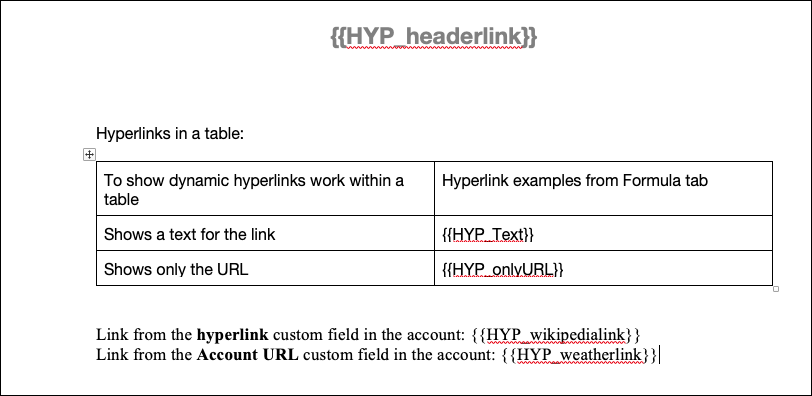
Place link tokens anywhere in the document template, such as in paragraphs, tables, and text boxes. Use a token in a header or a footer or within a repeating content section to pass an array of hyperlinks. Here's an example of a DOCX document with hyperlink tokens.
- Create a Microsoft Word template.
- In Token Mapping Method, select Data Mapper.
-
Enter a mapping Data Mapper bundle name.
The Data Mapper Transform maps the field with the ID to the token in the document template. The Data Mapper Transform then transforms the tokens with actual data in the document.
-
Enter a data extract Data Mapper bundle name.
The Data Mapper Extract retrieves the field with the ID of the image to be used in tokens.
-
To open the Data Mapper Extract on a new browser tab,click the
 icon next to the Data Extract Data Mapper Bundle Name field.
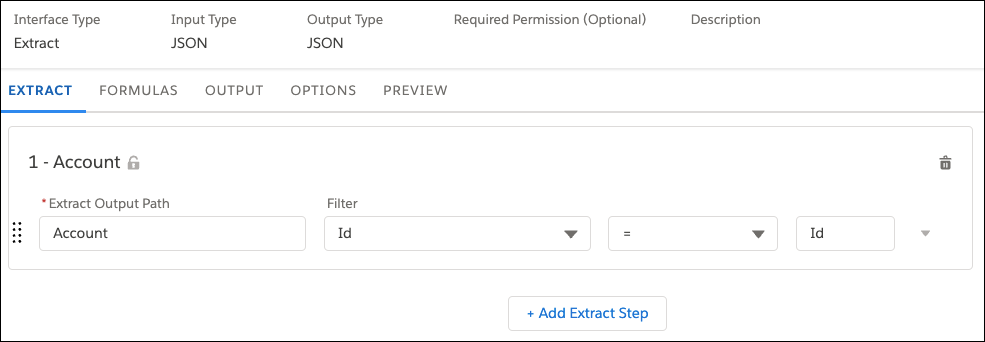
- Create a Data Mapper Extract.
-
Define the Initial Extraction.
-
Define Data Mapper Extract Output.
See Data Mapper Extract Output.
The Current JSON Output pane shows the structure that your output mappings specify.
- In Extract JSON Path, select the source field for extraction.
-
In Output JSON Path, specify the output path.
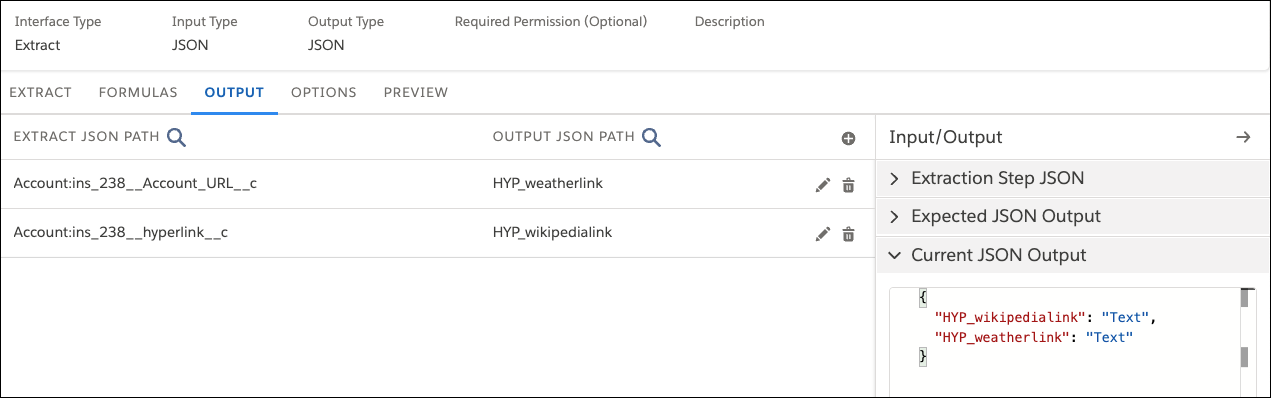
- Add all hyperlink token source fields.
-
On the PREVIEW tab, enter the Salesforce object ID and click Execute to
confirm that the response pane shows a JSON structure containing the
desired output.
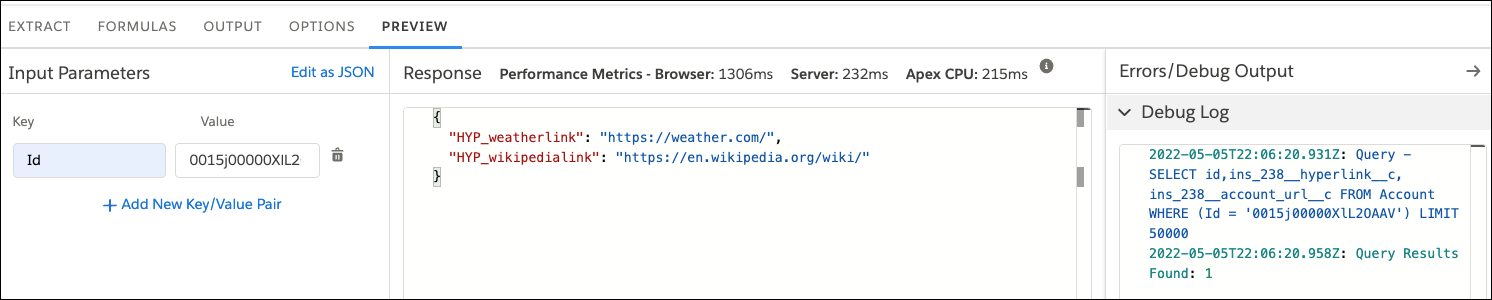
- On the OUTPUT tab, copy the Current JSON Output, and save it to use it later in your Data Mapper Transform.
-
To open the Data Mapper Transform on a new tab, click the icon next to the Mapping Data Mapper Bundle Name field.
 Note
NoteMap data on the Transforms tab in one of these ways: If the input and output names match, use Quick Match to Map Data. See Use Quick Match to Map Data. Else, specify each mapping individually. See Data Mapper Transform Data Mappings.
- Create a Data Mapper Transform.
- On the Transform tab, in the Input JSON panel, paste the Current JSON Output code that you copied from the Data Mapper Extract.
-
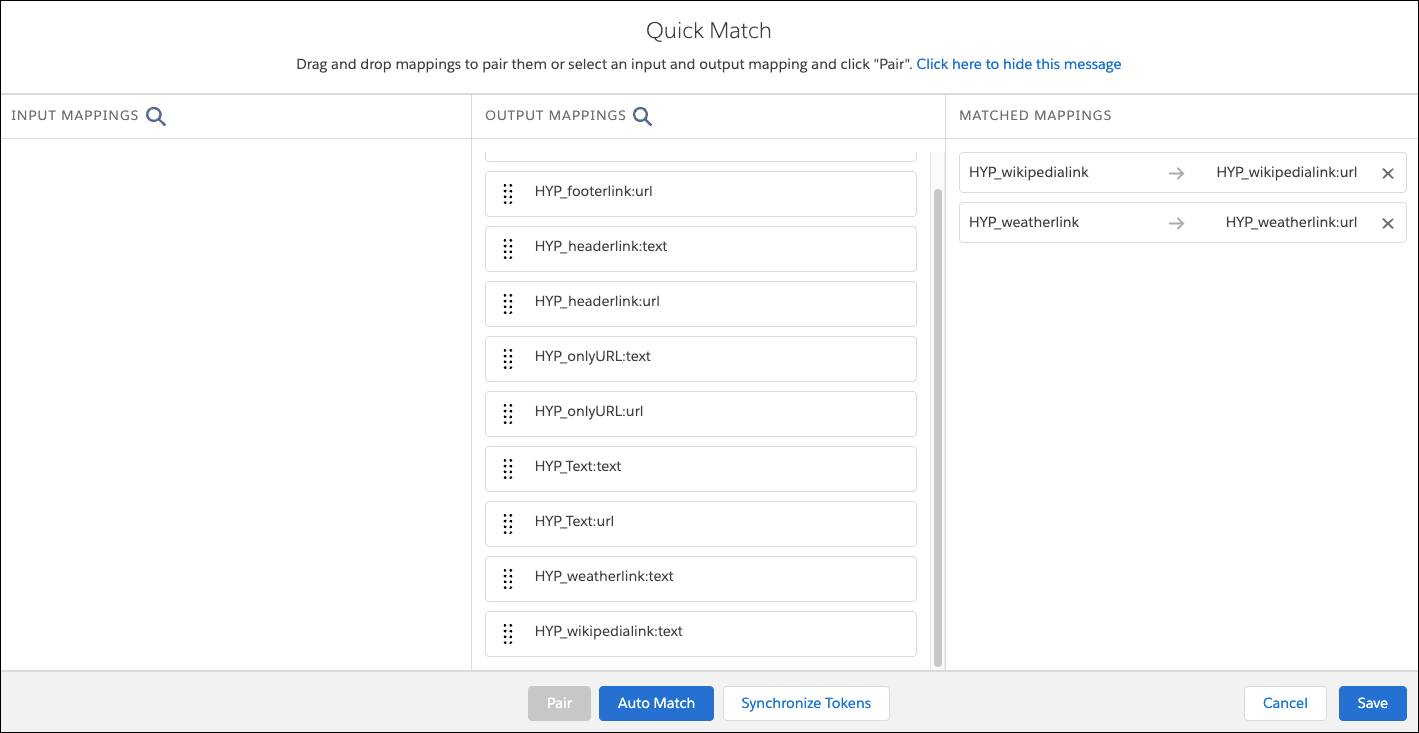
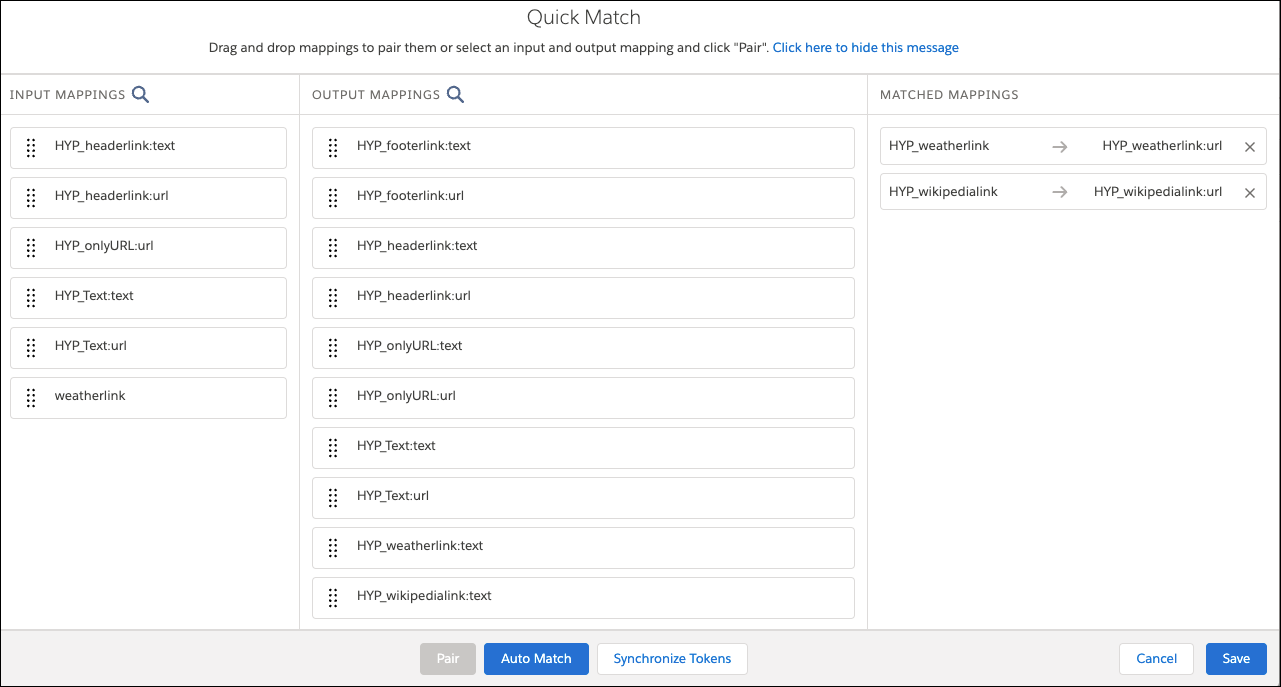
Click Quick Match.
The fields in the Input Mappings column come from the JSON code (Current JSON Output of the extractor). The fields in the Output Mappings column come from the tokens in the document template.
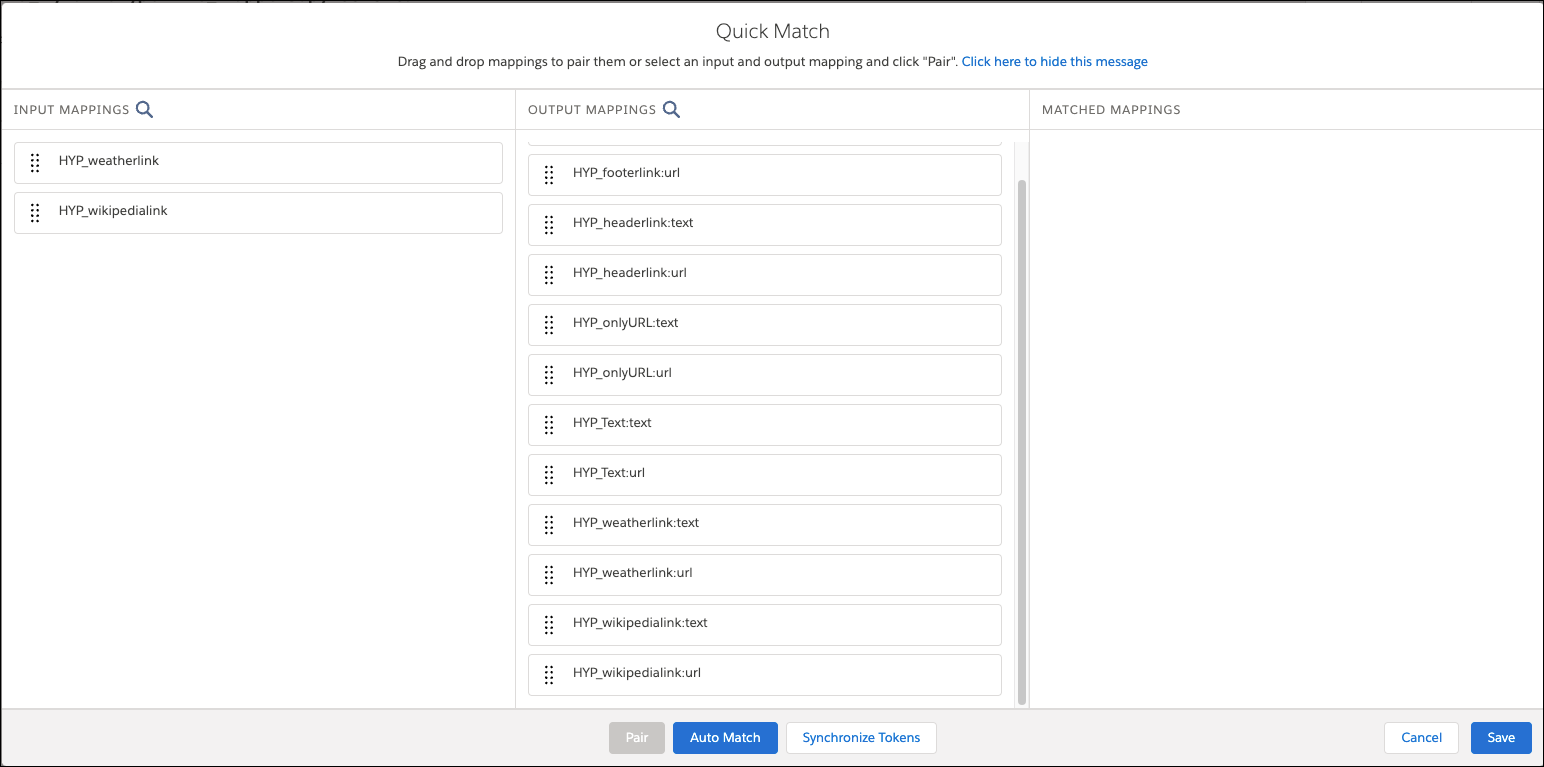
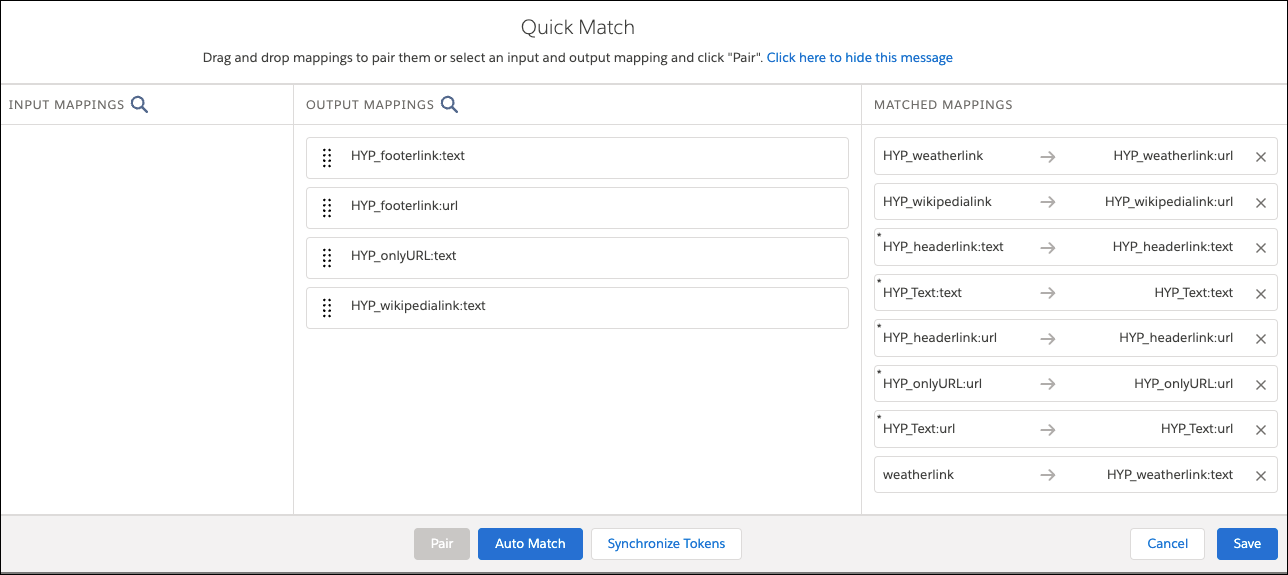
- To match the input and output fields, click Auto Match.
- Save your changes.
-
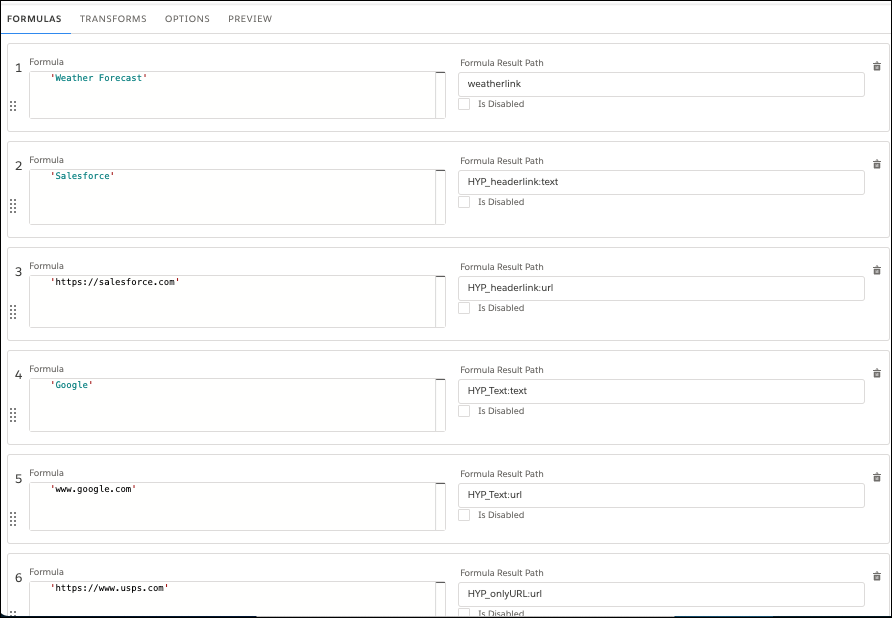
Additionally, you can define formulas in a Data Mapper to add text for
the hyperlinks or to add text and hyperlinks. When you define a formula,
you map its output to the output JSON (for extracts and transforms).
-
Click Quick Match.
The fields in the INPUT MAPPINGS column come from the data you defined on the FORMULAS tab. The fields in the OUTPUT MAPPINGS column come from the tokens in the document template.
-
If the fields don't match automatically, drag fields from the INPUT
MAPPINGS column to the OUTPUT MAPPINGS column.
-
Save your changes.
-
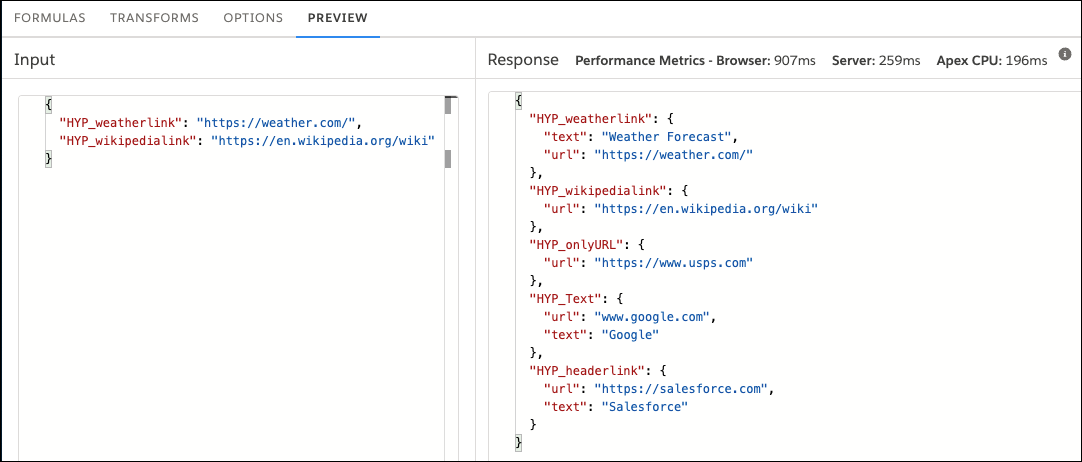
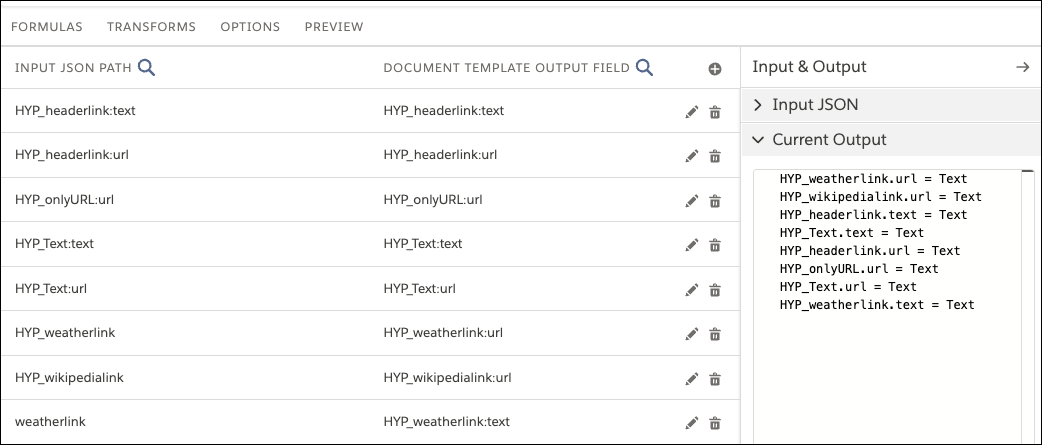
On the PREVIEW tab, verify the hyperlink tokens.
Based on the mapping that you provided, notice that for some hyperlink tokens, only the URL is listed, and for some hyperlink tokens, both the URL and text are available.